Spiris integration (before Visma eEkonomi)
Spiris is a comprehensive program for accounting and financial management that simplifies and streamlines a company’s financial operations.
To make bookkeeping easier, you can integrate OPEN One with Spiris. This allows your sales data to be automatically transferred to Spiris after each end-of-day closure.
This guide will help you activate the integration.
- Sign in to BackOffice.
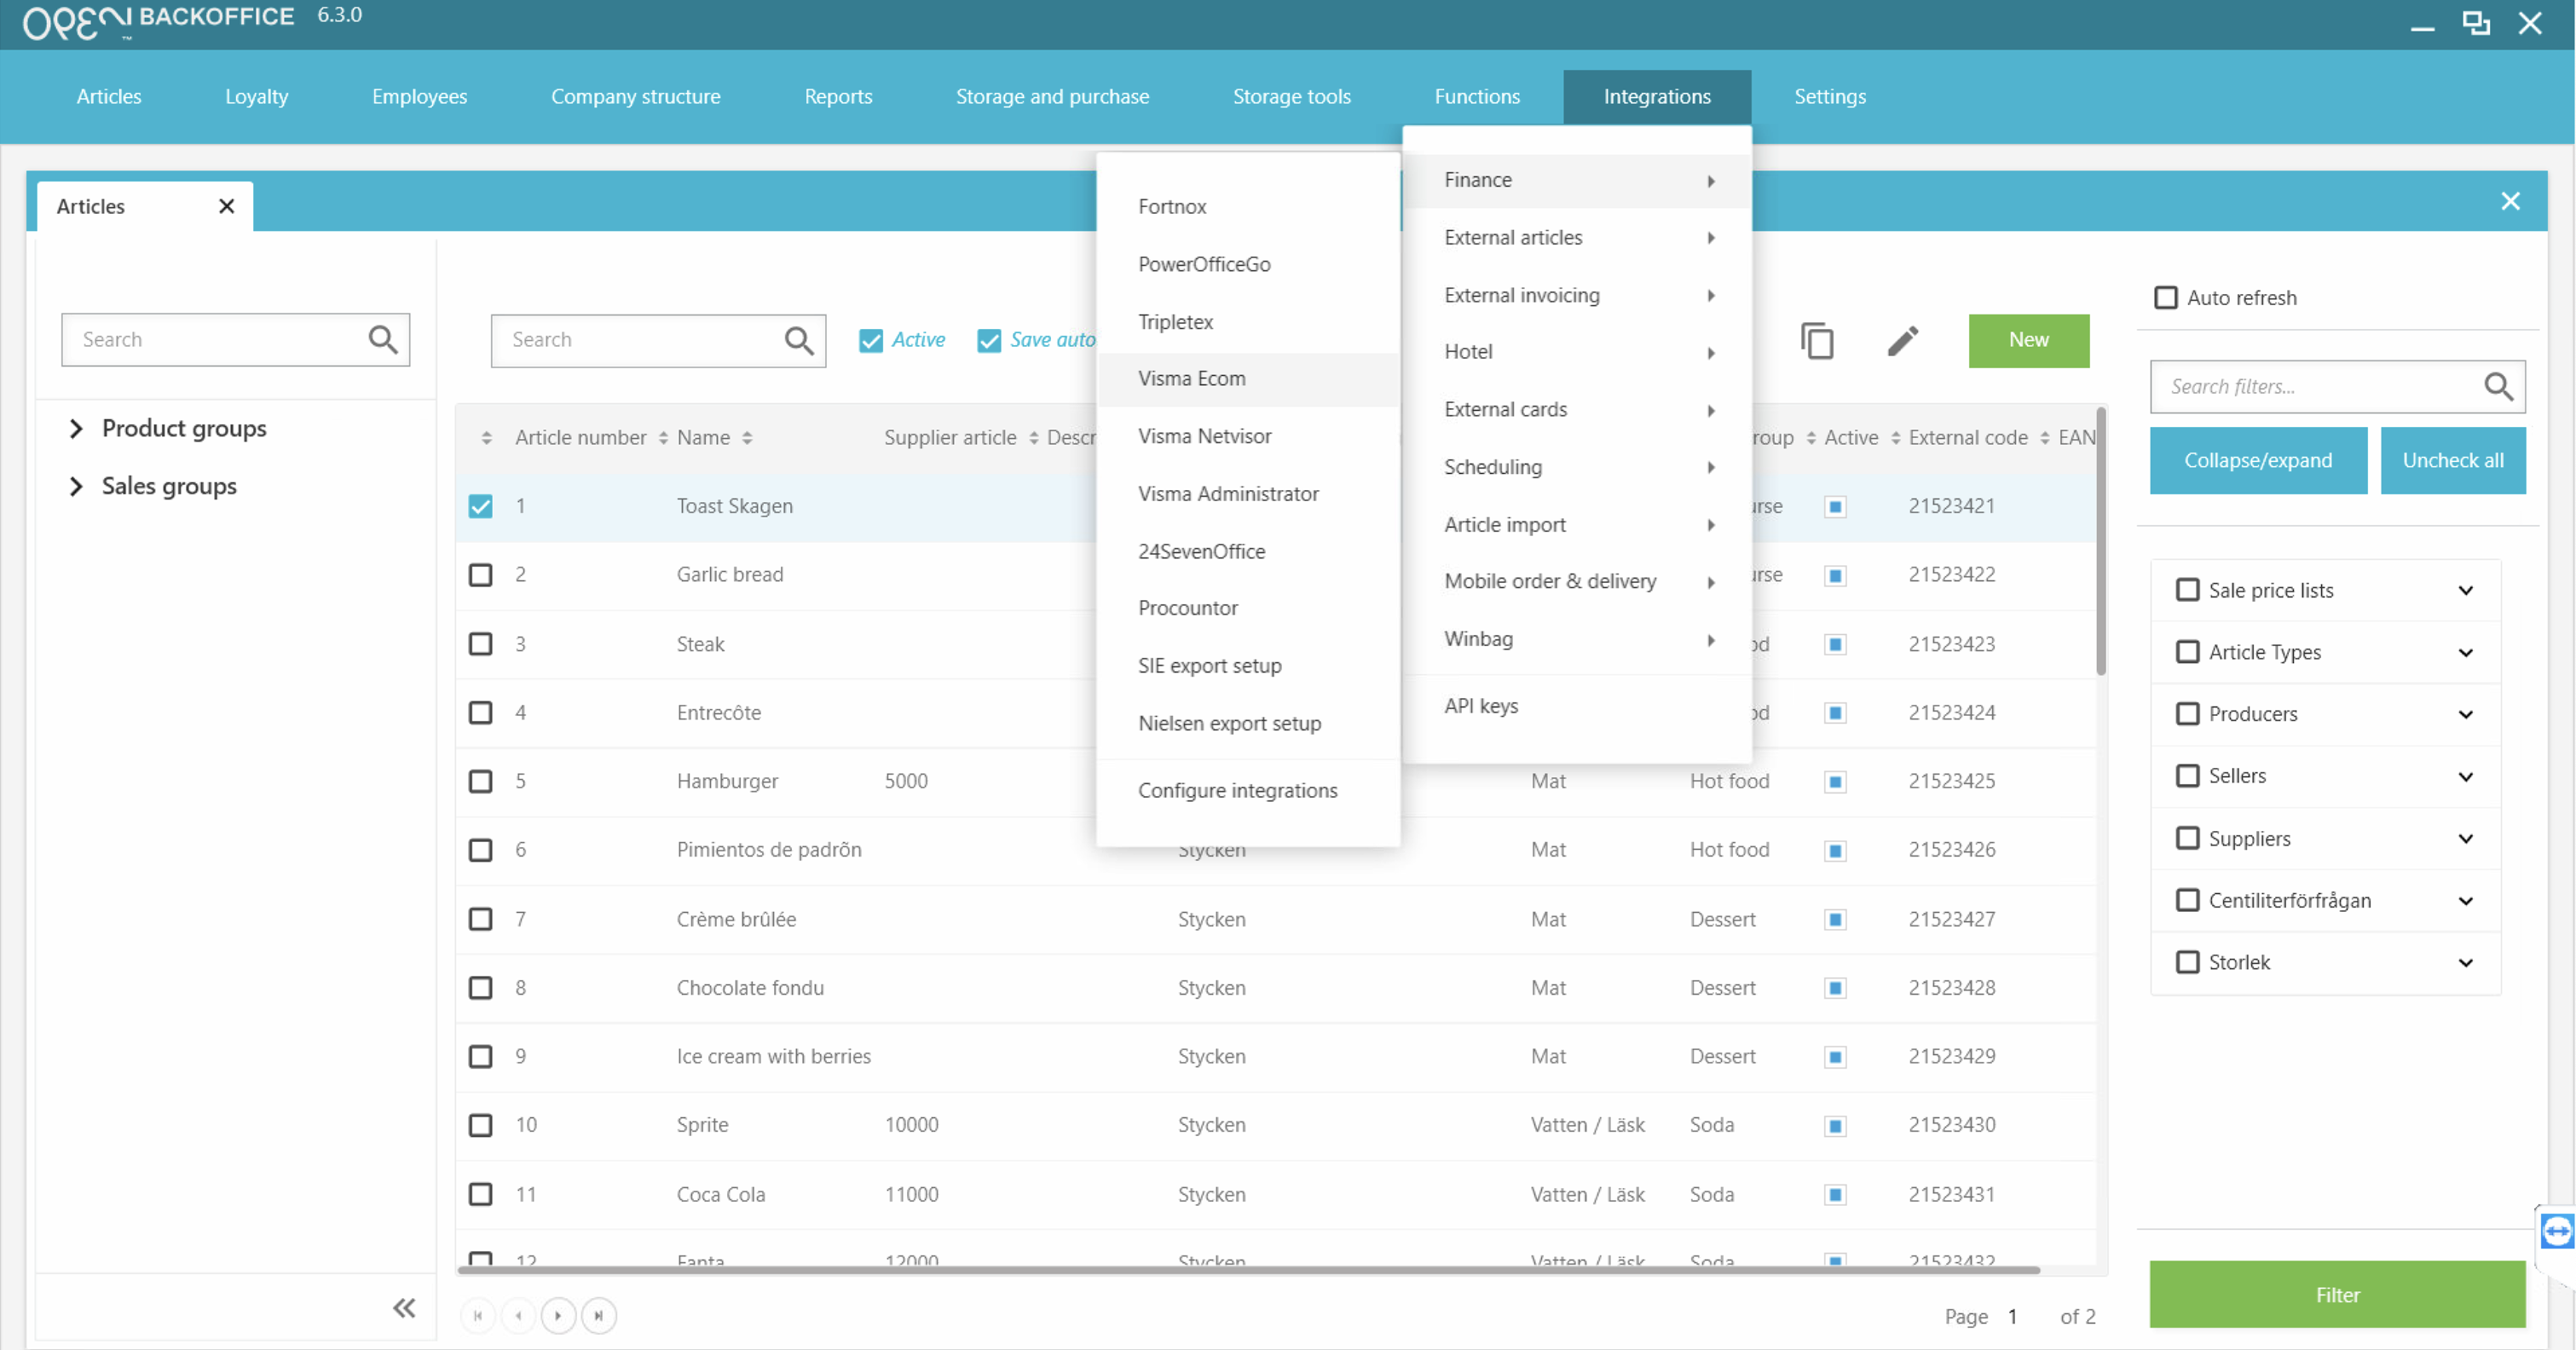
- Select Integrations in the top menu.

- Proceed to Finance and select Visma Ecom.
- The Spiris integration page will open.
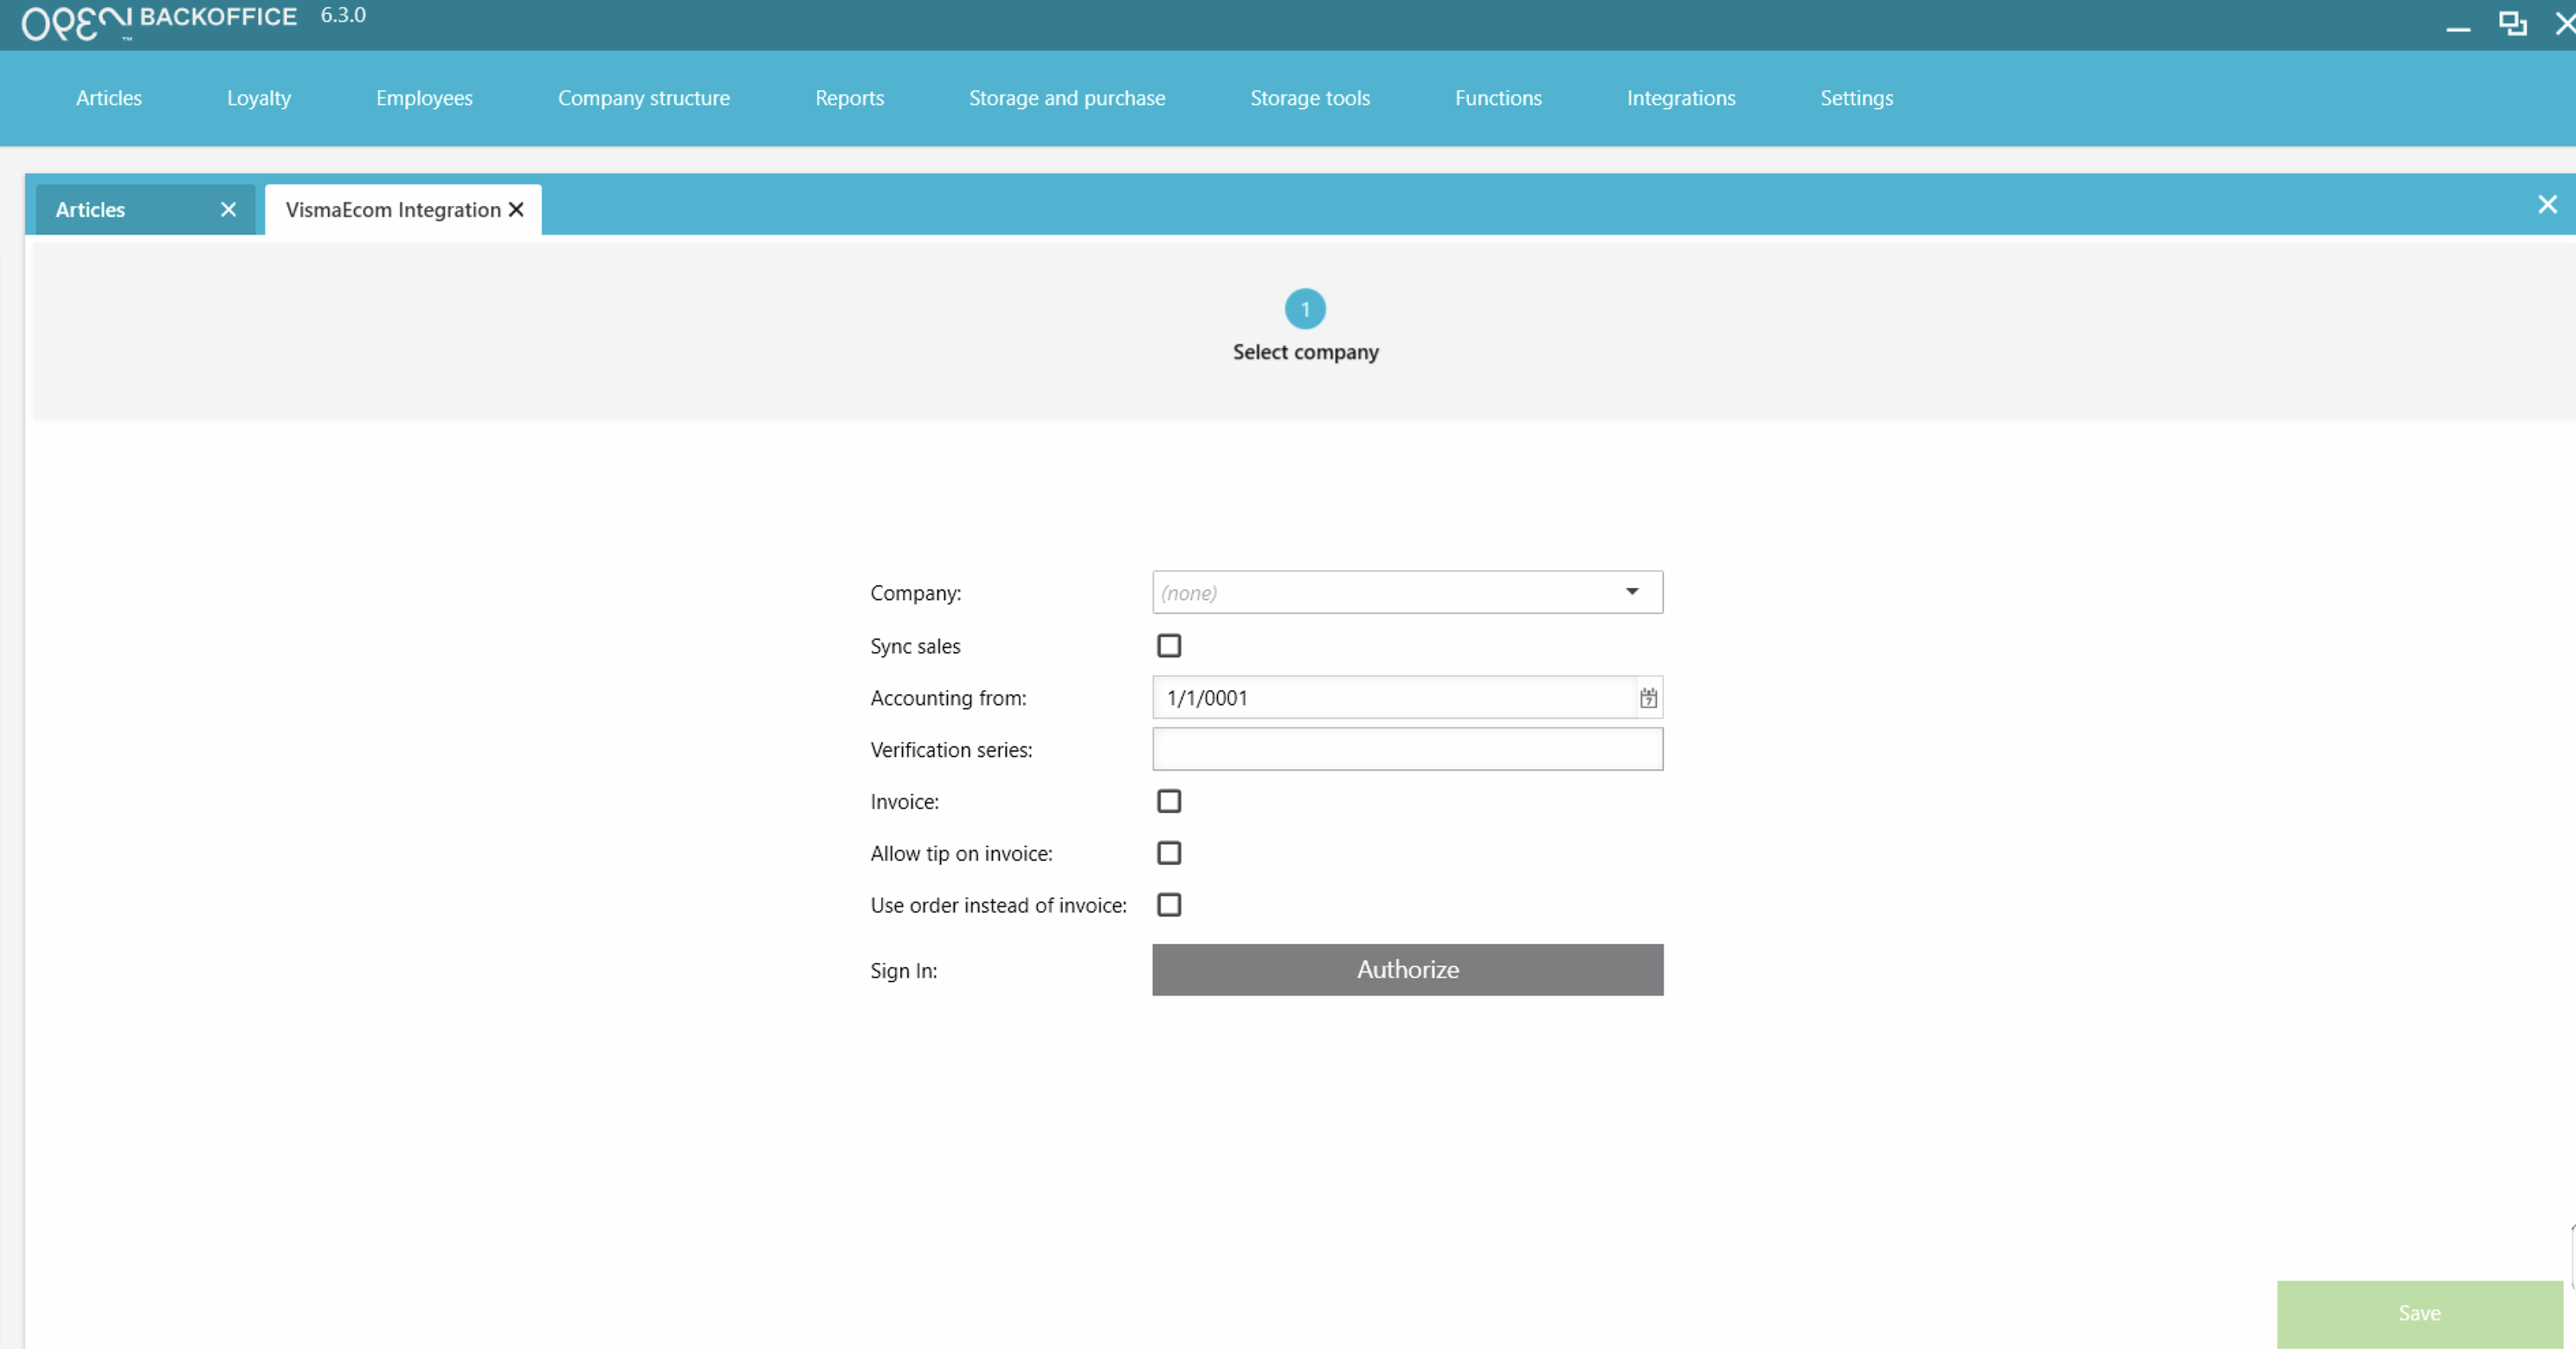
- Select your company and fill in the settings for the integration:
- Sync sales: Enable this to automatically export daily sales to Spiris after each end-of-day closure.
- Accounting from: choose from what date the sales data should be exported.
- Verification series: set which series to use.
- Invoice: Enable this to use invoicing via Spiris. Additional options:
- Allow tip on invoice: Include tips on invoices.
- Use order instead of invoice: Generate orders for collective invoicing (requires manual invoice handling in Spiris).
- Click Authorize. You’ll be redirected to Spiris to sign in and grant OPEN One access.


Keep in mind!
Remember that when you activate your Spris integration, it is important to set a number in the number series at Spiris website. Find it under Settings--> Company settings--> Invoice details. Set the number you want your invoices to start from.

If it is set to 0, the numbering will never start, and you will not be able to use the service.
Important: Don't combine with SIE export
If you activate the Spiris integration for accounting, do not use the SIE export feature to import sales data into Spiris. Doing so will create duplicate accounting entries.
Account Mapping
Step 1:
Account Mapping (info from Open is required here). Here is a guide - Company specific account mapping for accounting integrations
Step 2:
Spiris requires slightly different modules depending on which function you want to use. Below is a list of the most common modules used. To activate/order the functions you want, contact Spiris.
- Most common modules:
- Accounting = Required for accounting.
- Invoicing = Required for invoicing.
- Order & Quote = Needed for collective invoicing (Accounting & Invoicing + required)
- Integration (Required) = Needed for integration at all.
Step 3:
If you want to use Cost Center/Profit Units, you need to activate this according to the image below: Press Settings - Company Settings - Accounting Information. You can then control this at the account level and in the main menu under Accounting - Profit Units. There you can add the profit units and cost carriers you want to use.

Step 4:
Activate Profit Units on the account you want: according to the image below: Make sure that all accounts are created and active in Spiris. This also applies to any accounts you have set during Account Mapping (Step 1).

Step 5:
Set the verification series you want to use for the integration. You do this under Settings - Company Settings - Accounting Information.
