Fortnox integration
This guide will help you activate the Fortnox integration. Sync your cash register with Fortnox to simplify accounting, save time, and ensure accurate financial management.
- Sign in to BackOffice.
- Select Integrations in the top menu.

- Proceed to Finance and select Fortnox.
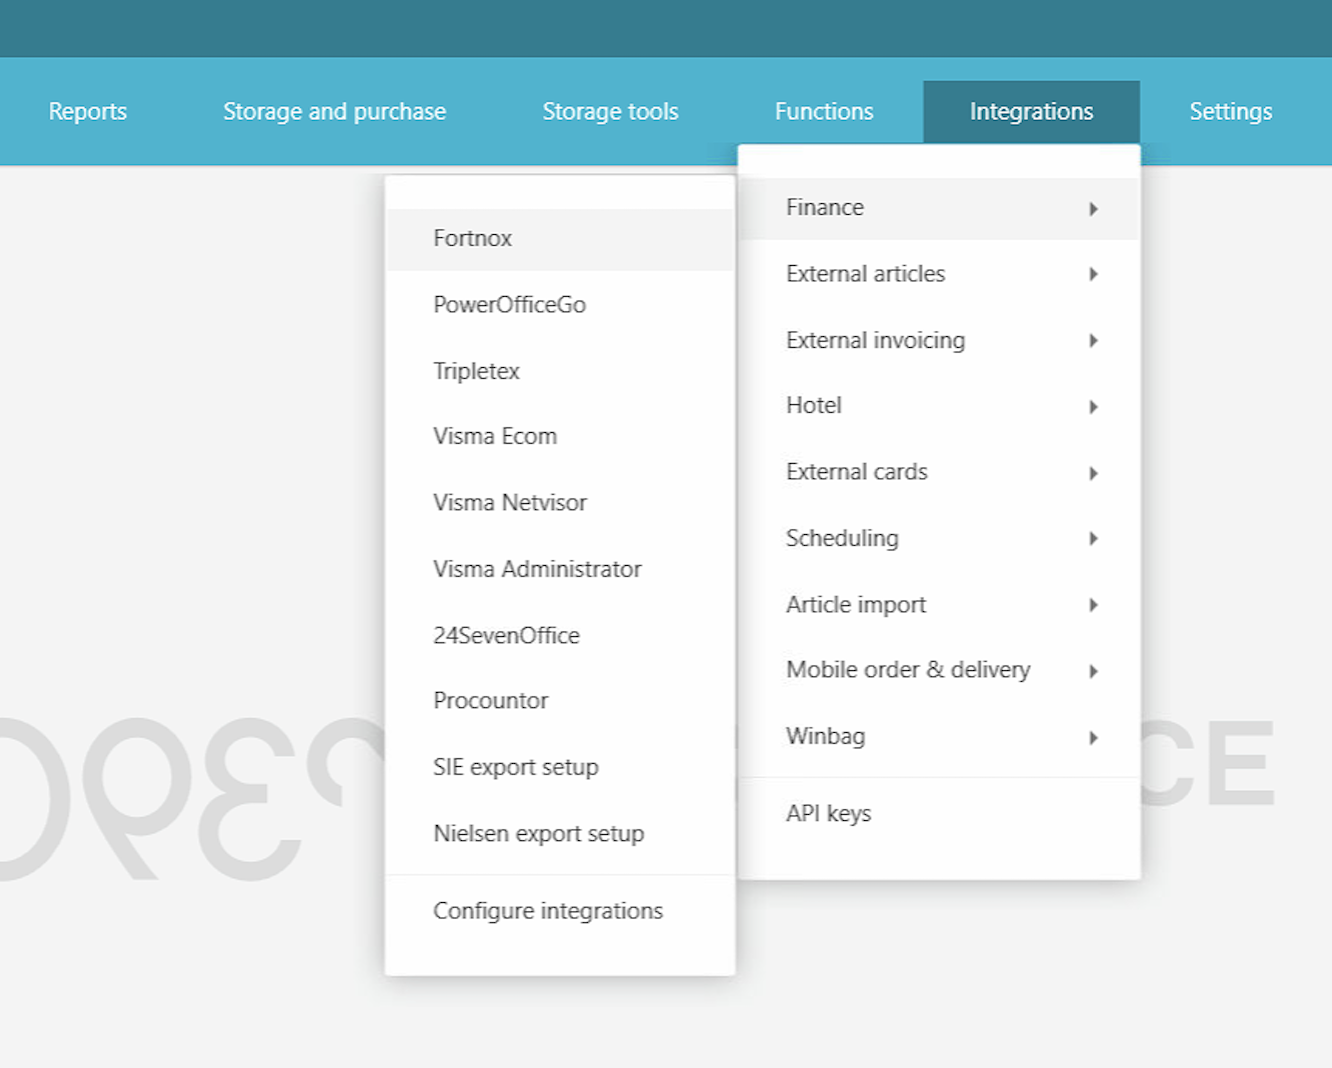
- The Fortnox integration page will open.
- Select your company and fill in the settings for the integration:
- Sync sales: Enable this to automatically export daily sales to Fortnox after each end-of-day closure.
- Invoice: Enable this to use invoicing via Fortnox. Additional options:
- Allow tip on invoice: Include tips on invoices.
- Use order instead of invoice: Generate orders for collective invoicing (requires manual invoice handling in Fortnox).
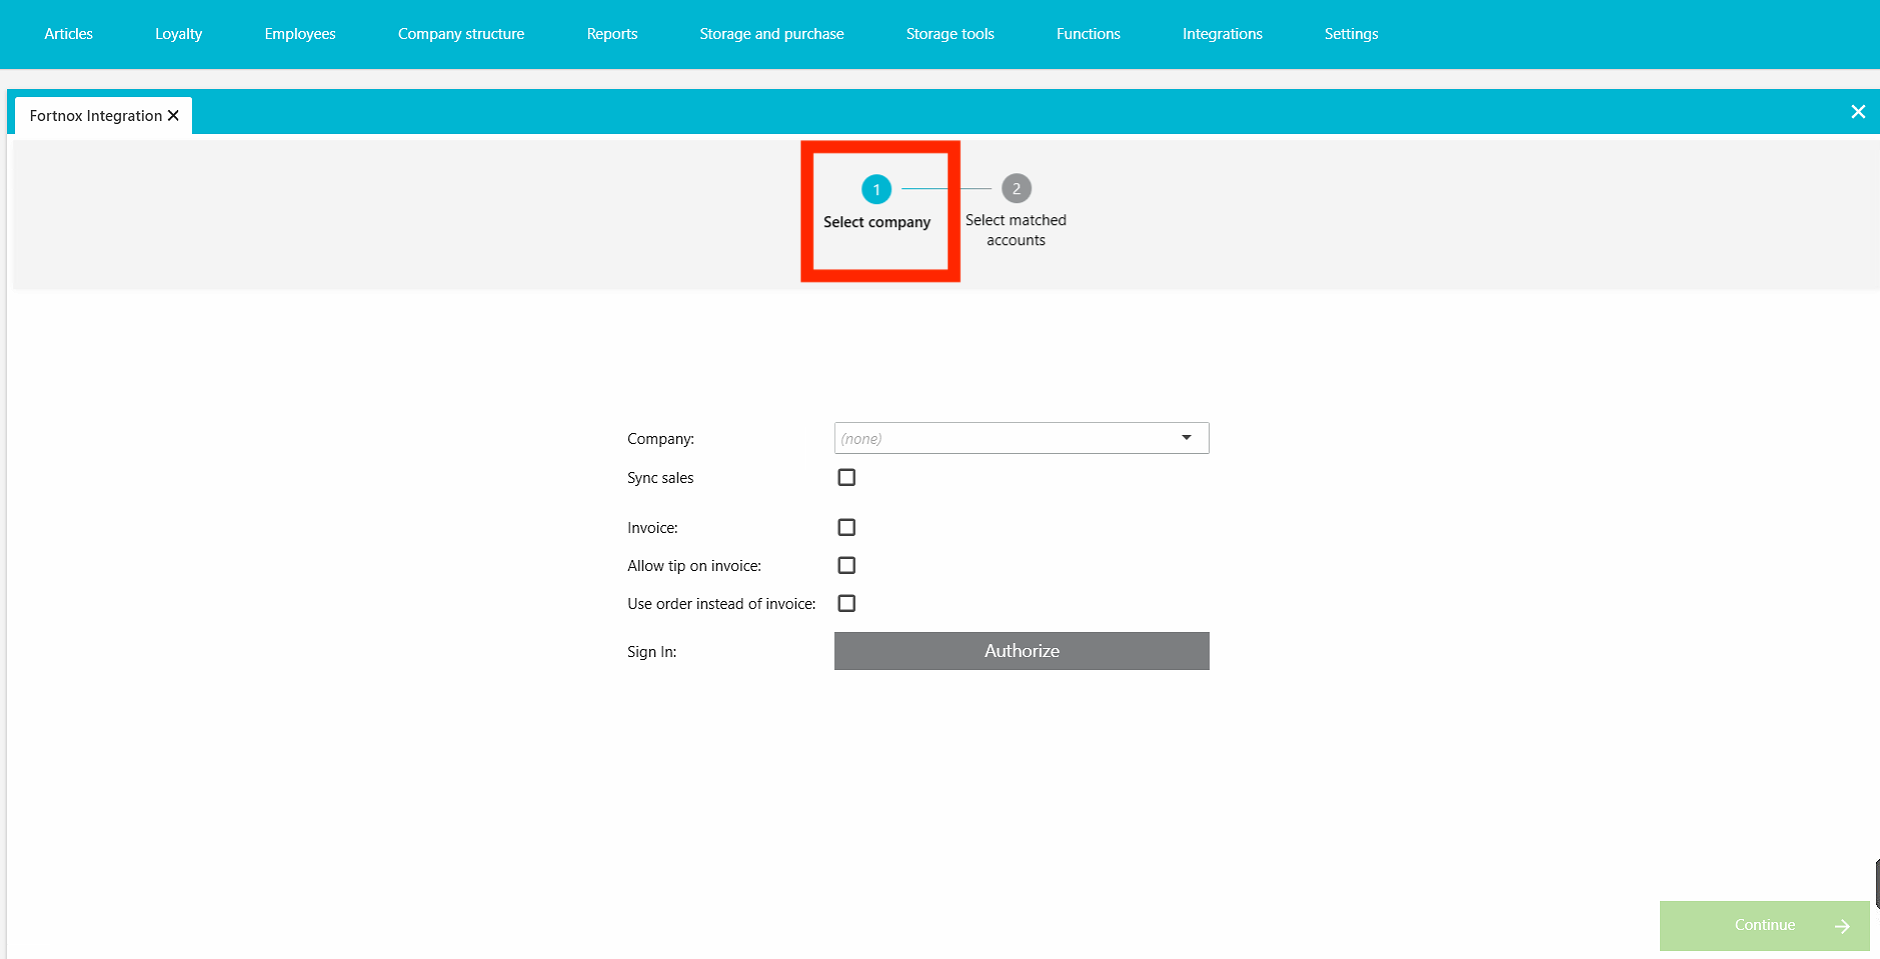
- Click Authorize. You’ll be redirected to Fortnox to sign in and grant OPEN One access.
- After authorization, you’ll return to BackOffice. Here you need to match your accounts by selecting which Fortnox accounts to use for:
- Payment methods
- Product groups
- Other relevant categories


Important: Don't combine with SIE export
If you activate the Fortnox integration for accounting, do not use the SIE export feature to import sales data into Fortnox. Doing so will create duplicate accounting entries.
Make your own account mapping
Step 1:
For those stores that want to make an account mapping (Own chart of accounts), you first need to make the account mapping.
This is done in OPEN BackOffice according to the following guide:
Click here--> Company-specific account mapping for accounting integrations
Step 2:
Fortnox requires slightly different modules depending on which function you want to use. Below is a list of the most common modules used.
To activate/order the functions you want,
Most common modules:
- Bookkeeping = Required for bookkeeping.
- Invoicing = Required for invoicing
- Order & Quote = Required for collective invoicing
- Integration (Required) = Required for integration in general.
Step 3:
Cost center needs to be active in Fortnox for the integration to work. This is activated as follows: Press the gear and select accounting.

Go to cost centers and set “Activate cost center support” to “YES”.

Step 4:
Make sure that all accounts are created and active in Fortnox. This also applies to any accounts you have set at Account Mapping (Step 1).
Example of what an account might look like.

Step 5:
Set the verification series you wish to use for the integration to Manual. Go under the gear wheel and select “Accounting”.

Navigate down to verification series and check “Manual accounting”.

Step 6:
Check permissions. For stores that have Fortnox through an agency, in some cases it may be required that the agency reviews and sets the correct permissions for the person who will carry out the integration. Below you can see an image of the permissions that the integration requires.

Fortnox's own guides
Below are some helpful links to Fortnox's own guides: