Install Epson printer (USB-C connection)

This guide will help you install the Epson printer and connect it to a tablet via USB-C.
Unpack the printer
Start by unpacking the printer and ensuring that all the necessary components are included. These typically include the printer, power cable, USB cable, and any additional accessories.
Turn the printer on by holding down the power button for a couple of seconds.
Connect the printer to the tablet
- Remove the paper cover if it is attached. Click here for a guide on how to do this.
- Connect the AC adapter and the interface (USB-C) cable to the connectors at the bottom of the printer.
- Attach the paper cover. Click here for a guide on how to do this.
- Connect the interface (USB-C) cable to your tablet device.

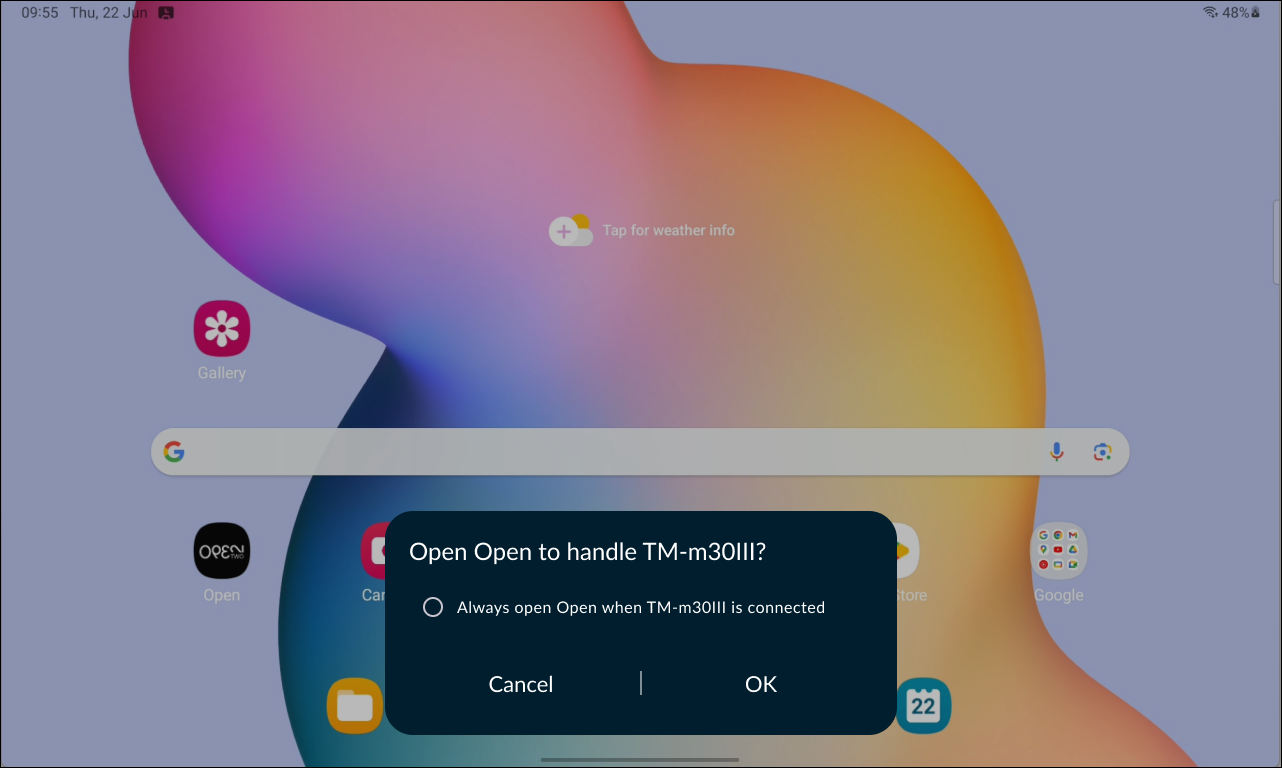
- A popup will now appear on your tablet device, asking if you want to open the Open TWO app to handle the printer. Press OK.
- Connect the AC cable plug to a power outlet.
Select the printer from printer settings
Once your tablet is connected to the printer, open the Open TWO app to select the printer in the printer settings.
- In the Open TWO app, open the menu and go to SETTINGS.

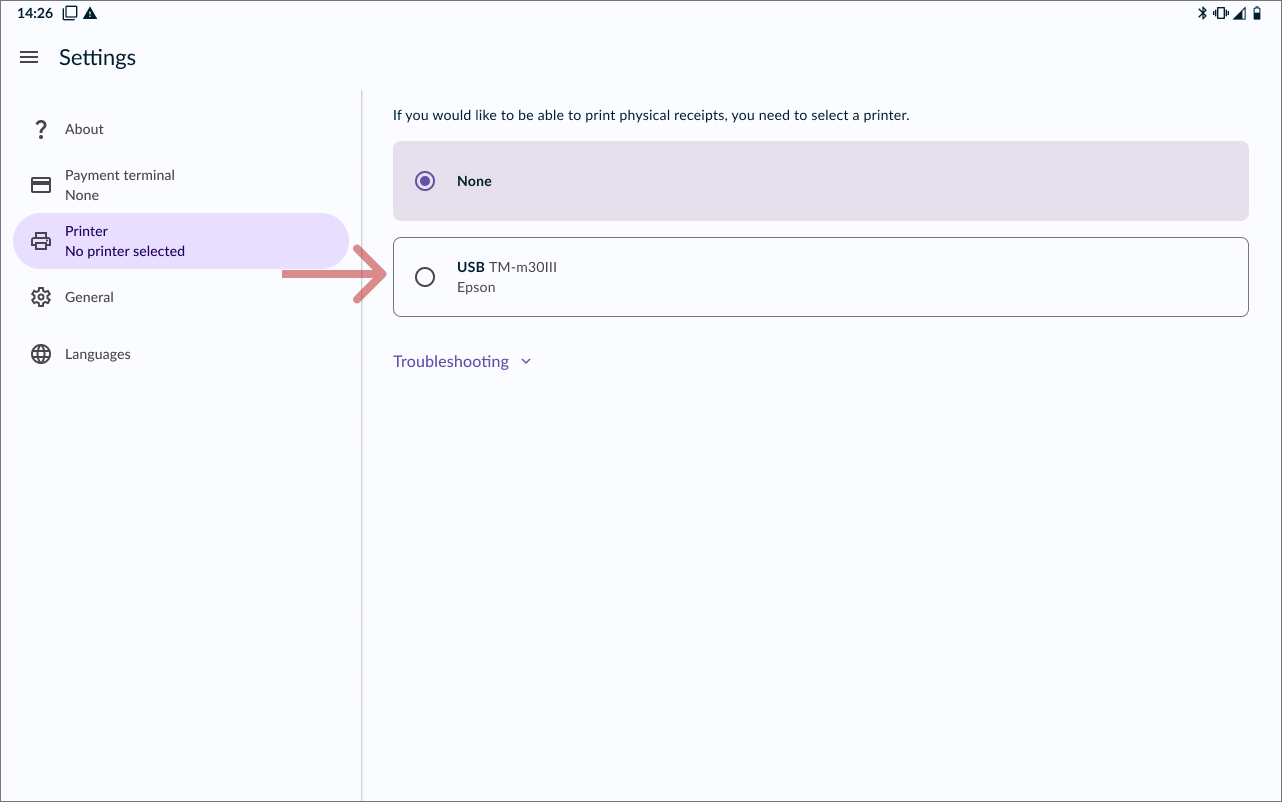
- Go to PRINTERS.

- Select the printer (TM-m30II-H) from the list.
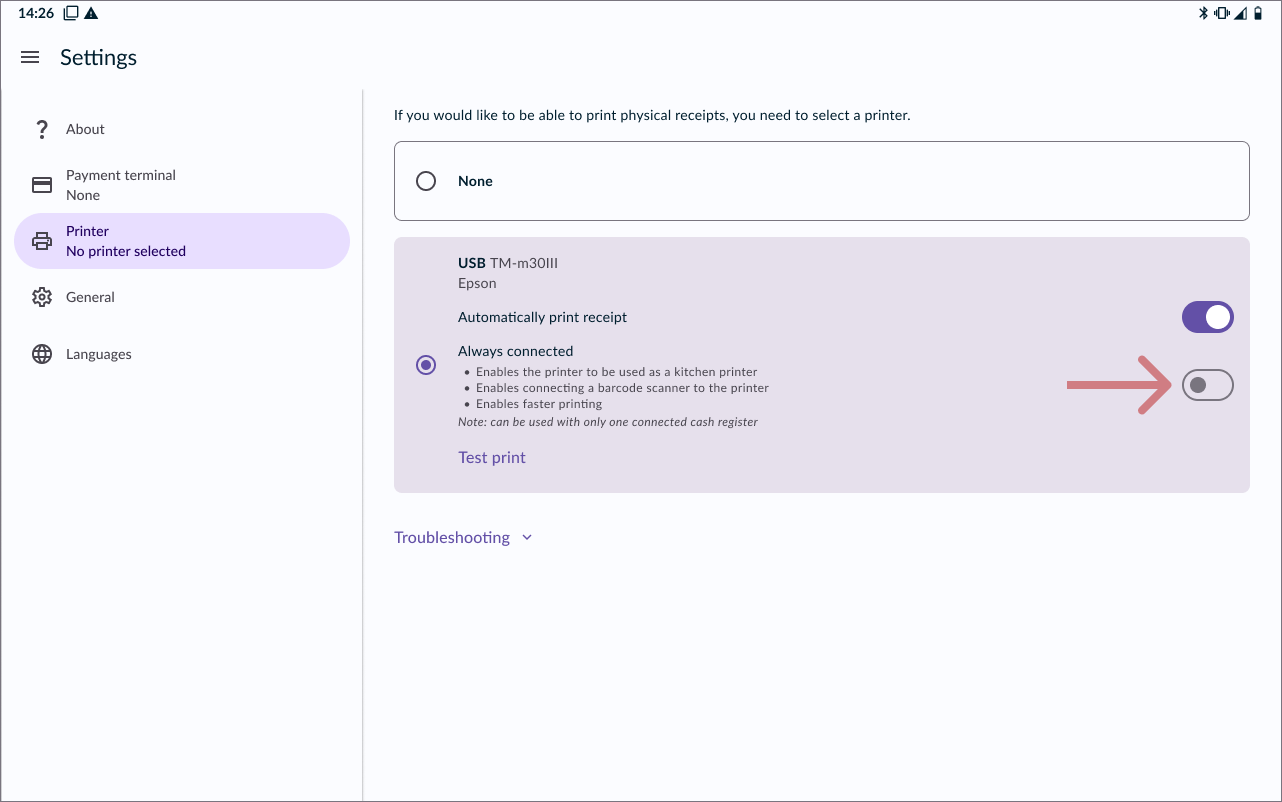
It’s optional to enable Always connected. This feature provides faster printing, but cannot be used if multiple cash registers are to be connected to the printer.

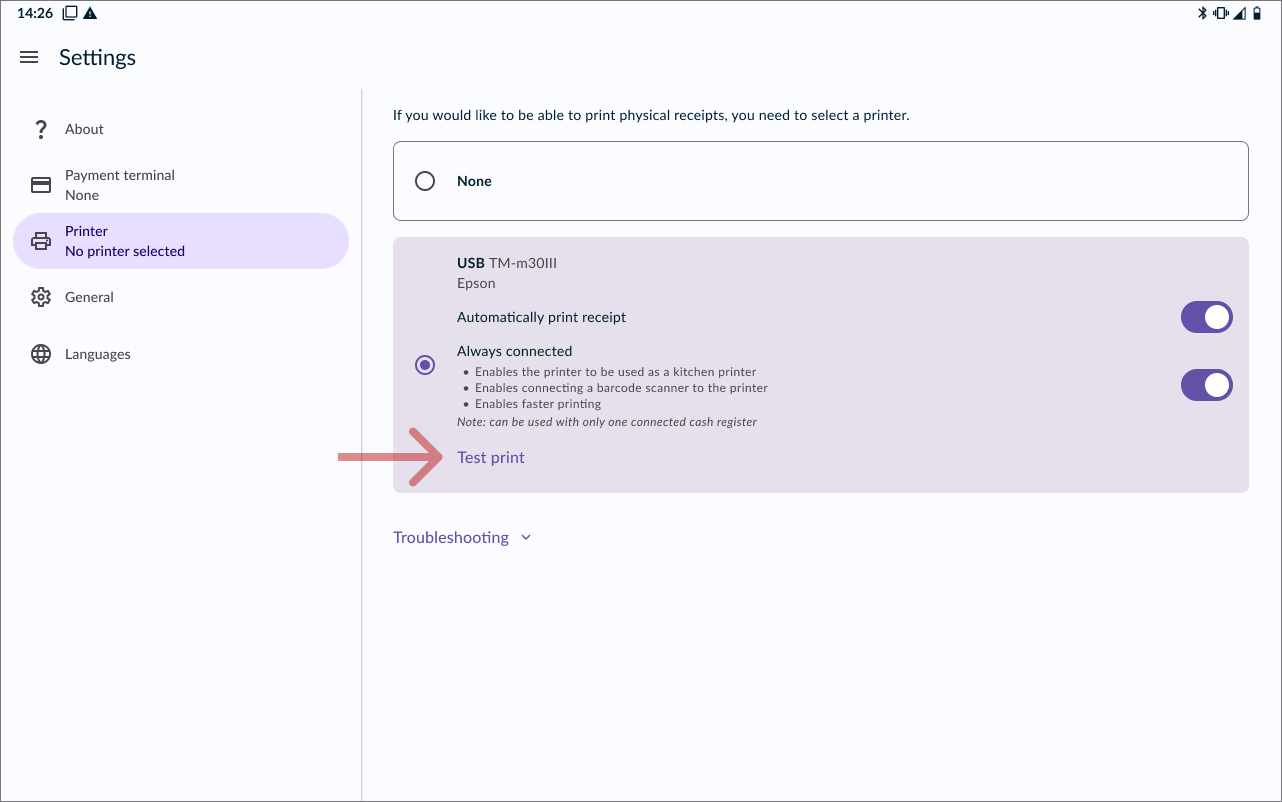
- Once you have selected your printer, you are all set! But to make sure the printer is working properly, you can print a test receipt by pressing TEST PRINT.