Invoice via OPEN
OPEN Invoice & Customers gives you full control over both customers and invoices in one unified system, making it an especially suitable choice if you are looking for a cost-effective solution without needing to pay for external services or handle complex integrations. With integrated customer and invoice management, you won't need to switch between different systems, making OPEN's own invoicing service a smart choice for those who want a simple, user-friendly solution that does not require much technical expertise to implement and maintain.
Some of the advantages of OPEN's own invoicing service:
Integrated customer and invoice management: Manage all customers and invoices directly from OPEN Two without having to switch between different systems.
Create customers in real-time: The ability to create new customers directly from BackOffice or from the cash register saves time and reduces the risk of errors.
Custom user roles: Assign specific roles and permissions to employees, so they only have access to the parts of the system relevant to their tasks.
For more information about user roles, see the guide User roles.
Secure access: Ensure, for example, that an employee has full access to the customer register without having access to sensitive information like finance and accounting.
Flexibility when choosing accounting programs: You can change accounting programs without affecting the management of invoices and customers in OPEN Two. This gives you greater flexibility and control over your accounting solution.
Get started with invoicing via OPEN
Obtain the license for OPEN's invoicing service
Contact your salesperson to obtain the required license to use the invoicing feature via OPEN. Once the license is in place, you can configure your invoice settings and create customers.
Access Invoice settings, Customers, and Invoices
You will now have access to the Invoice Settings, Customers, and Invoices pages in BackOffice, under the Finance menu.
Fill in invoice settings
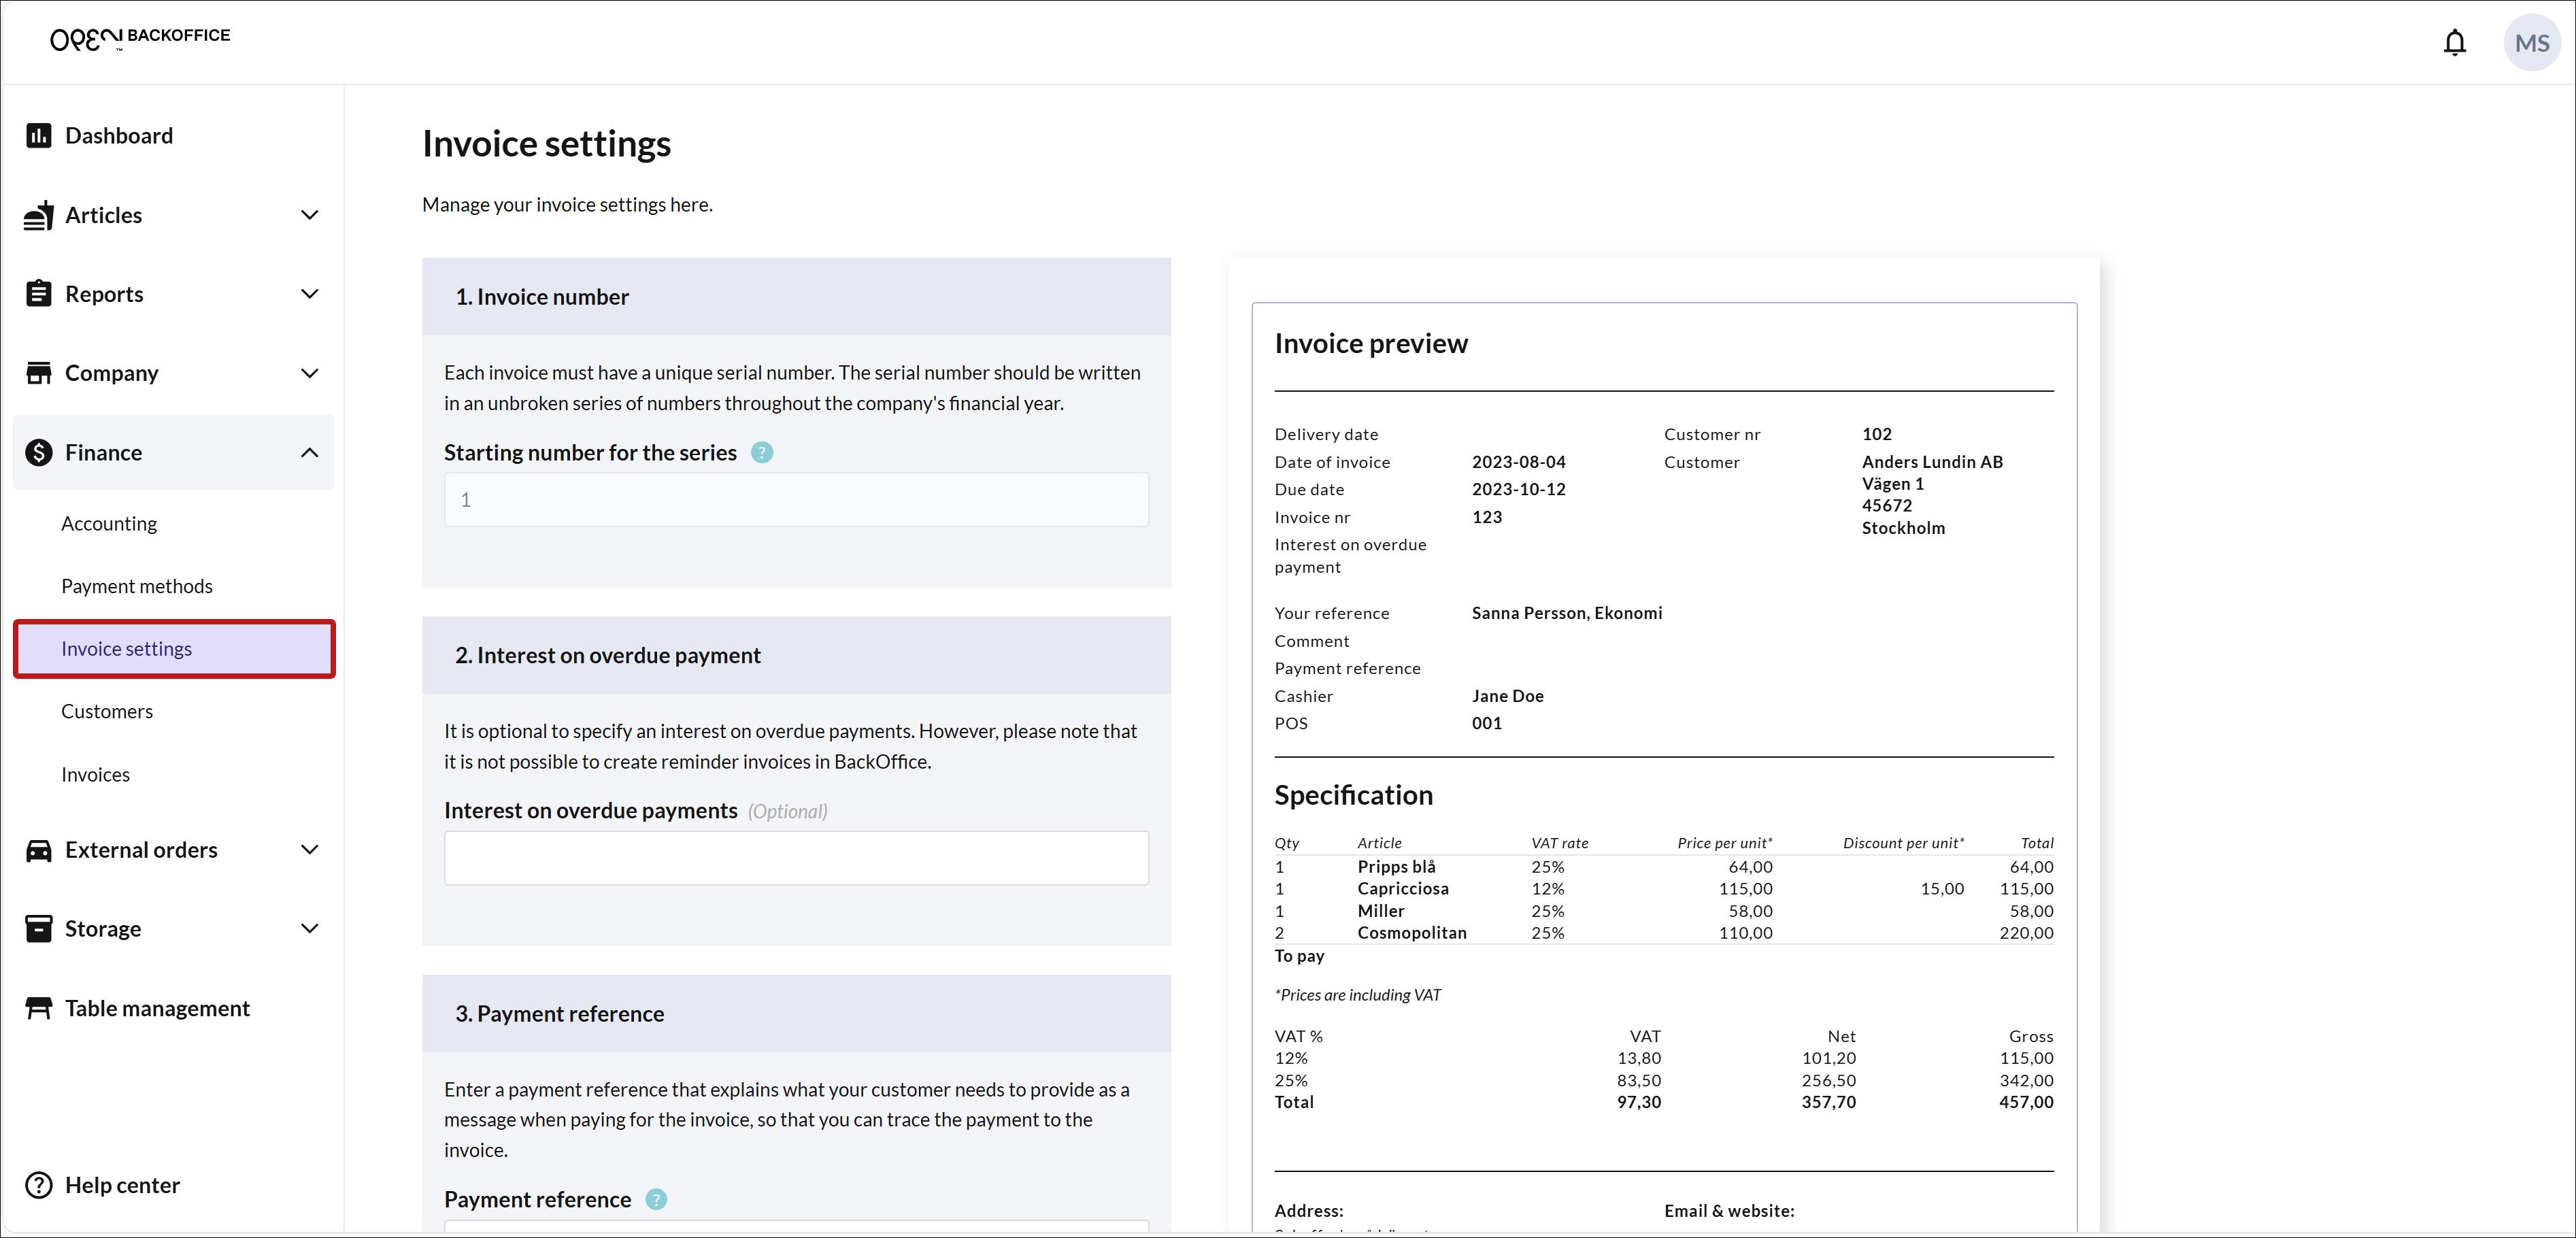
Complete your invoice settings, which include the information that will appear on the invoice.
Activate invoice as a payment method
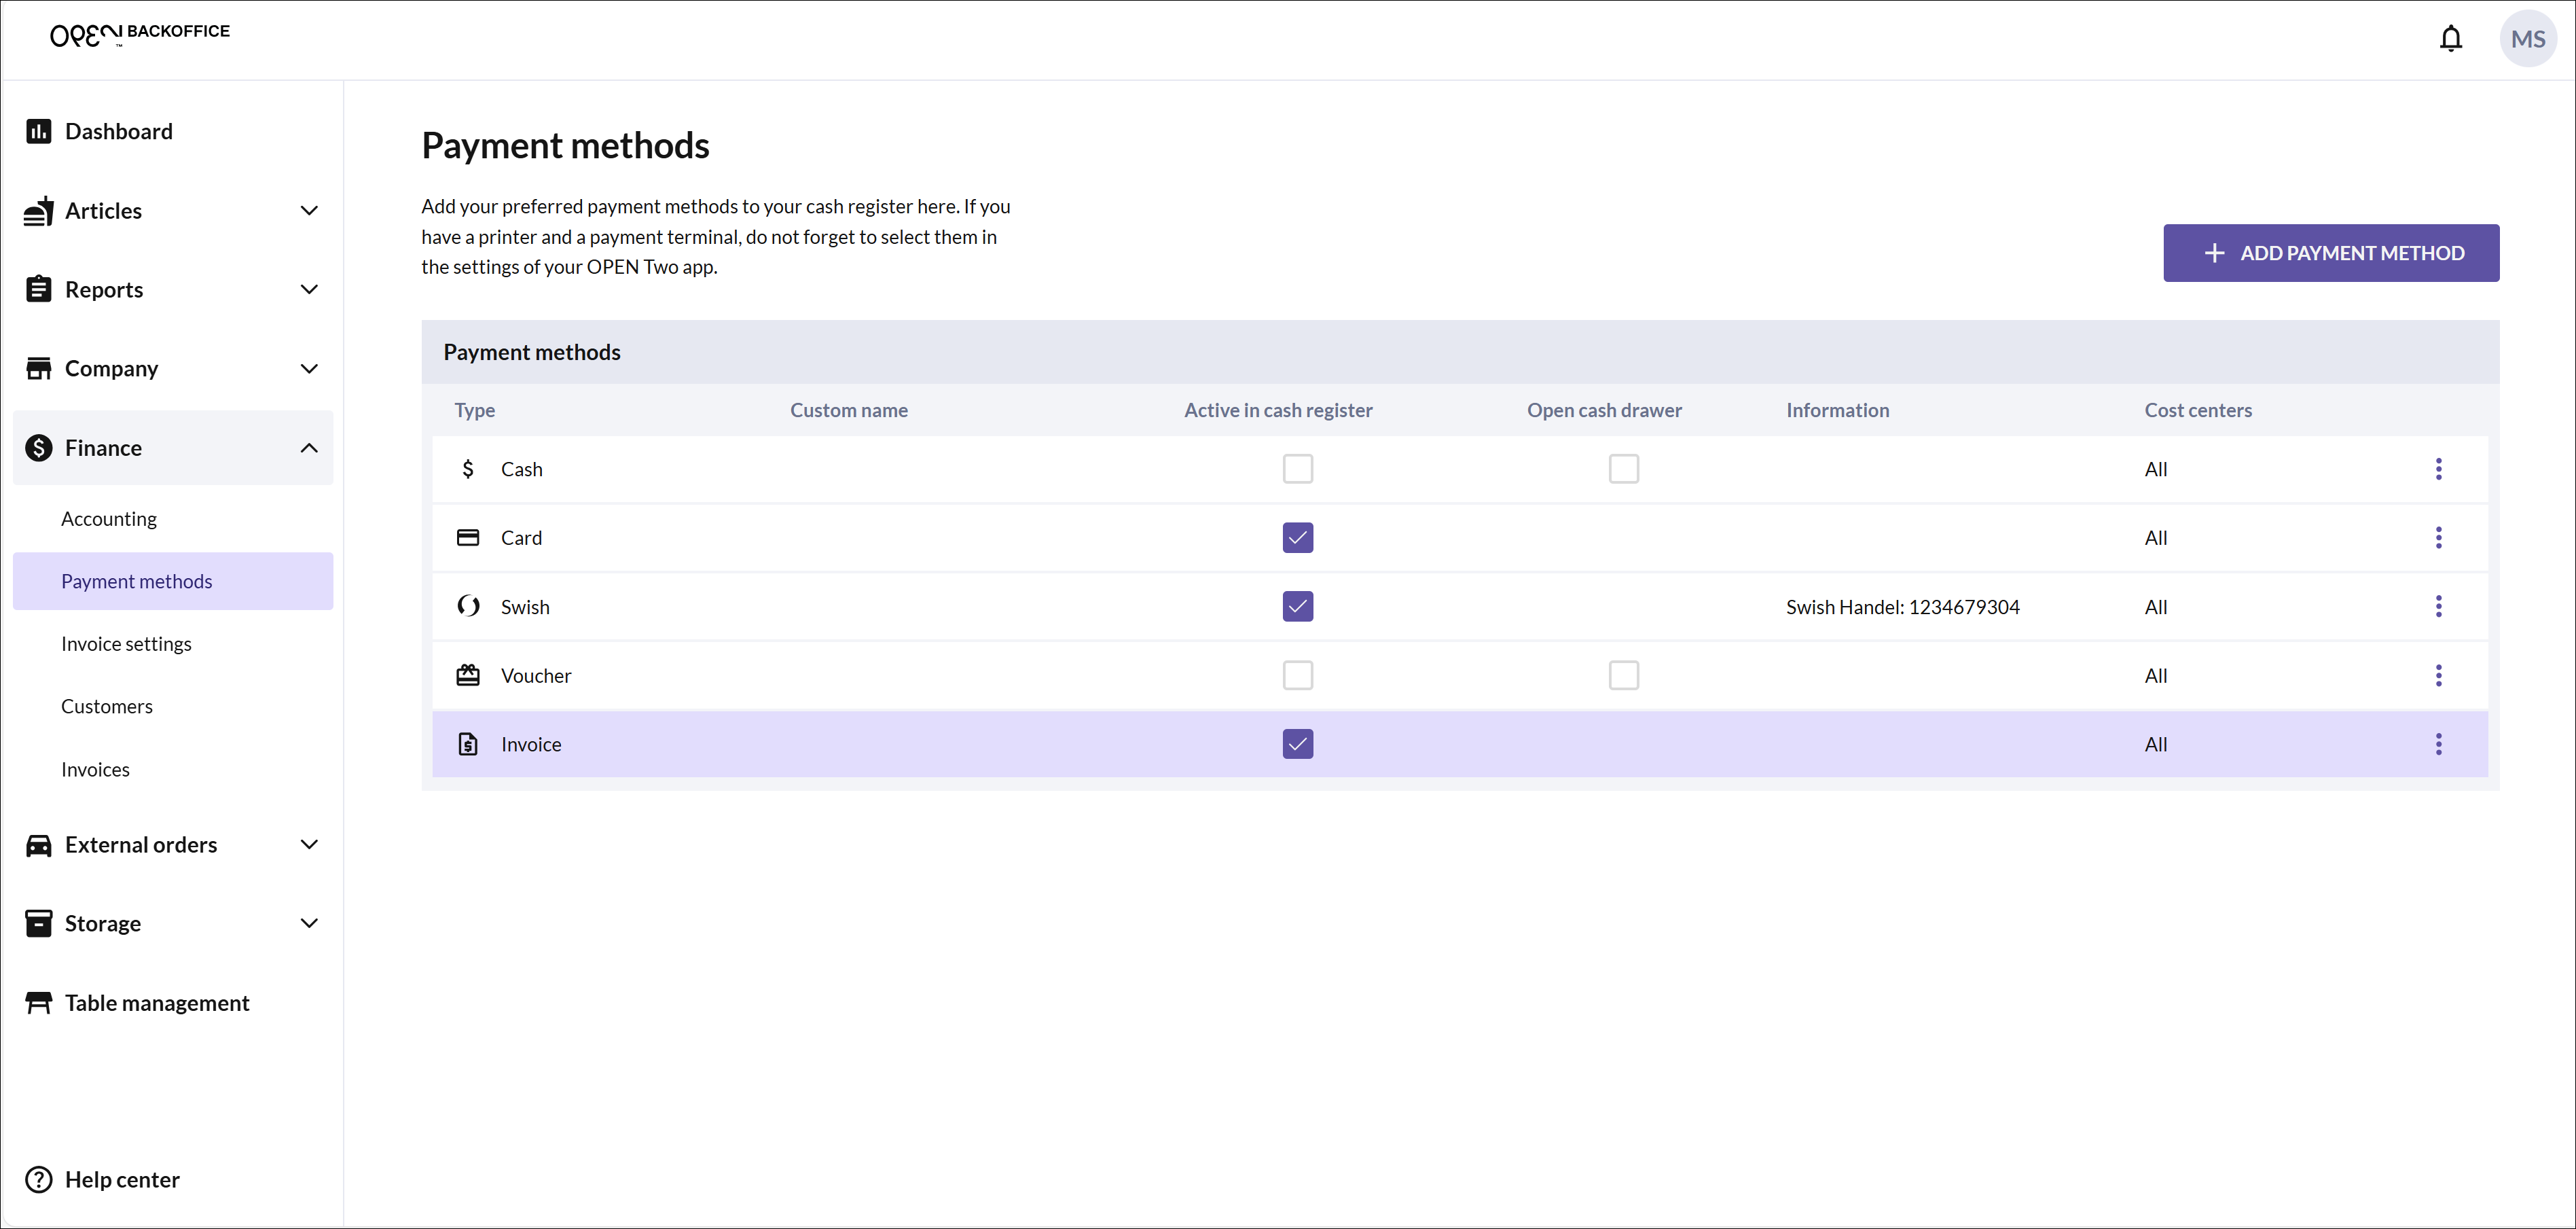
The invoice payment method is automatically activated at all your locations. This can be changed on the Payment methods page in BackOffice.
Create customers in BackOffice or at the cash register
You can now create customers in BackOffice, or do this in real-time from the register.
Process payments via invoice
From the register, you can now invoice your customers.
Fill in invoice settings
Before you can send your first invoice, you need to fill in your invoice settings, which consist of the information that will appear on the invoice. This includes the starting number for invoice numbers, any payment reference, and which Bankgiro/Plusgiro the invoices should be paid to.
In BackOffice, select FINANCE from the menu and go to the INVOICE SETTINGS page.

Fill in your invoice settings - this is necessary before you can create your first invoice.
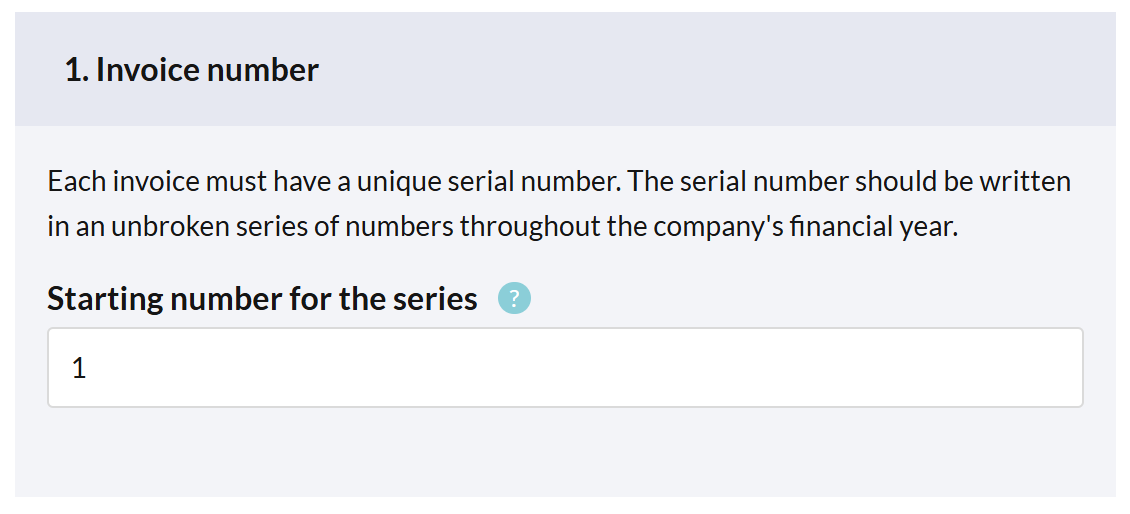
Invoice Number
Each invoice must have a unique serial number. The serial number should be in a continuous series throughout the company's fiscal year. Choose a starting number for the series.
Note that the serial number series cannot be changed once you have sent your first invoice.
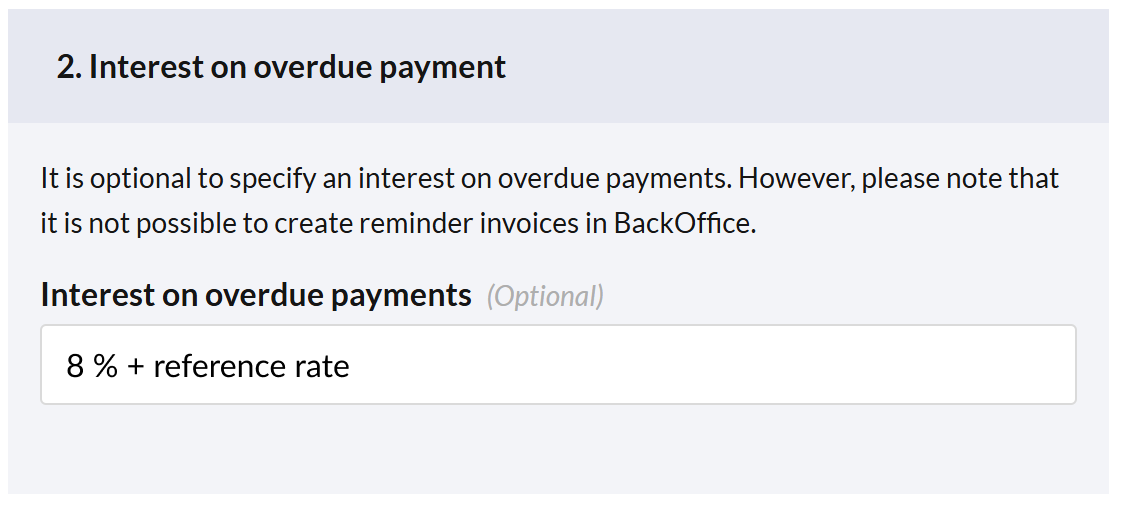
Interest on overdue payment
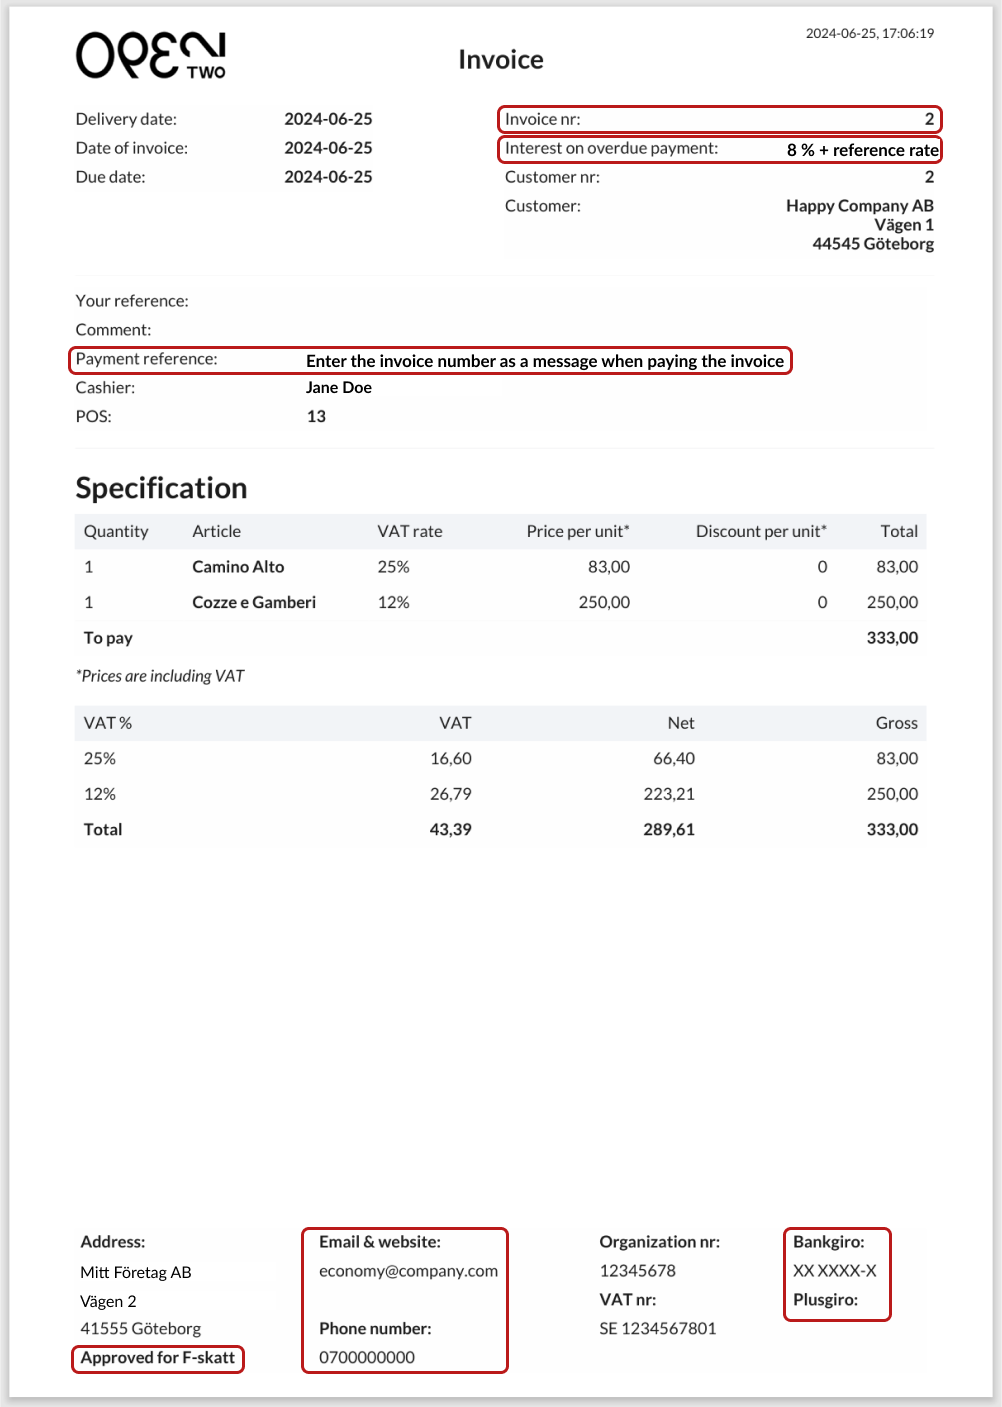
It is optional to specify any late payment interest, e.g., "8% + reference interest."
Note that it is not possible to create reminder invoices in BackOffice.
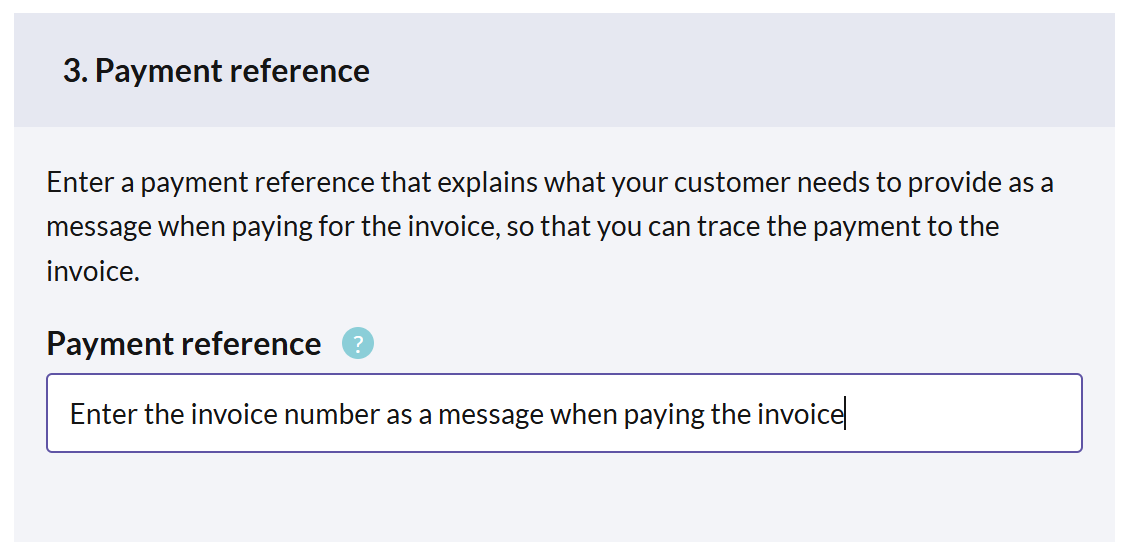
Payment reference
Specify a payment reference explaining what your customer needs to indicate as a message when they pay the invoice so you can trace the payment to the invoice. Example: "Enter the invoice number as a message when paying the invoice" This information will appear on the invoice.
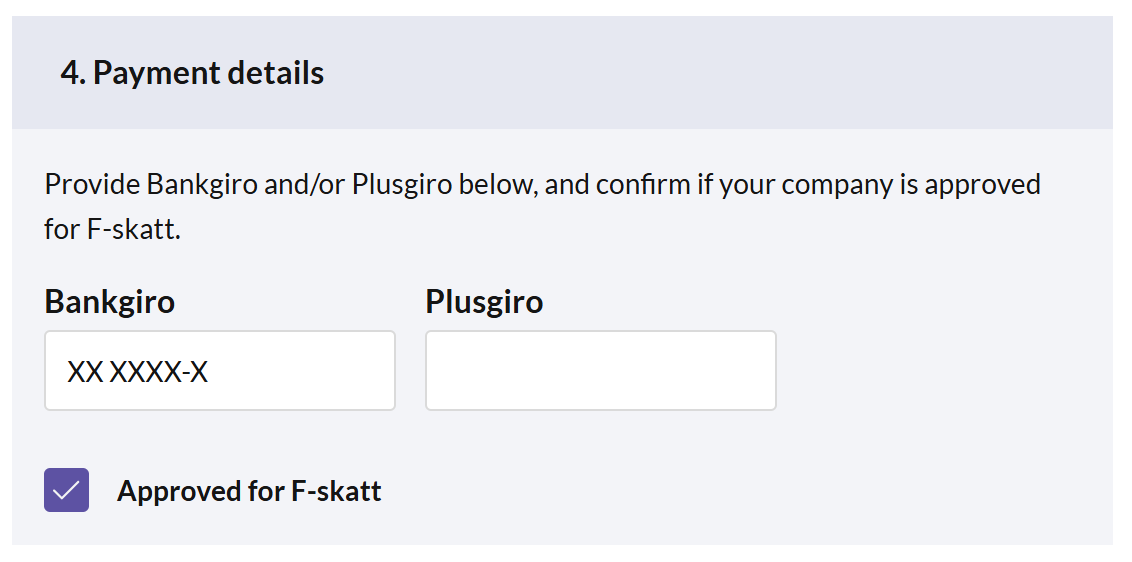
Payment details
Enter the Bankgiro and/or Plusgiro below and confirm if your company is approved for F-tax.
Contact information
Provide contact details for the company that your customers can use for invoice-related queries.
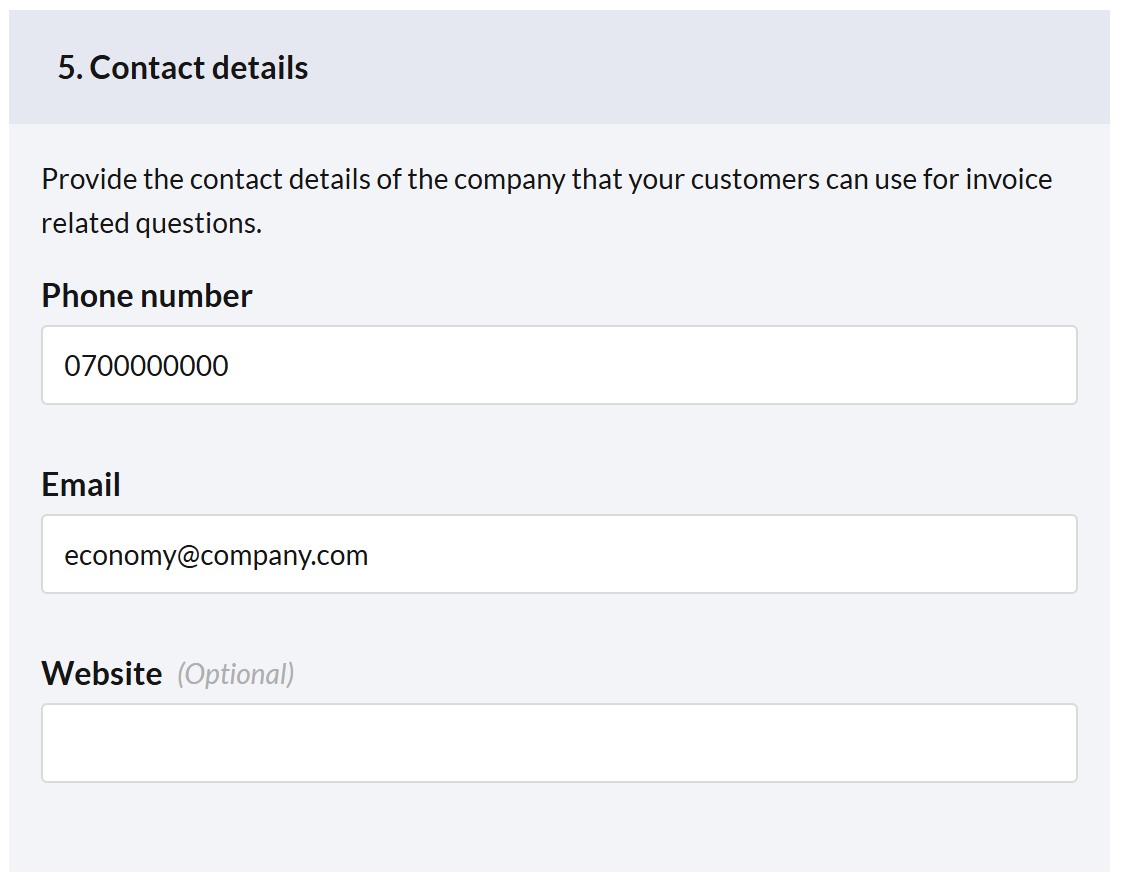
Press SAVE CHANGES at the bottom of the page when you are done.
Below is an example of how your invoice settings may appear on an invoice.
How to manage customers
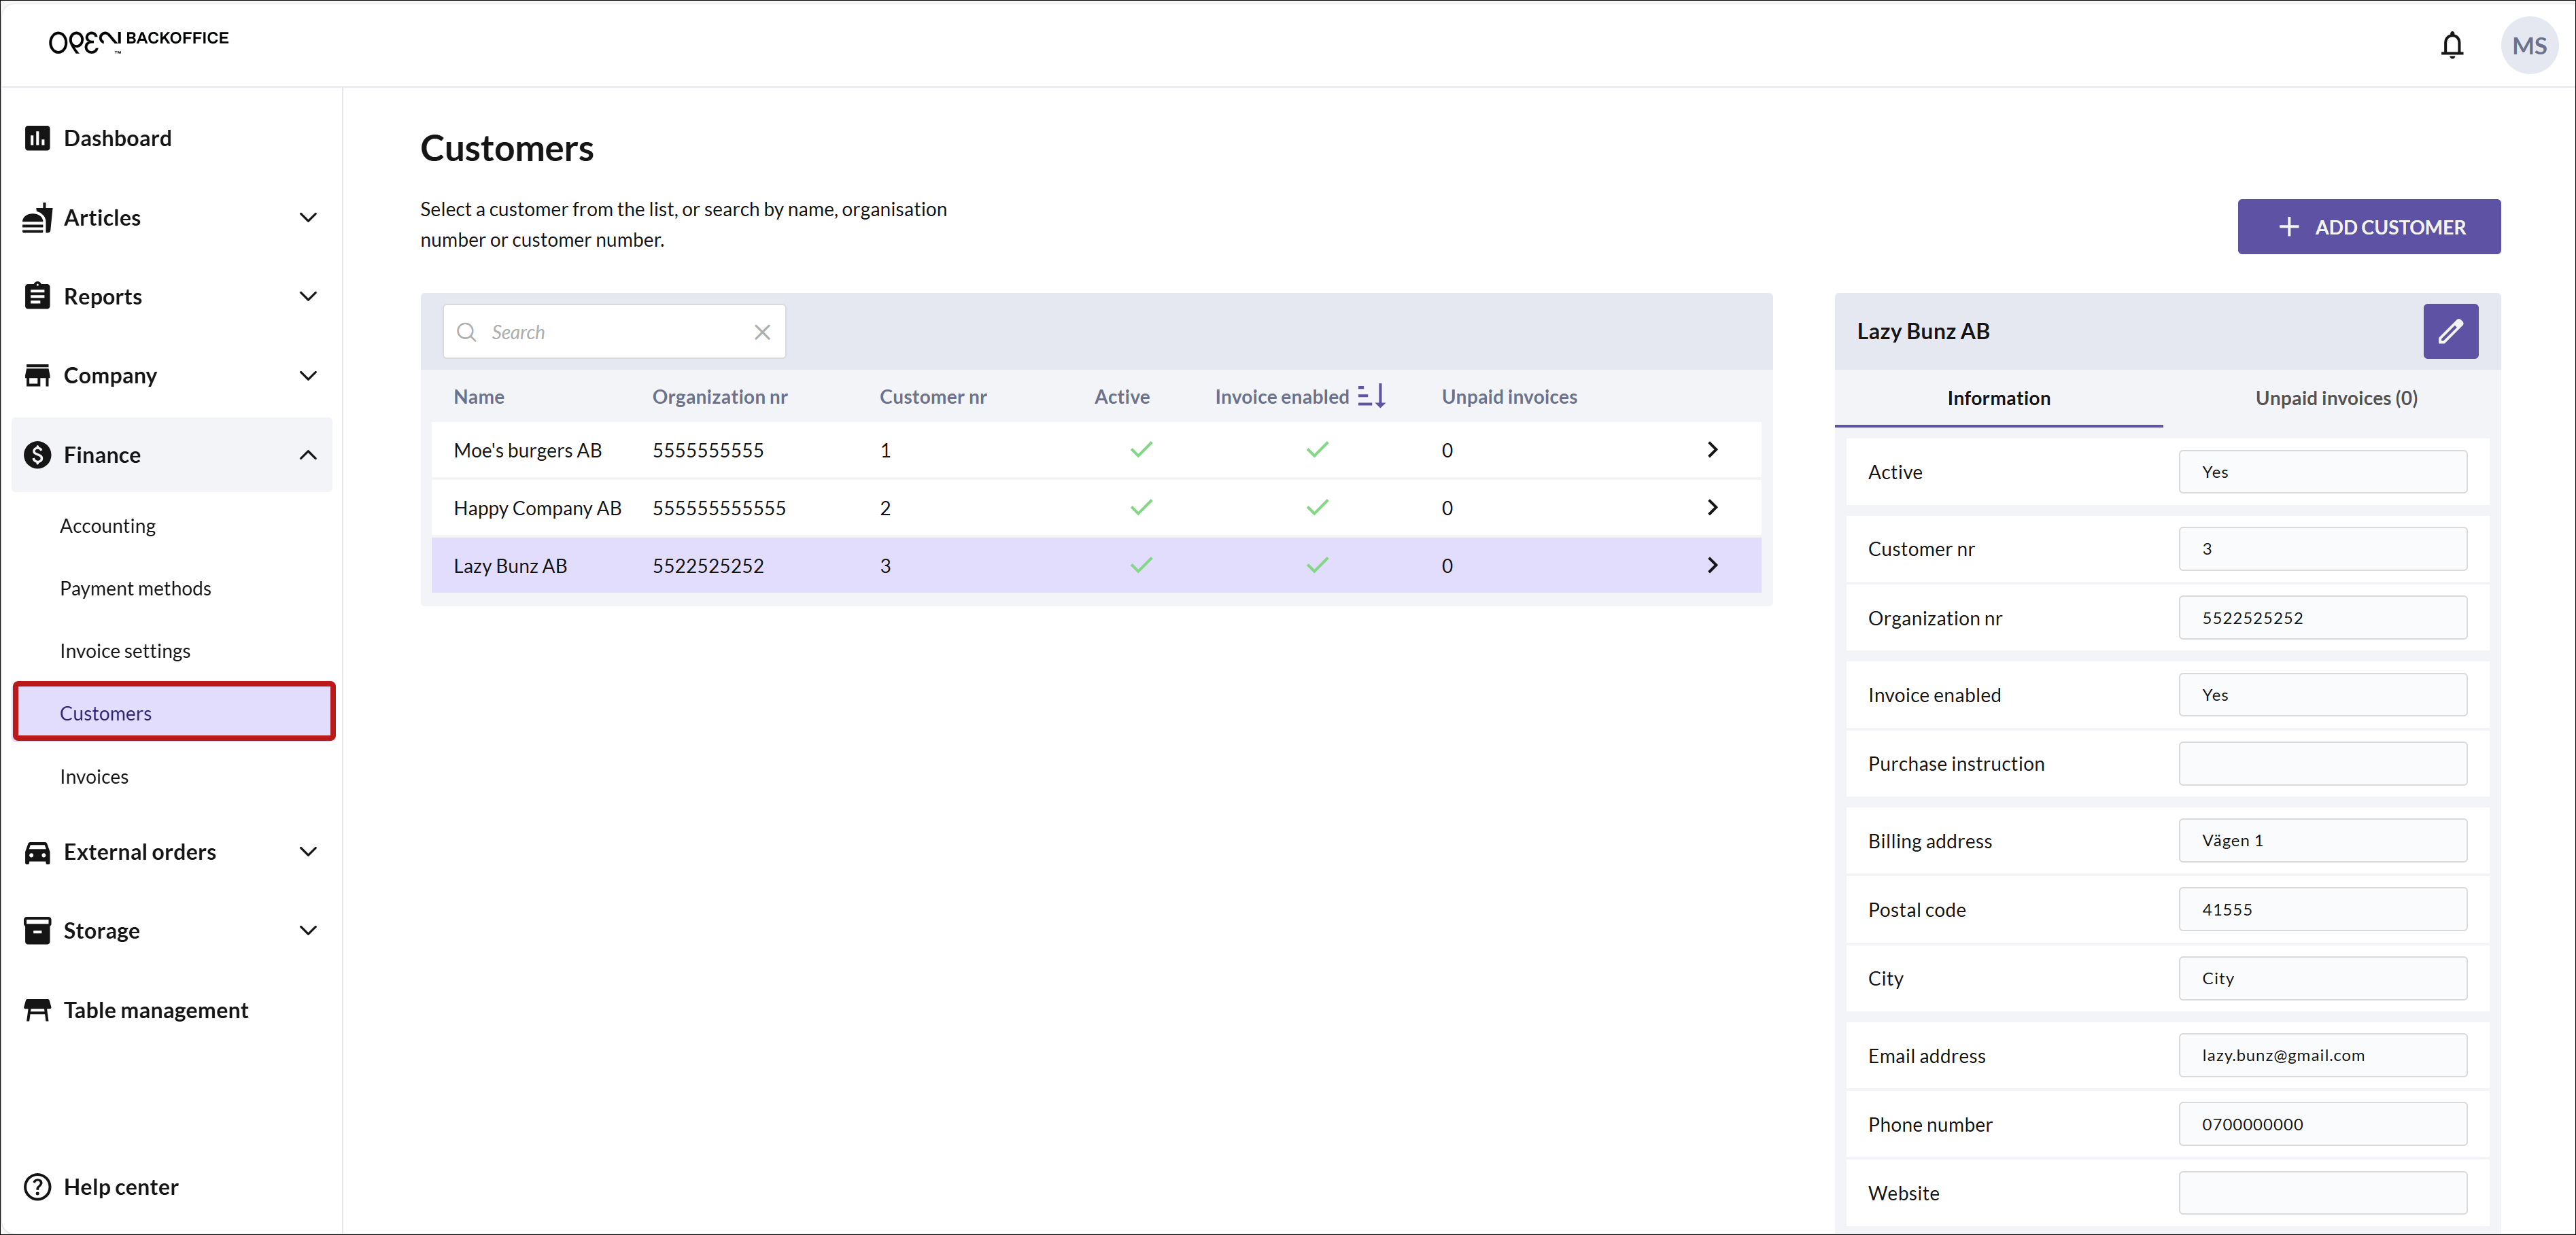
From the Customers page in BackOffice, you can manage and create new invoice customers.

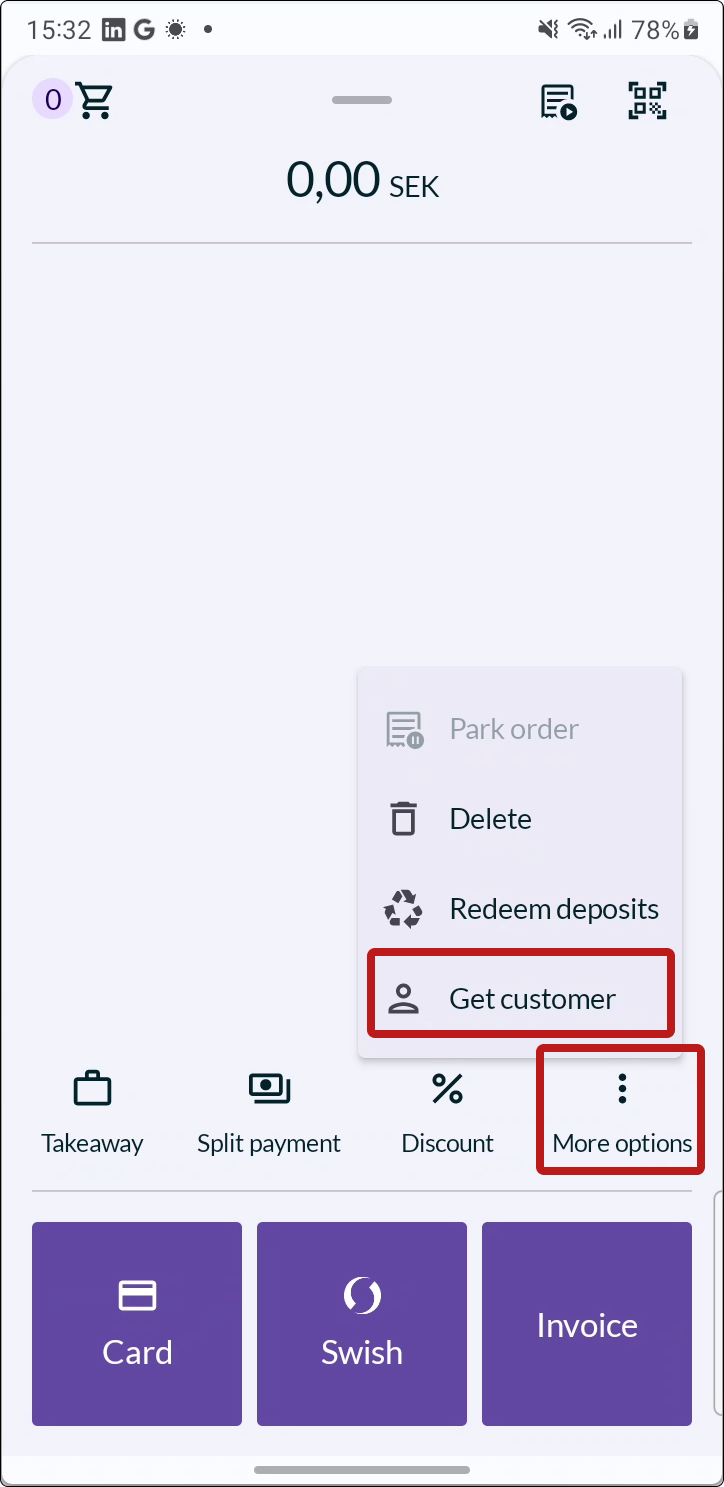
You can also manage and create new invoice customers directly from the register.
Create or edit a customer from BackOffice
In BackOffice, select FINANCE from the menu and go to the CUSTOMERS page.
To create a new customer, press the + ADD CUSTOMER button in the upper right corner.
If you want to edit an existing customer, select the customer from the list and press the PEN icon in the upper right corner.
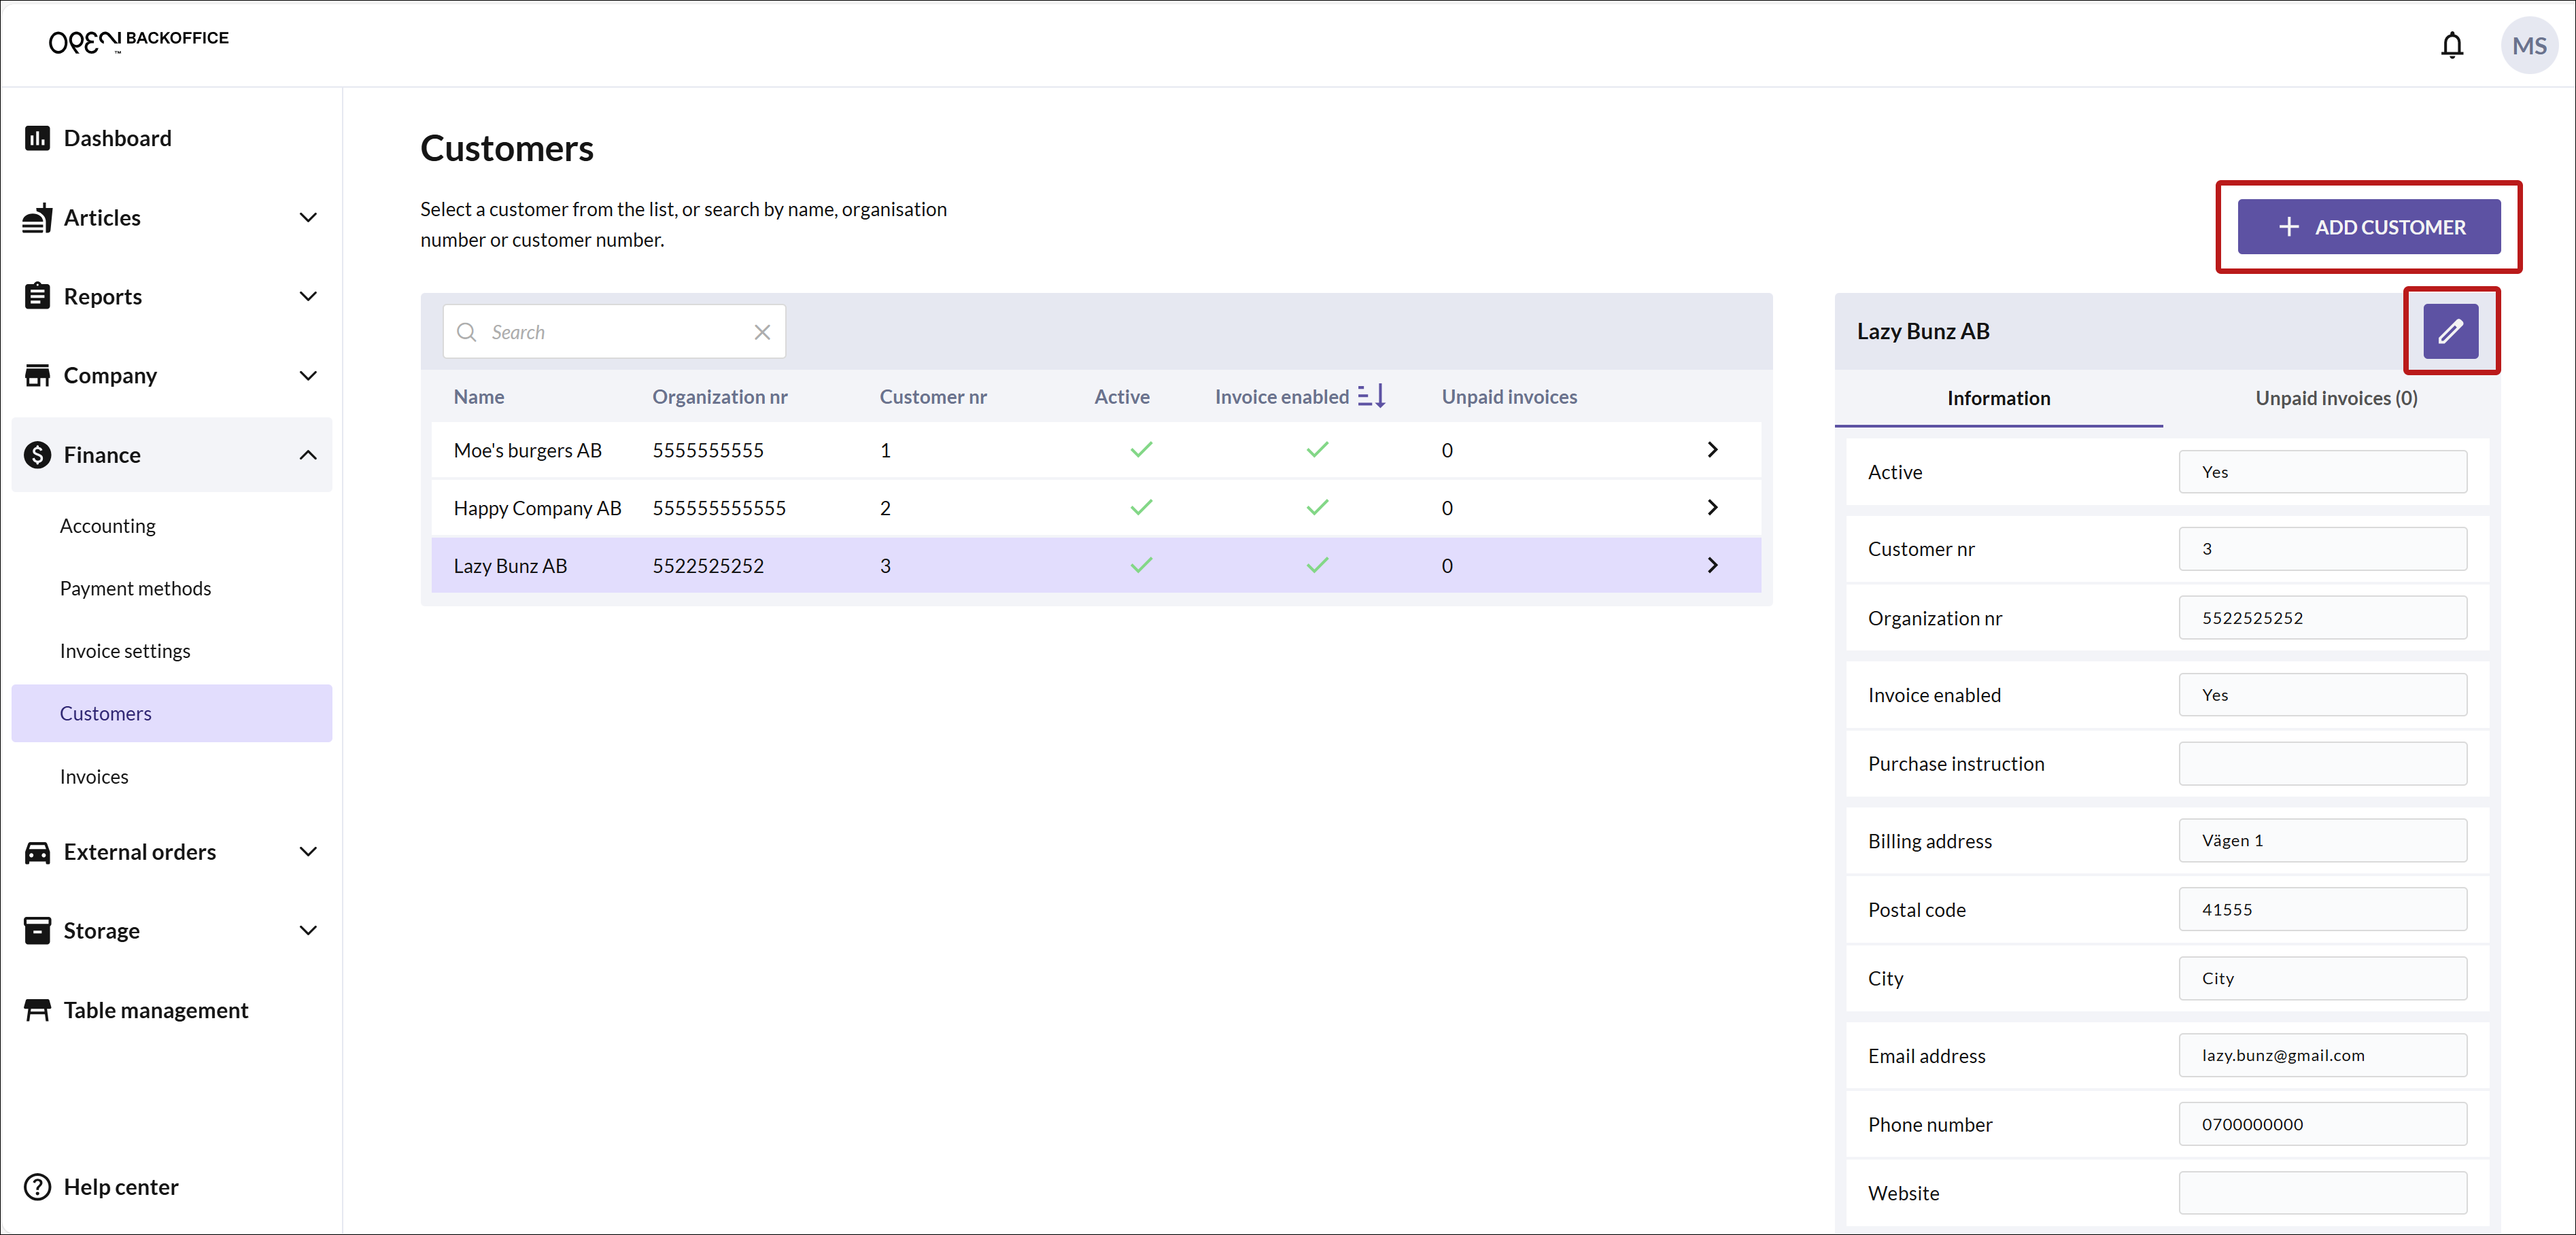
Fill in the customer information.
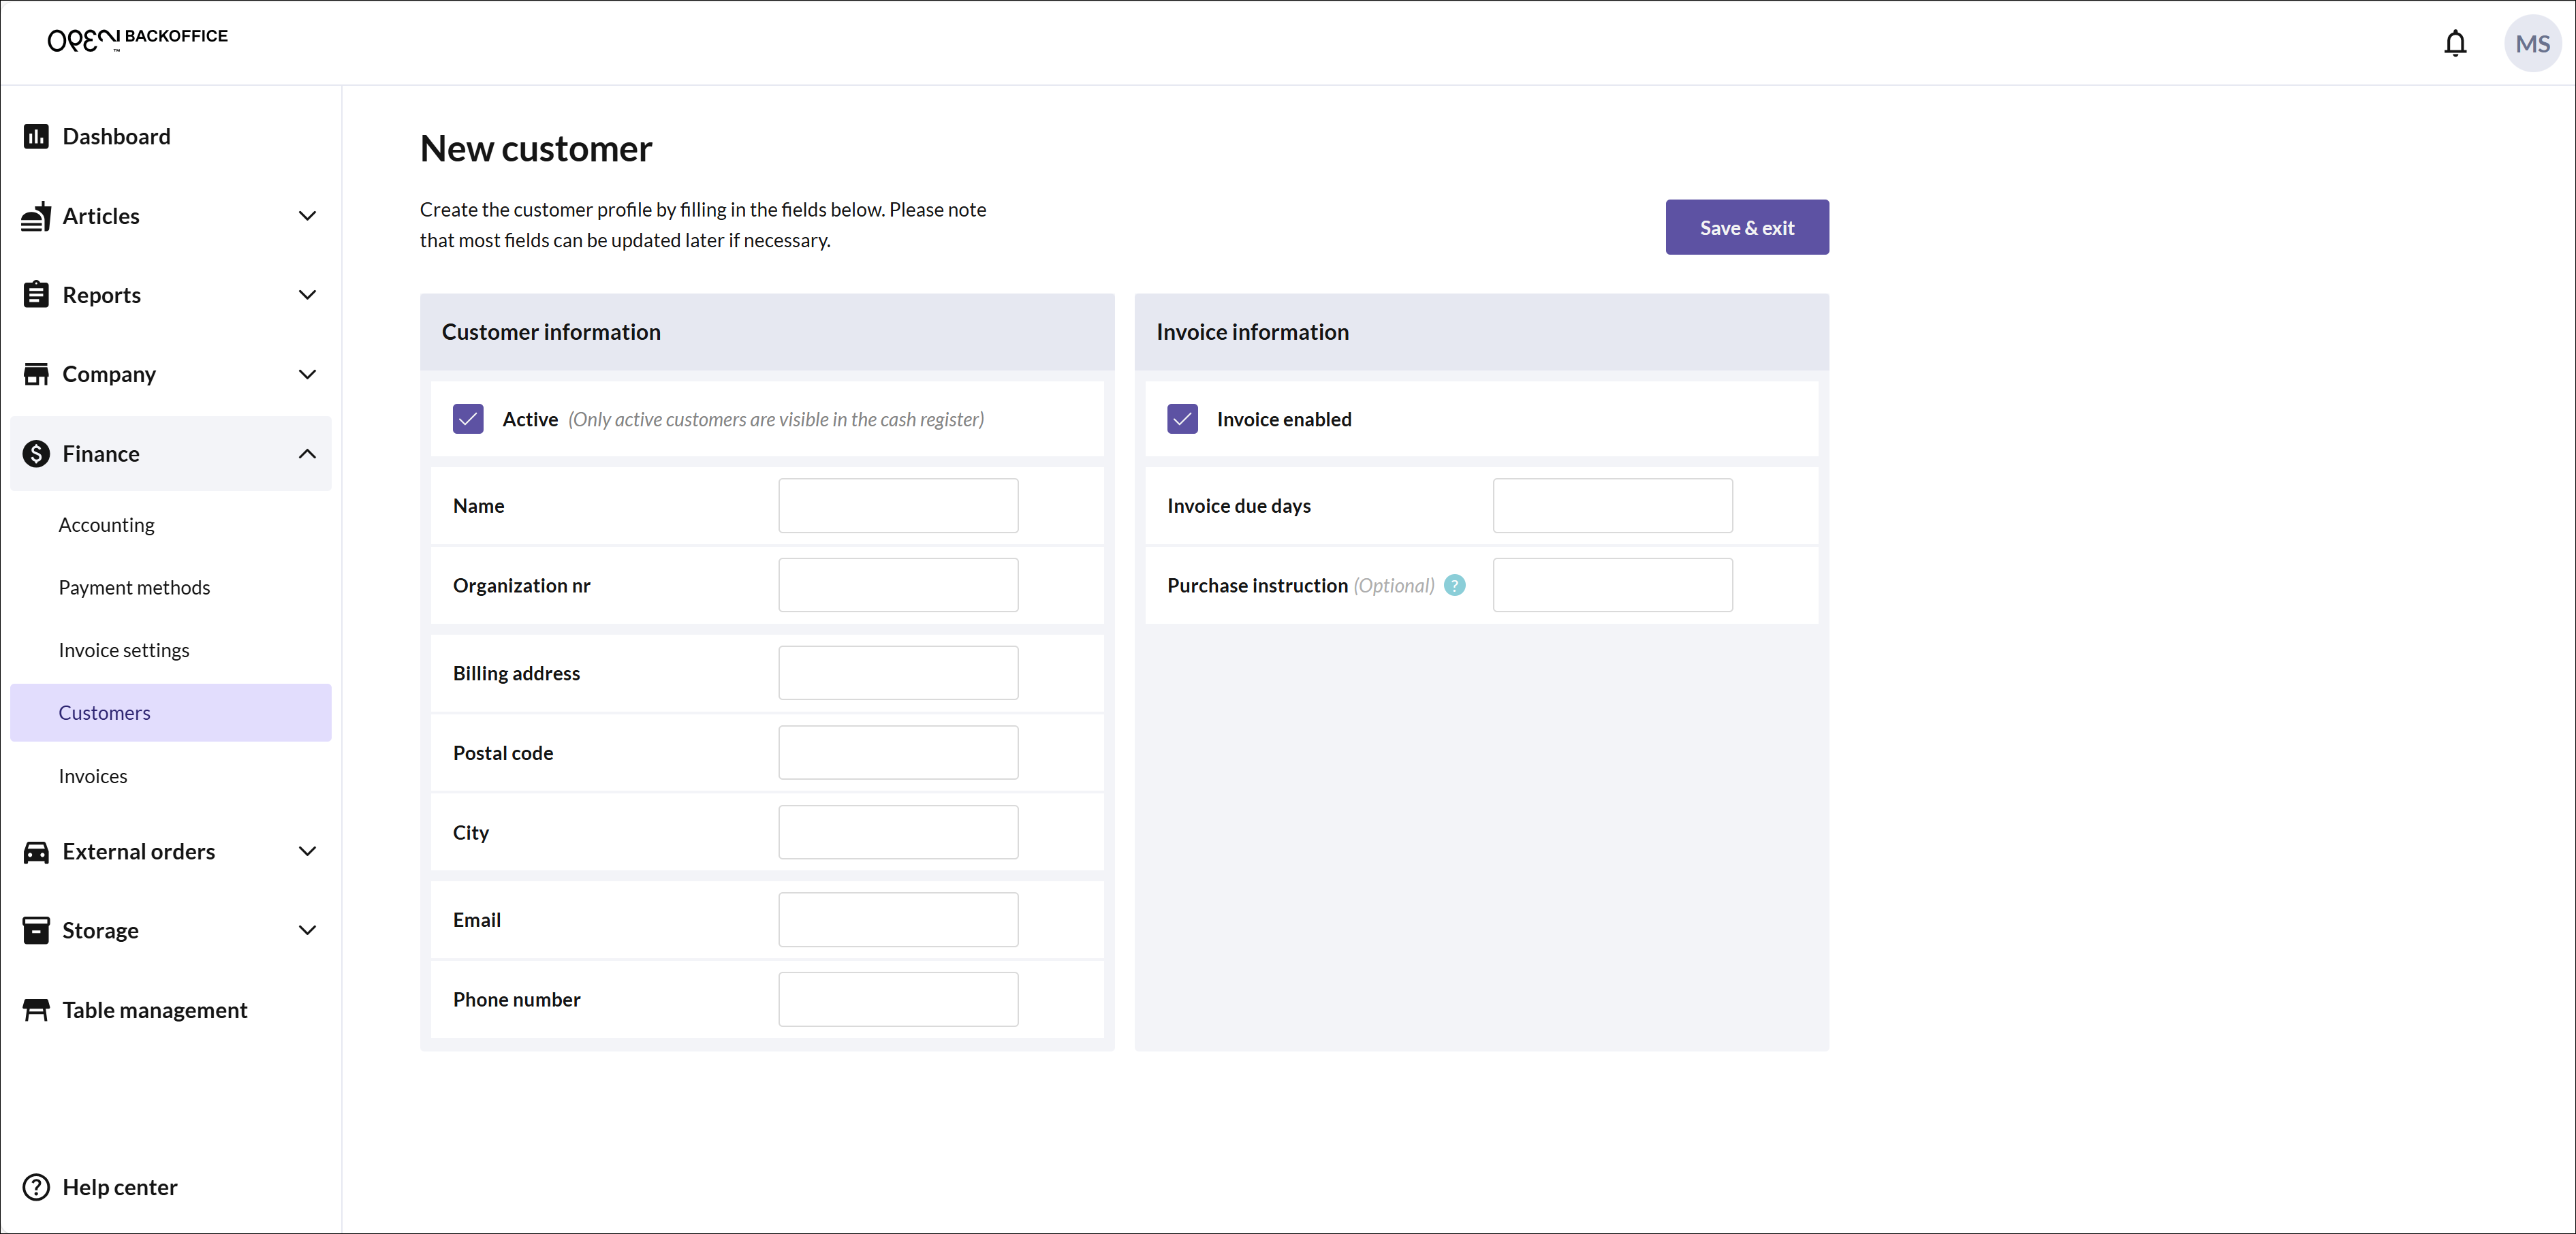
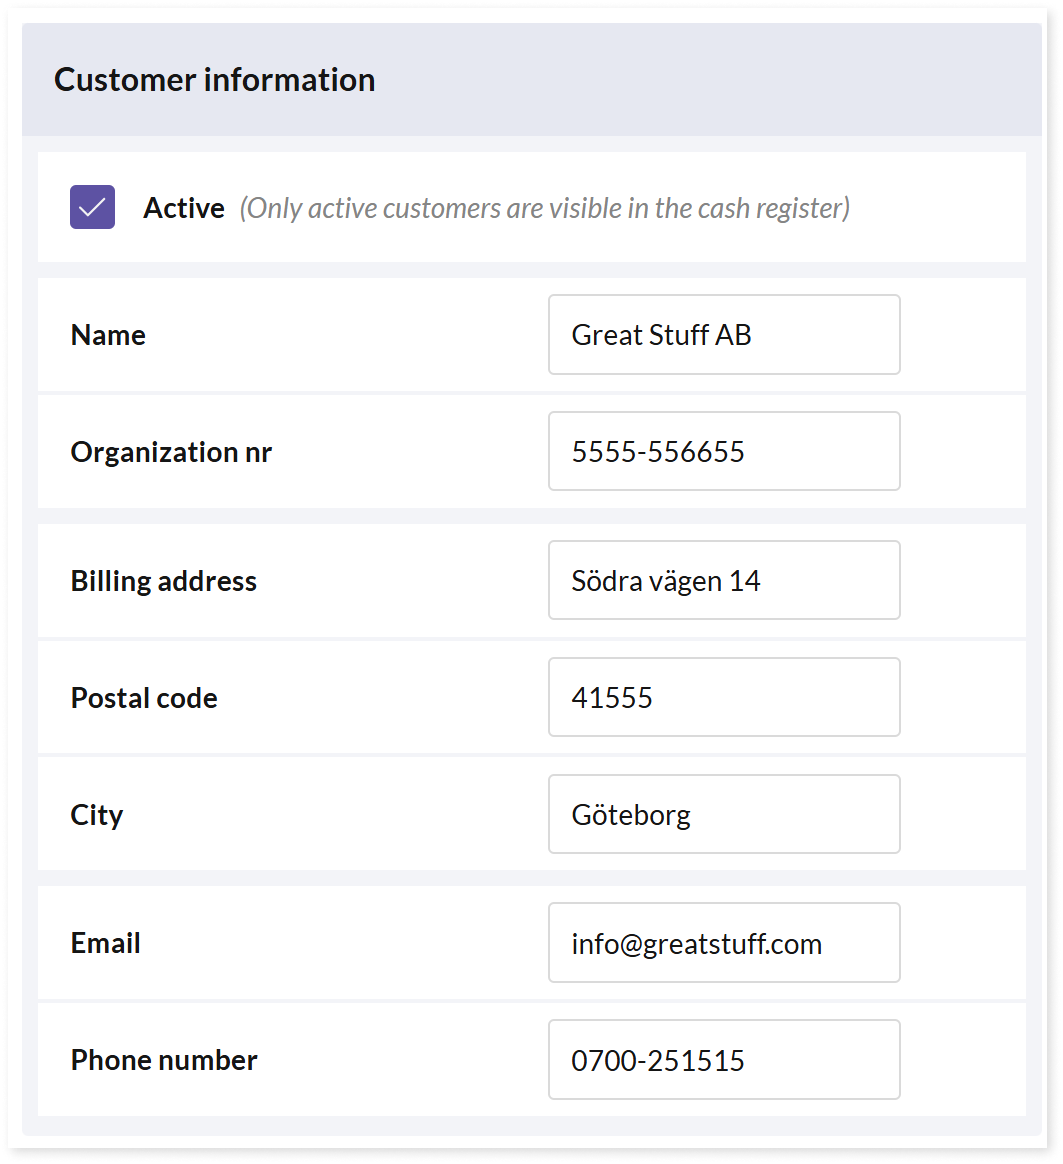
Customer information:
Choose whether the customer should be active. Only active customers are visible at the register.
Then fill in Name, Organization number, Billing address, as well as Email address and Phone number.
Note that a customer number is automatically created once you save a new customer.
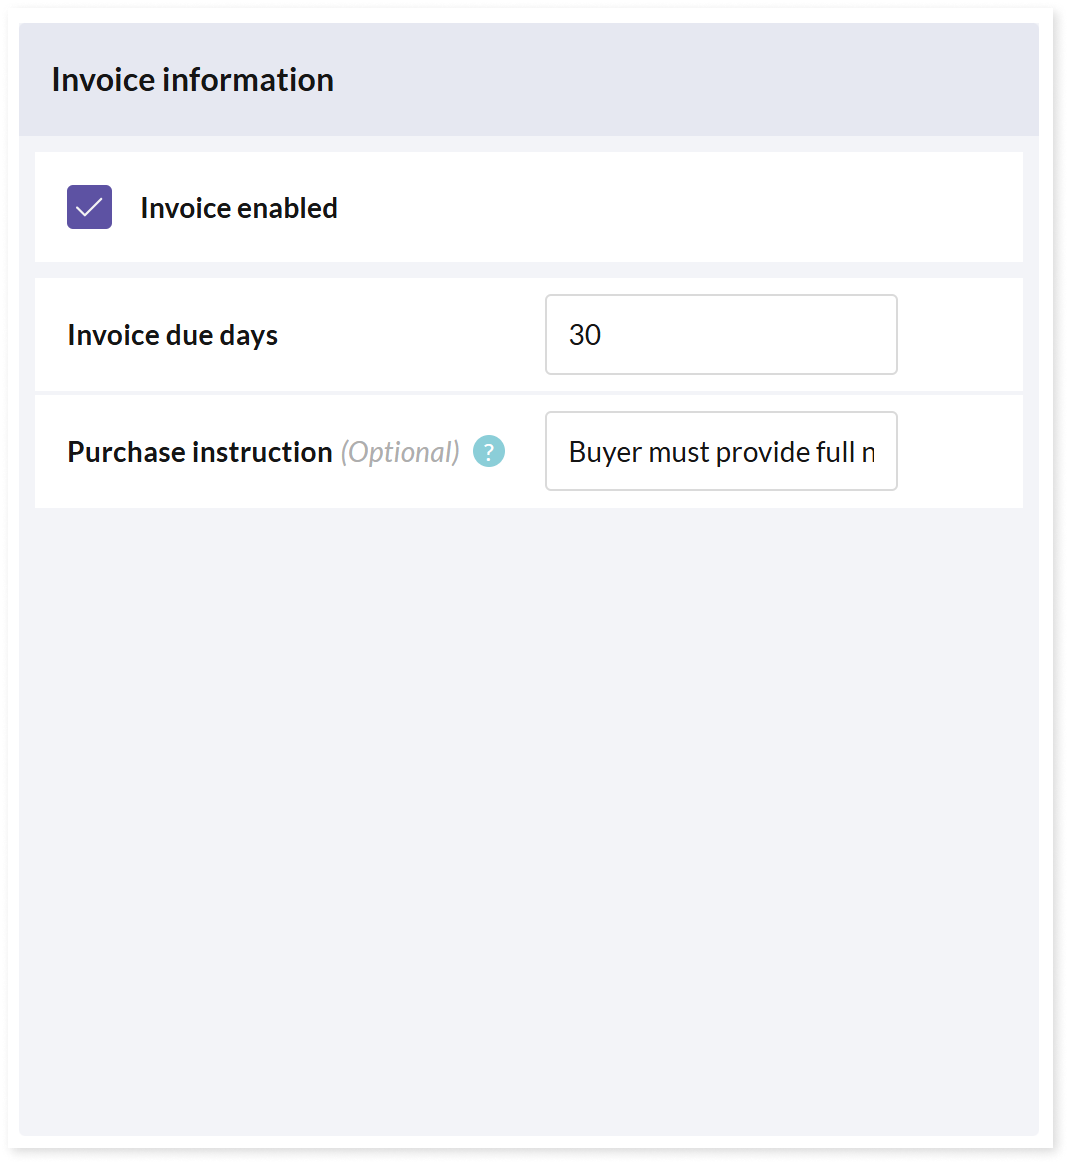
Invoice information:
Choose whether invoicing should be activated for the customer.
Then fill in the number of due days (i.e., how many days the customer has to pay an invoice) and any Purchase instruction.
Note that this instruction is for the cashier, such as a requirement that anyone purchasing via invoice must provide their full name or indicate which department they work in.
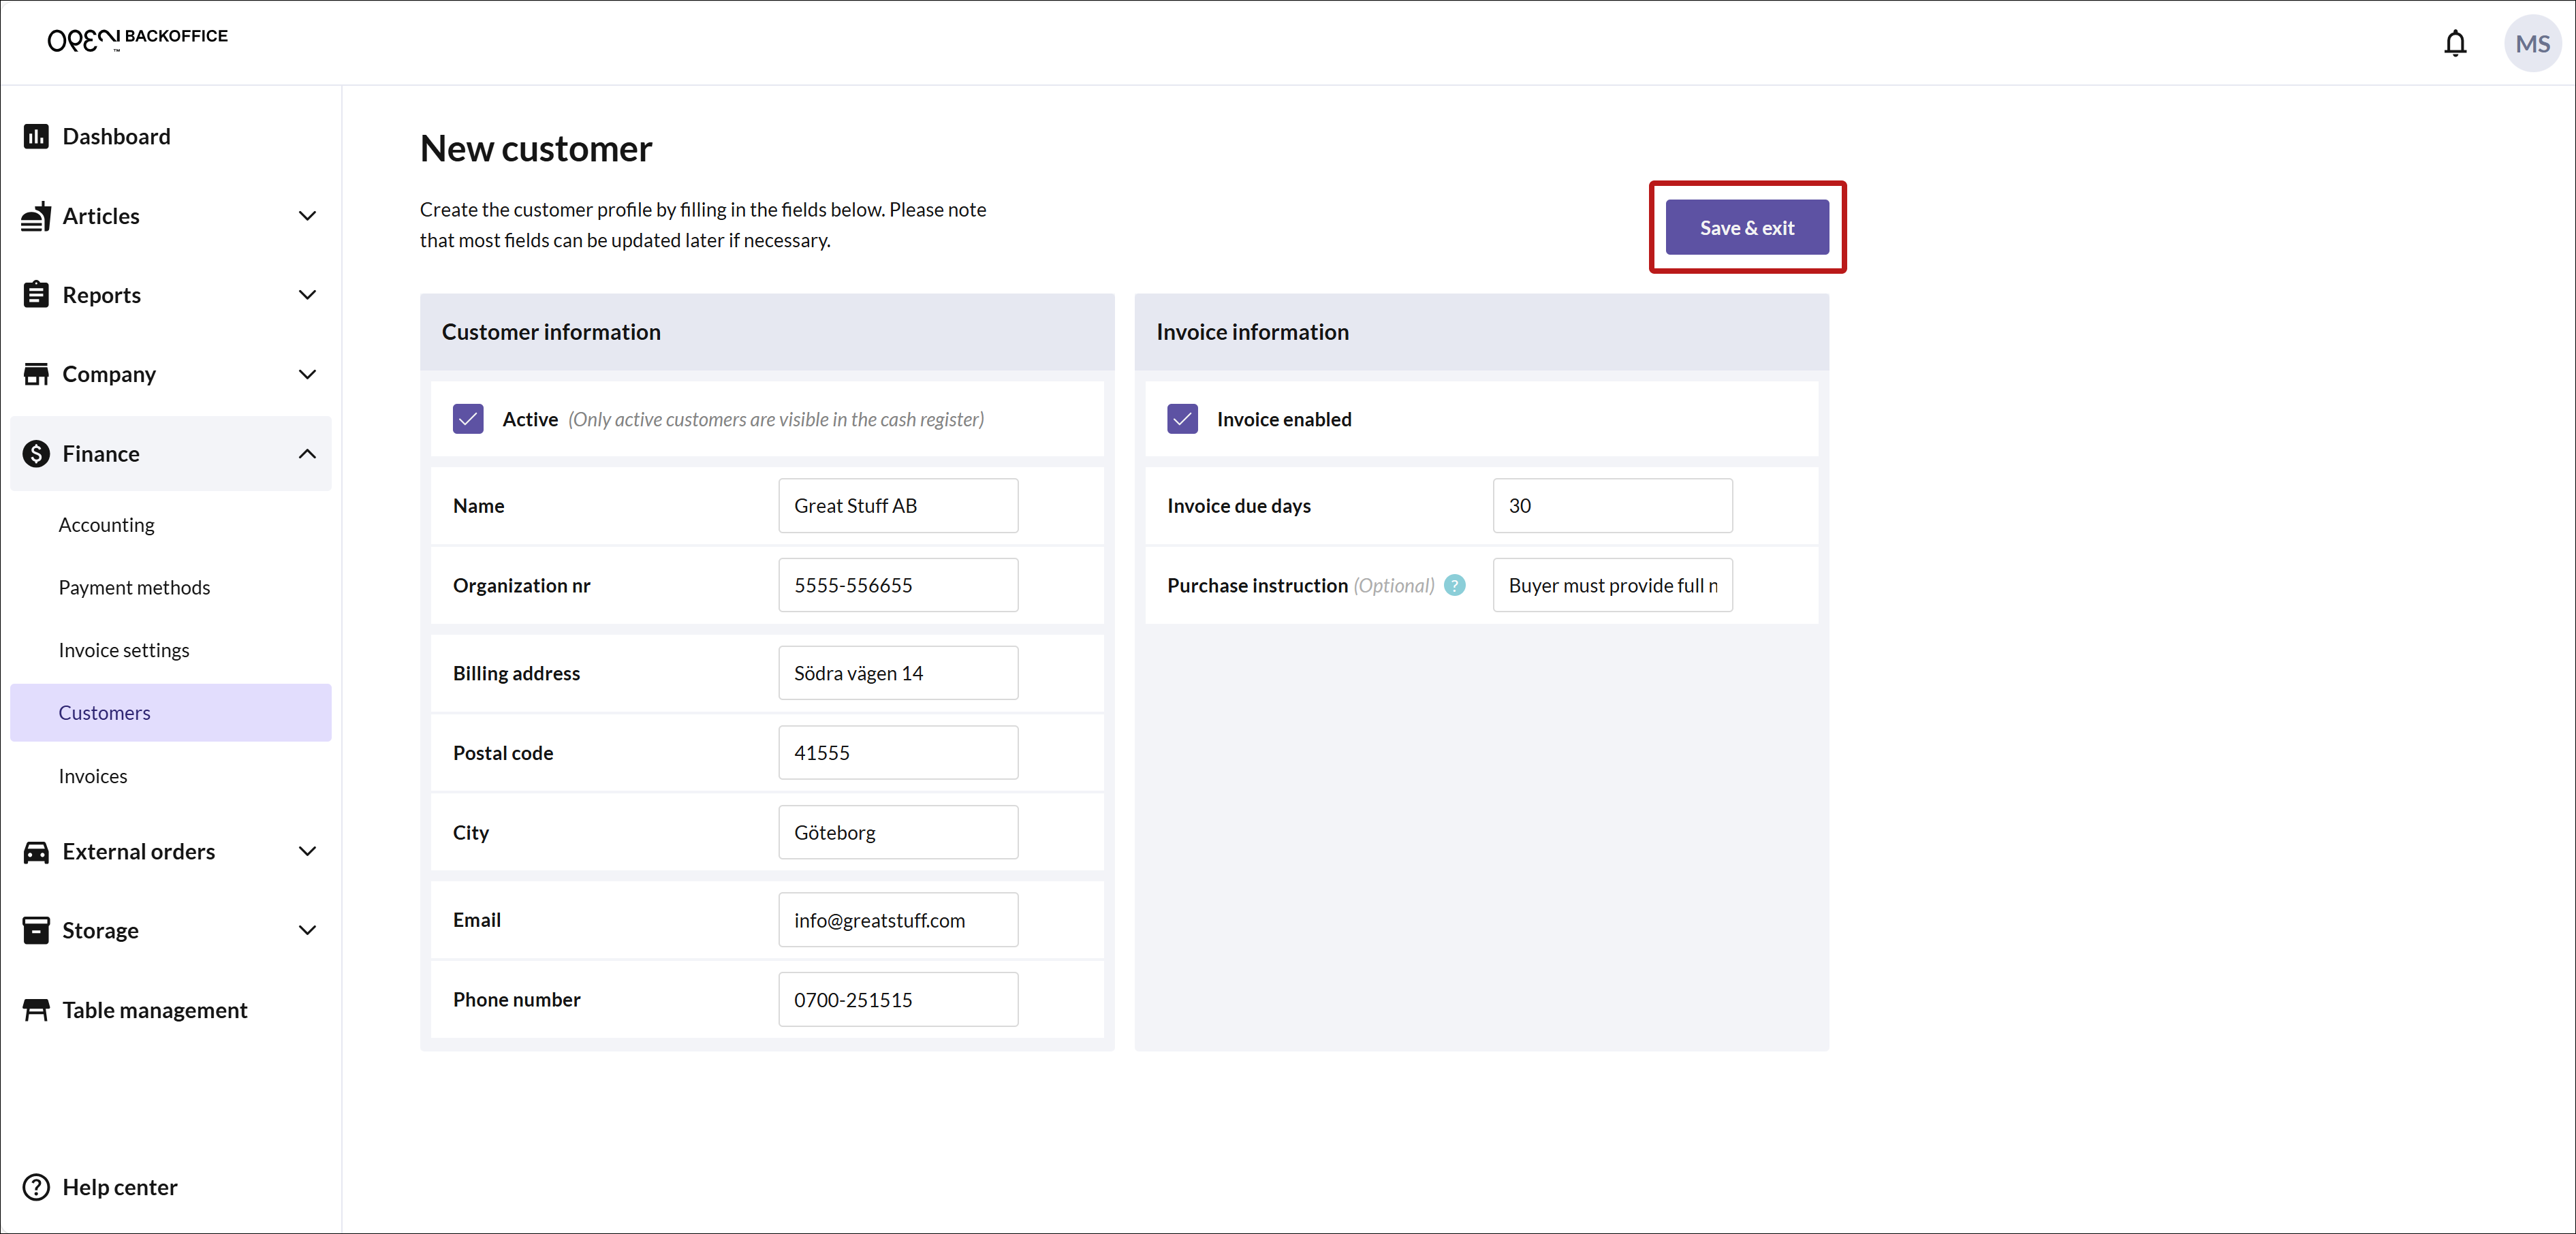
Save the changes when you are done by pressing SAVE & EXIT in the upper right corner.
Create or edit a customer from the cash register

- At the register, select MORE OPTIONS and press GET CUSTOMER.
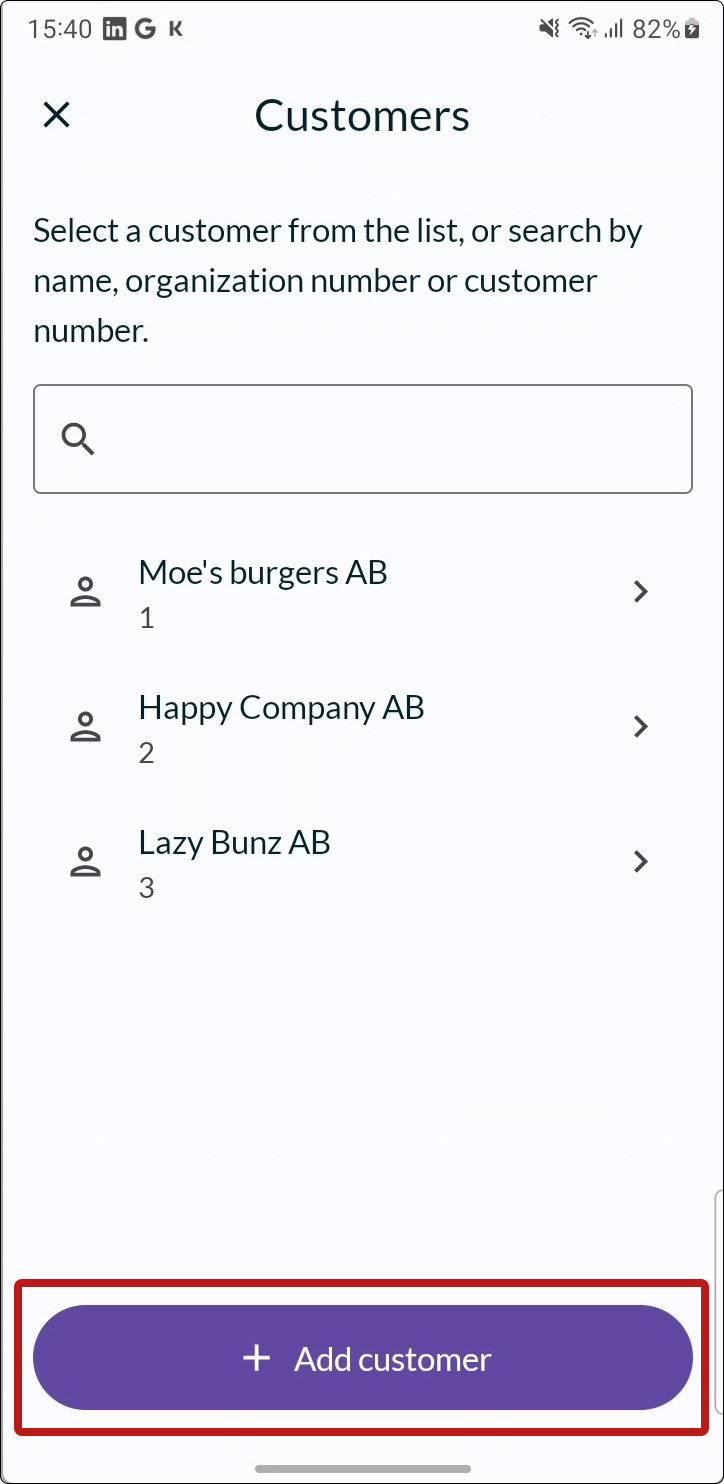
To create a new customer, press the + ADD CUSTOMER button.
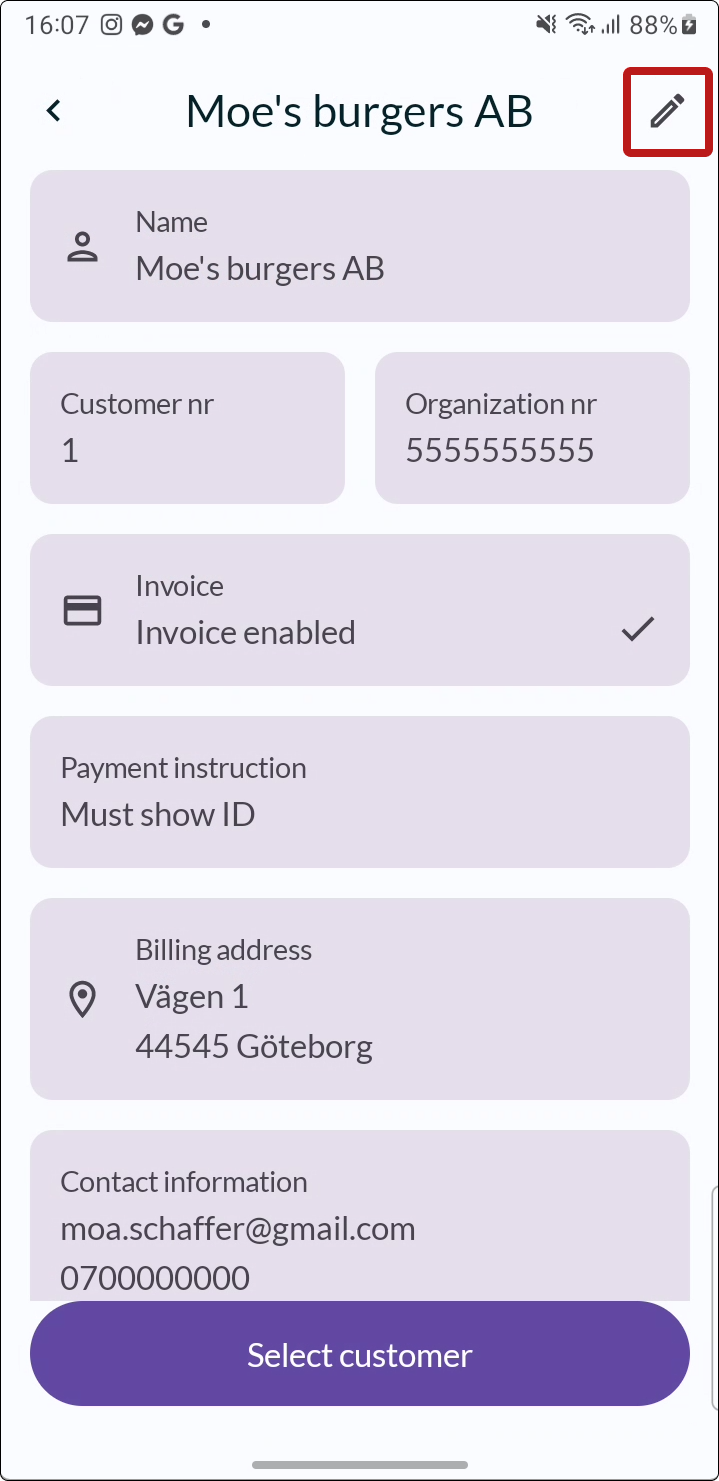
If you want to edit an existing customer, select the customer from the list and press the PEN icon in the upper right corner.
Fill in the customer information.
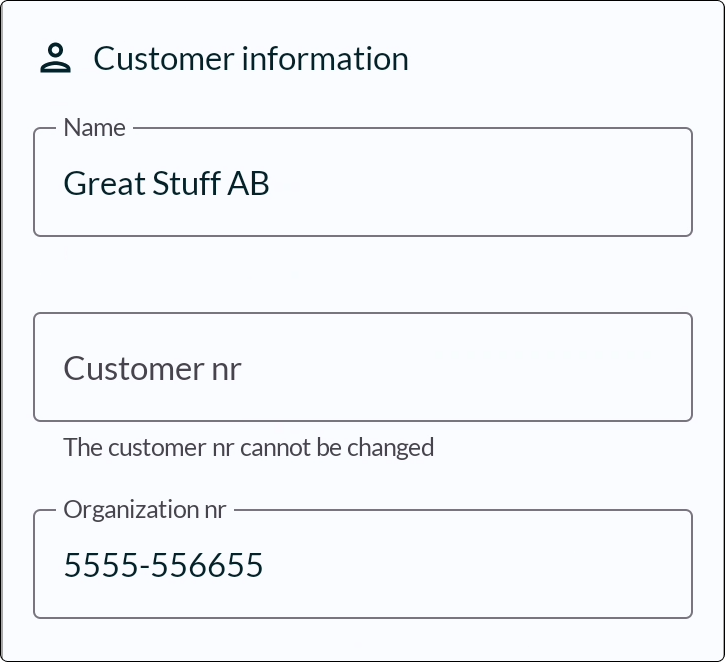
Customer information
Fill in Name and Organization Number.
Note that a customer number is automatically created once you save a new customer.
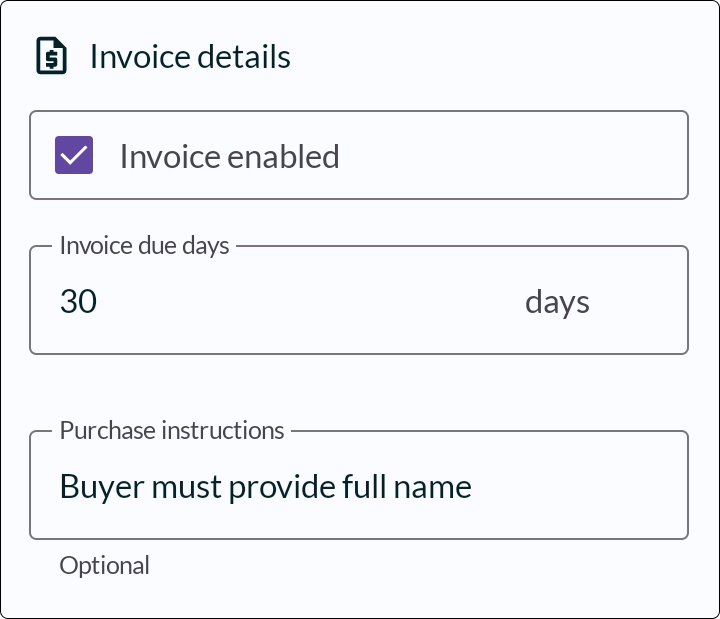
Invoice details
Choose whether invoicing should be activated for the customer.
Then fill in the number of due days (i.e., how many days the customer has to pay an invoice) and any payment instructions.
Note that this instruction is for the cashier, such as a requirement that anyone purchasing via invoice must provide their full name or indicate which department they work in.
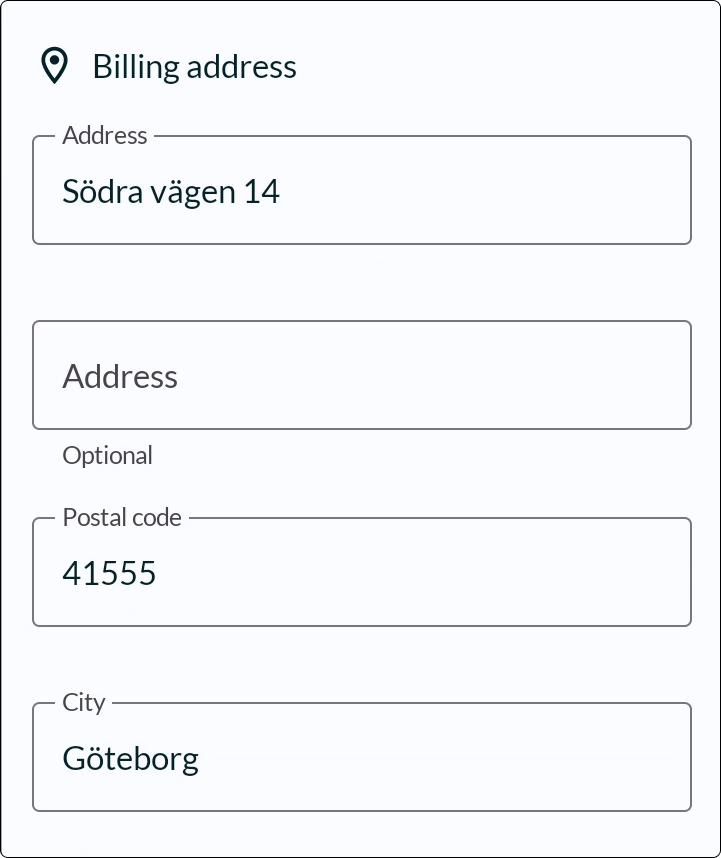
Billing address
Fill in the Billing address.
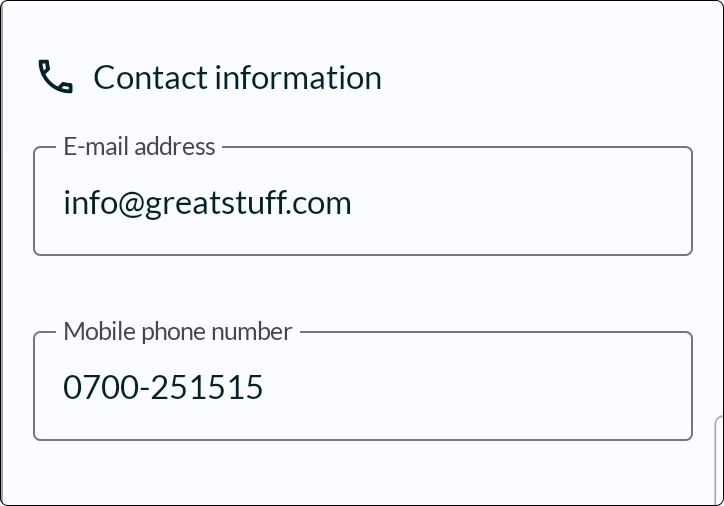
Contact information
Fill in Email address and Phone number.
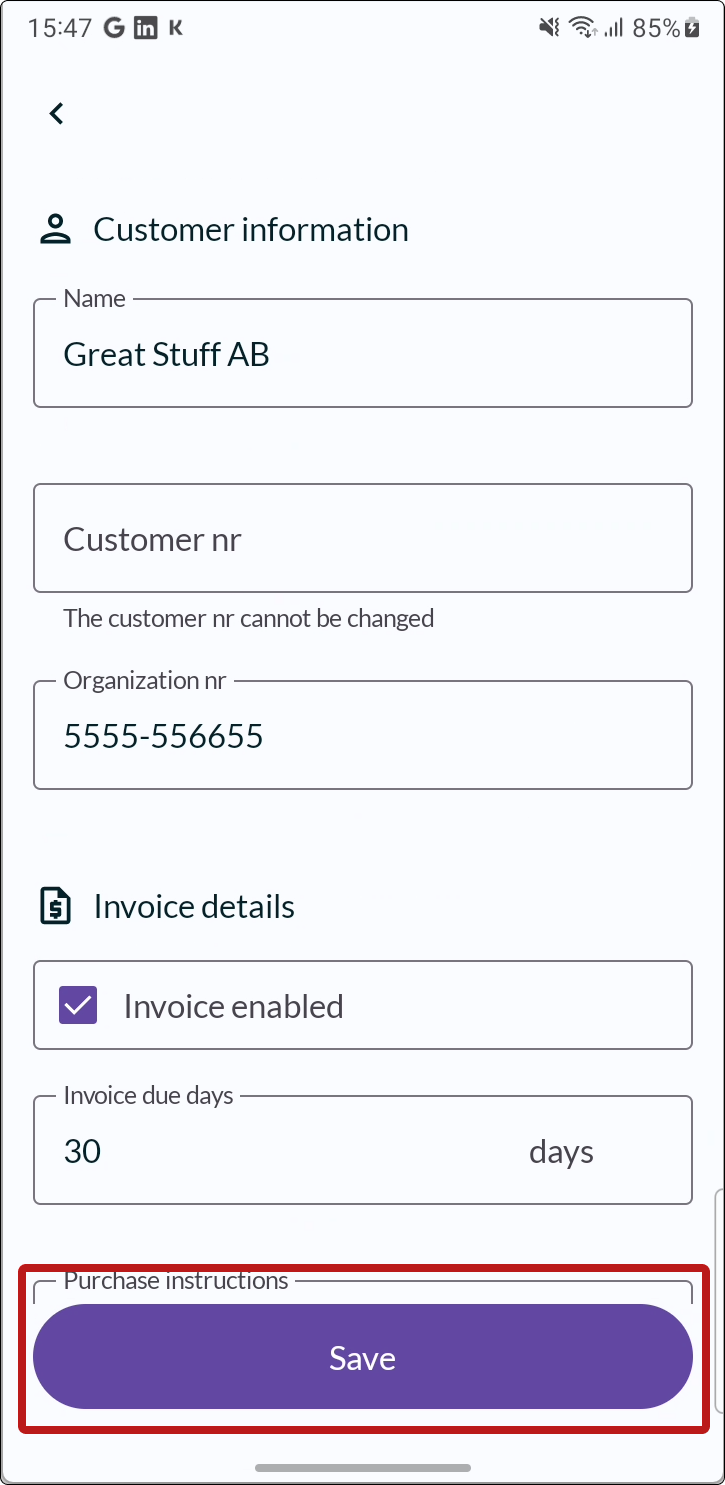
- Save the changes when you are done by pressing SAVE.
How to charge via invoice
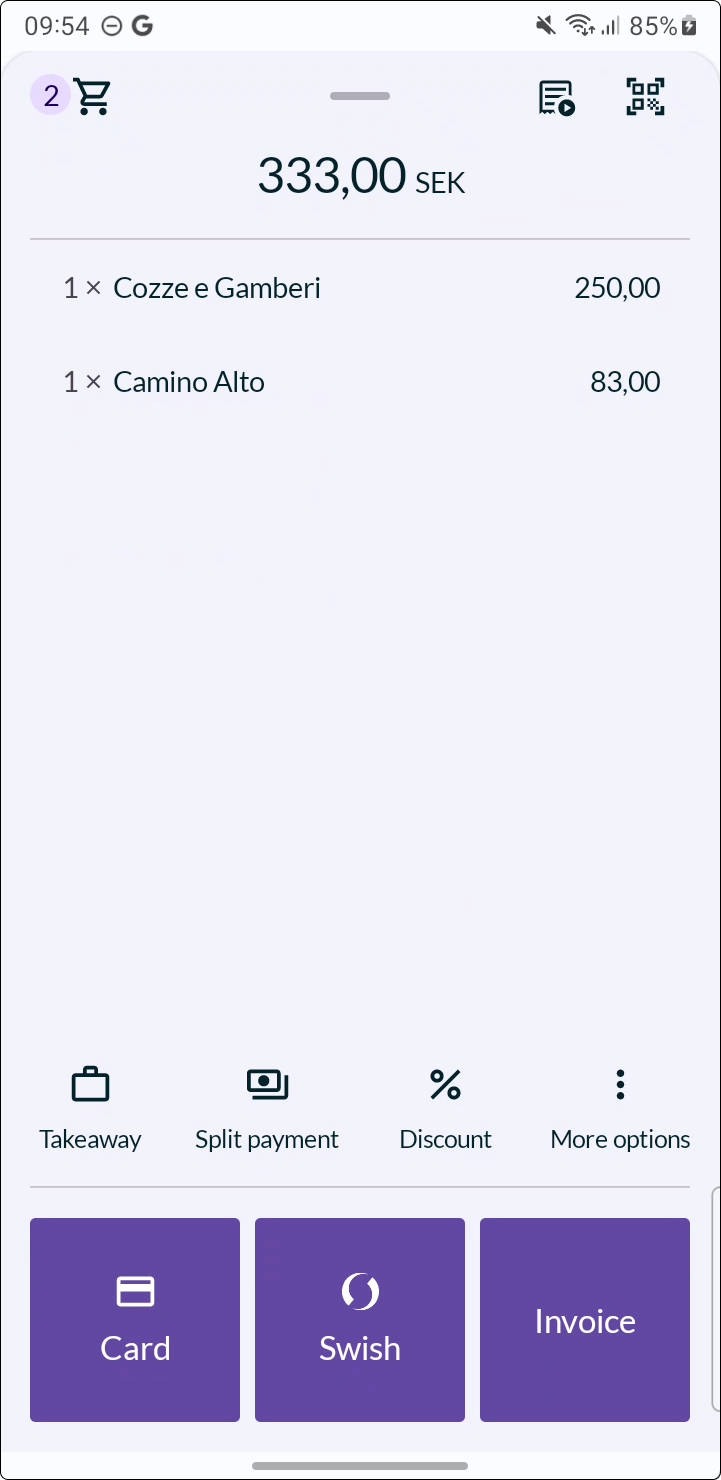
Ring up the articles as usual in the cash register.
Select the payment method "invoice".
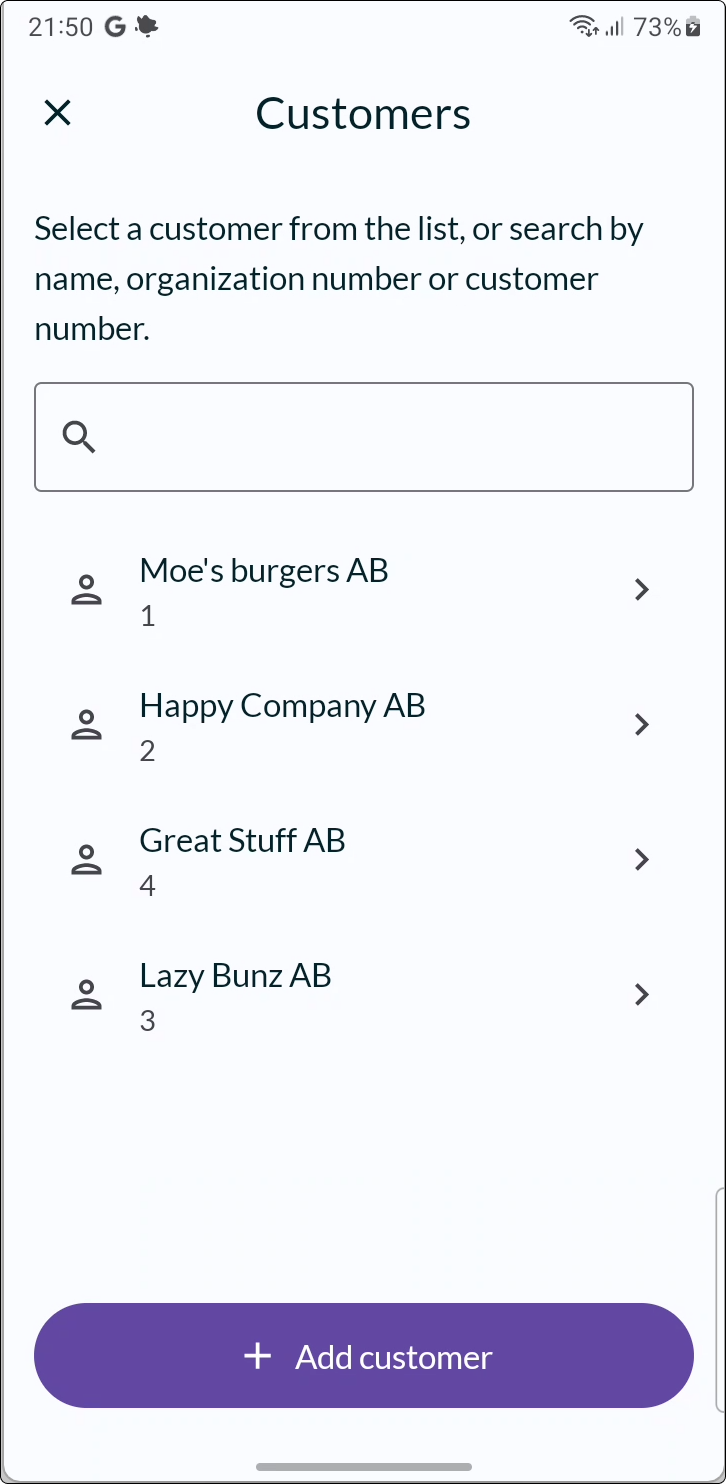
- Look up the customer. You can either find the customer in the list or search by name, organization number, or customer number.
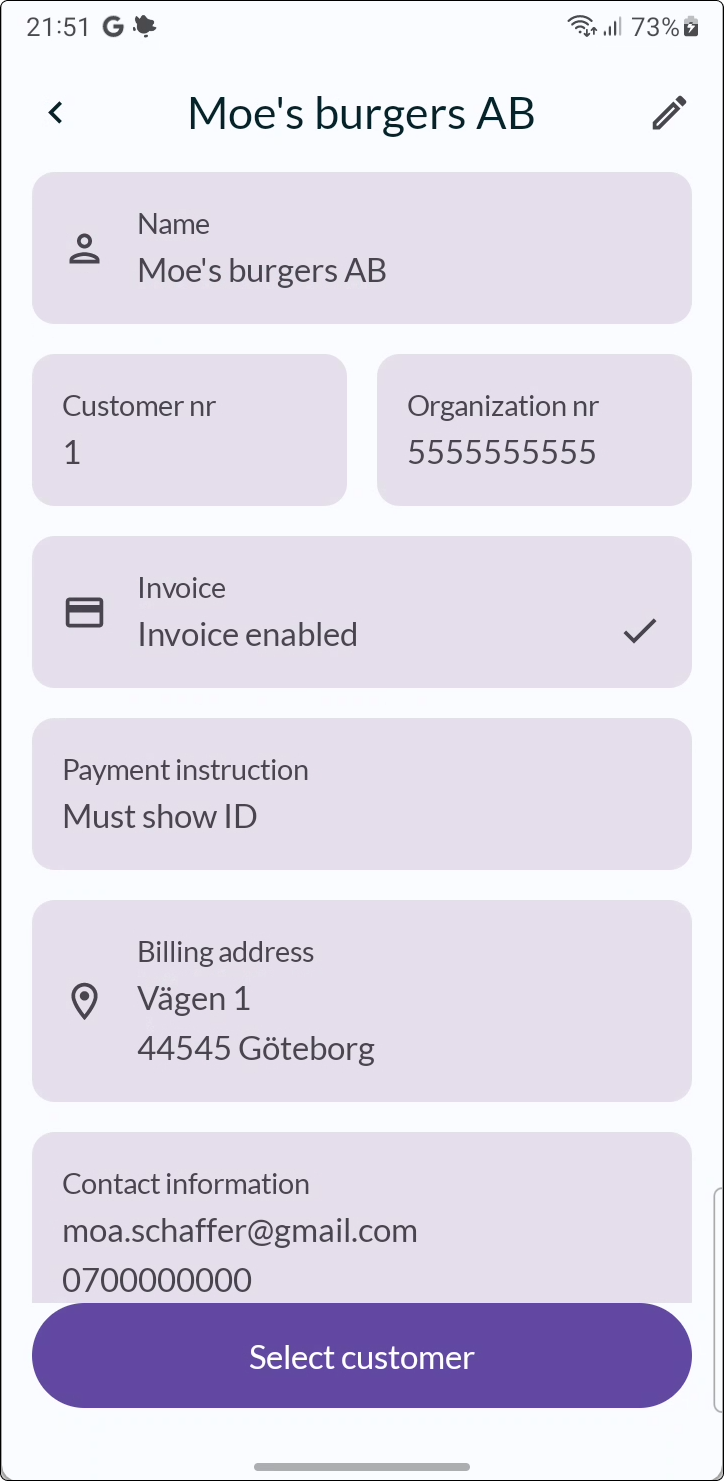
- Select the customer.
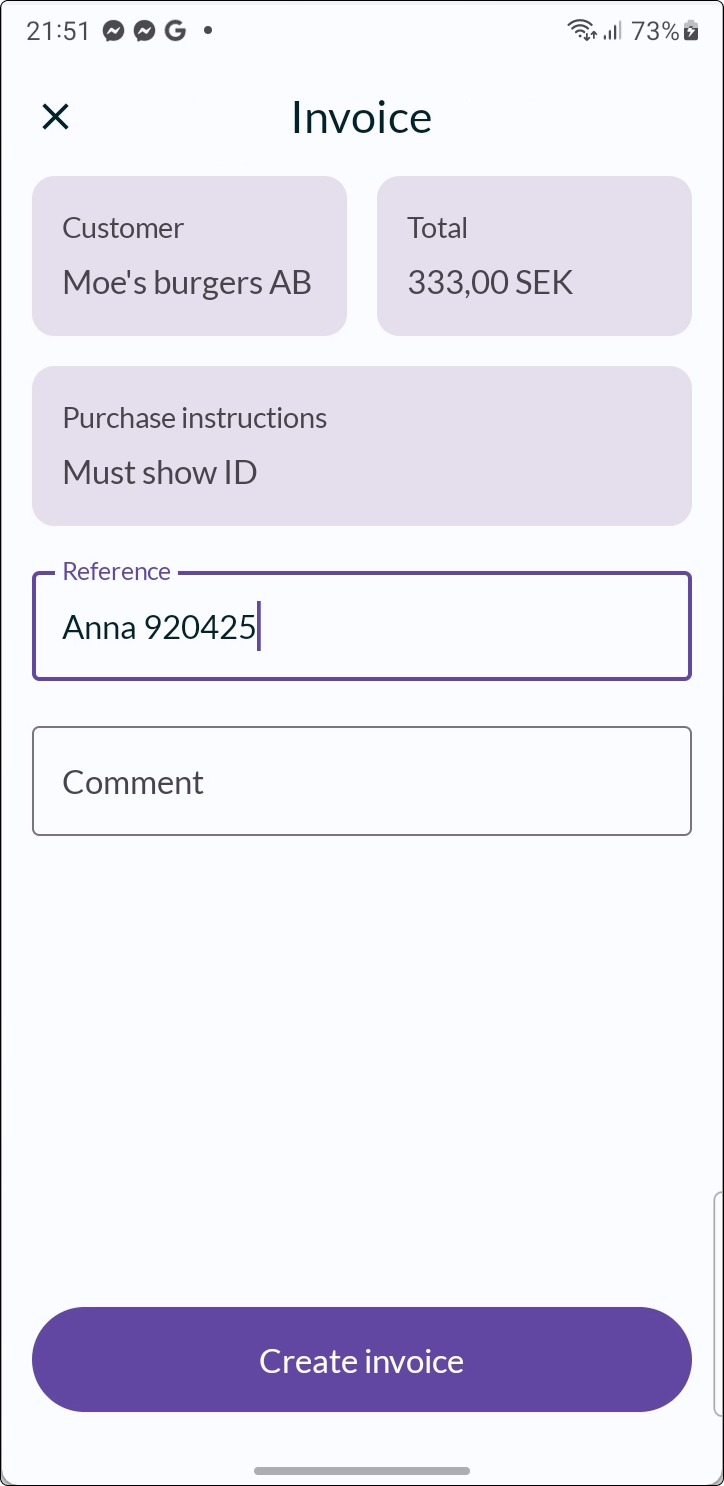
- Add any reference and comment, then create the invoice.
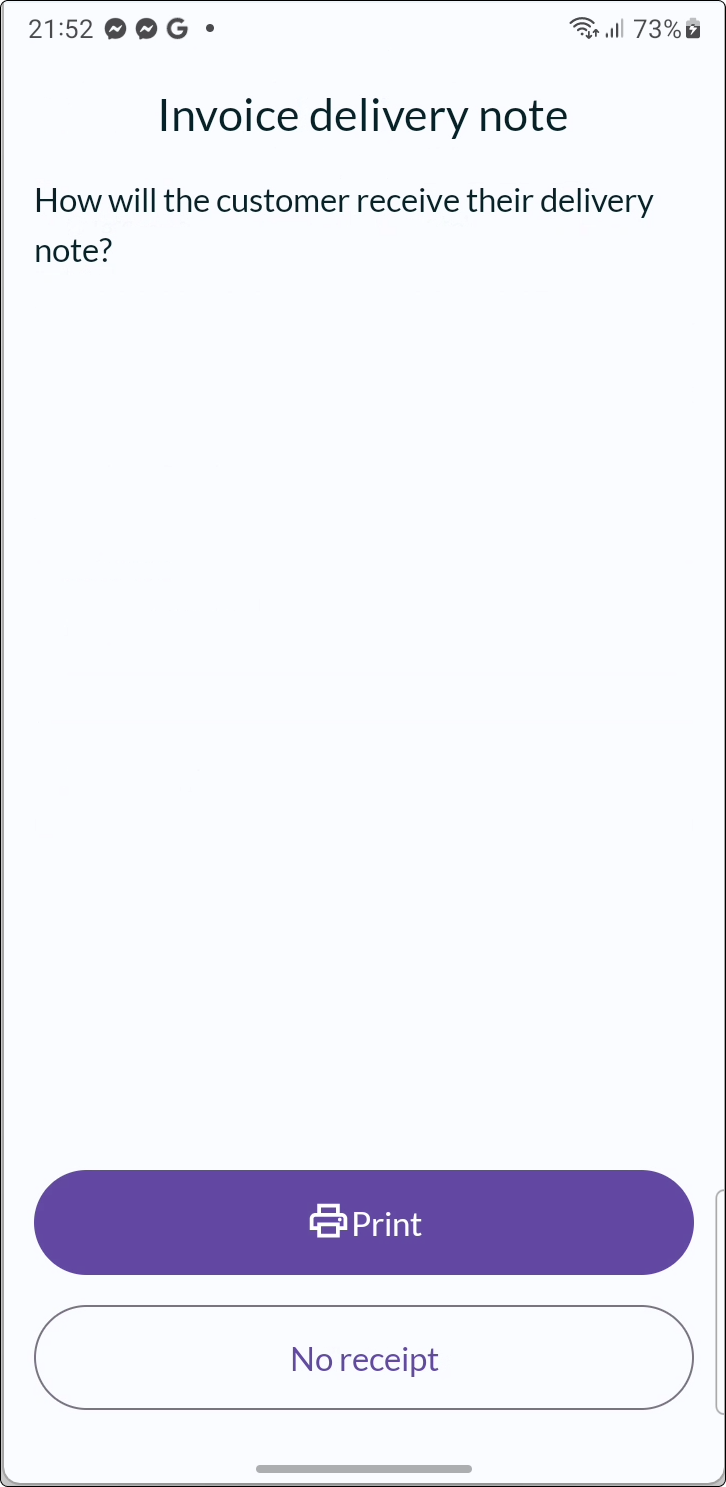
- As a last step, you have an opportunity to print a delivery note (optional).
- All further invoice management is handled in BackOffice.
How to manage invoices
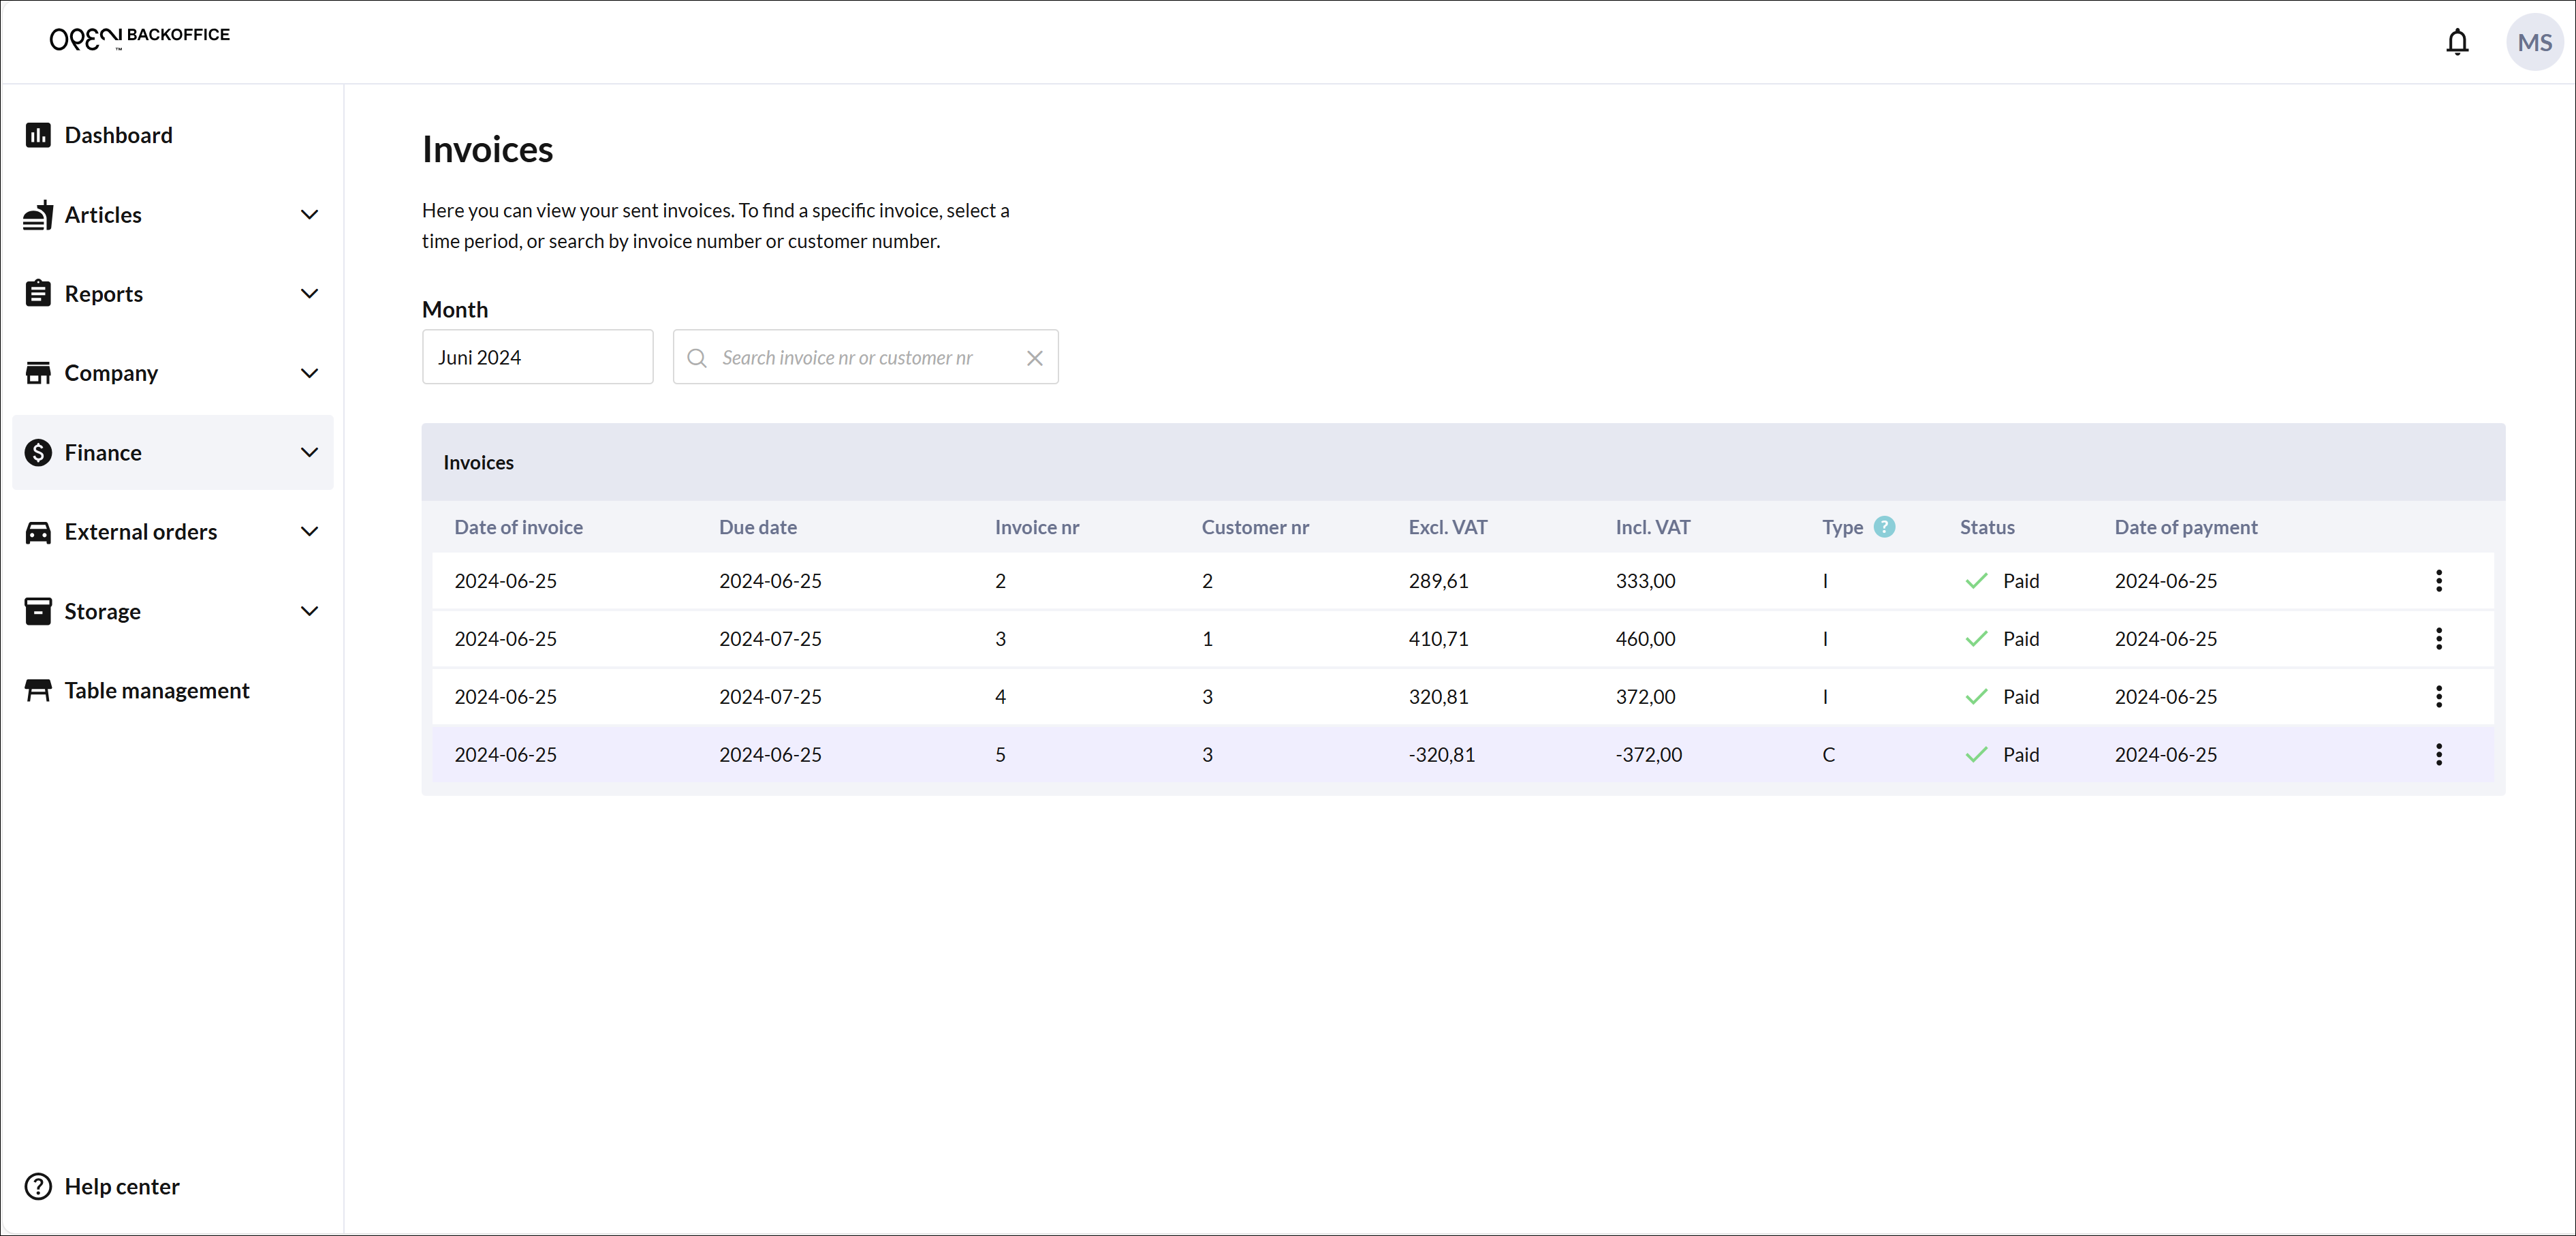
From the Invoices page in BackOffice, you can view and manage all your invoices. To send an invoice to a customer, export the invoice as a PDF and send it to the customer using any program (such as via email).
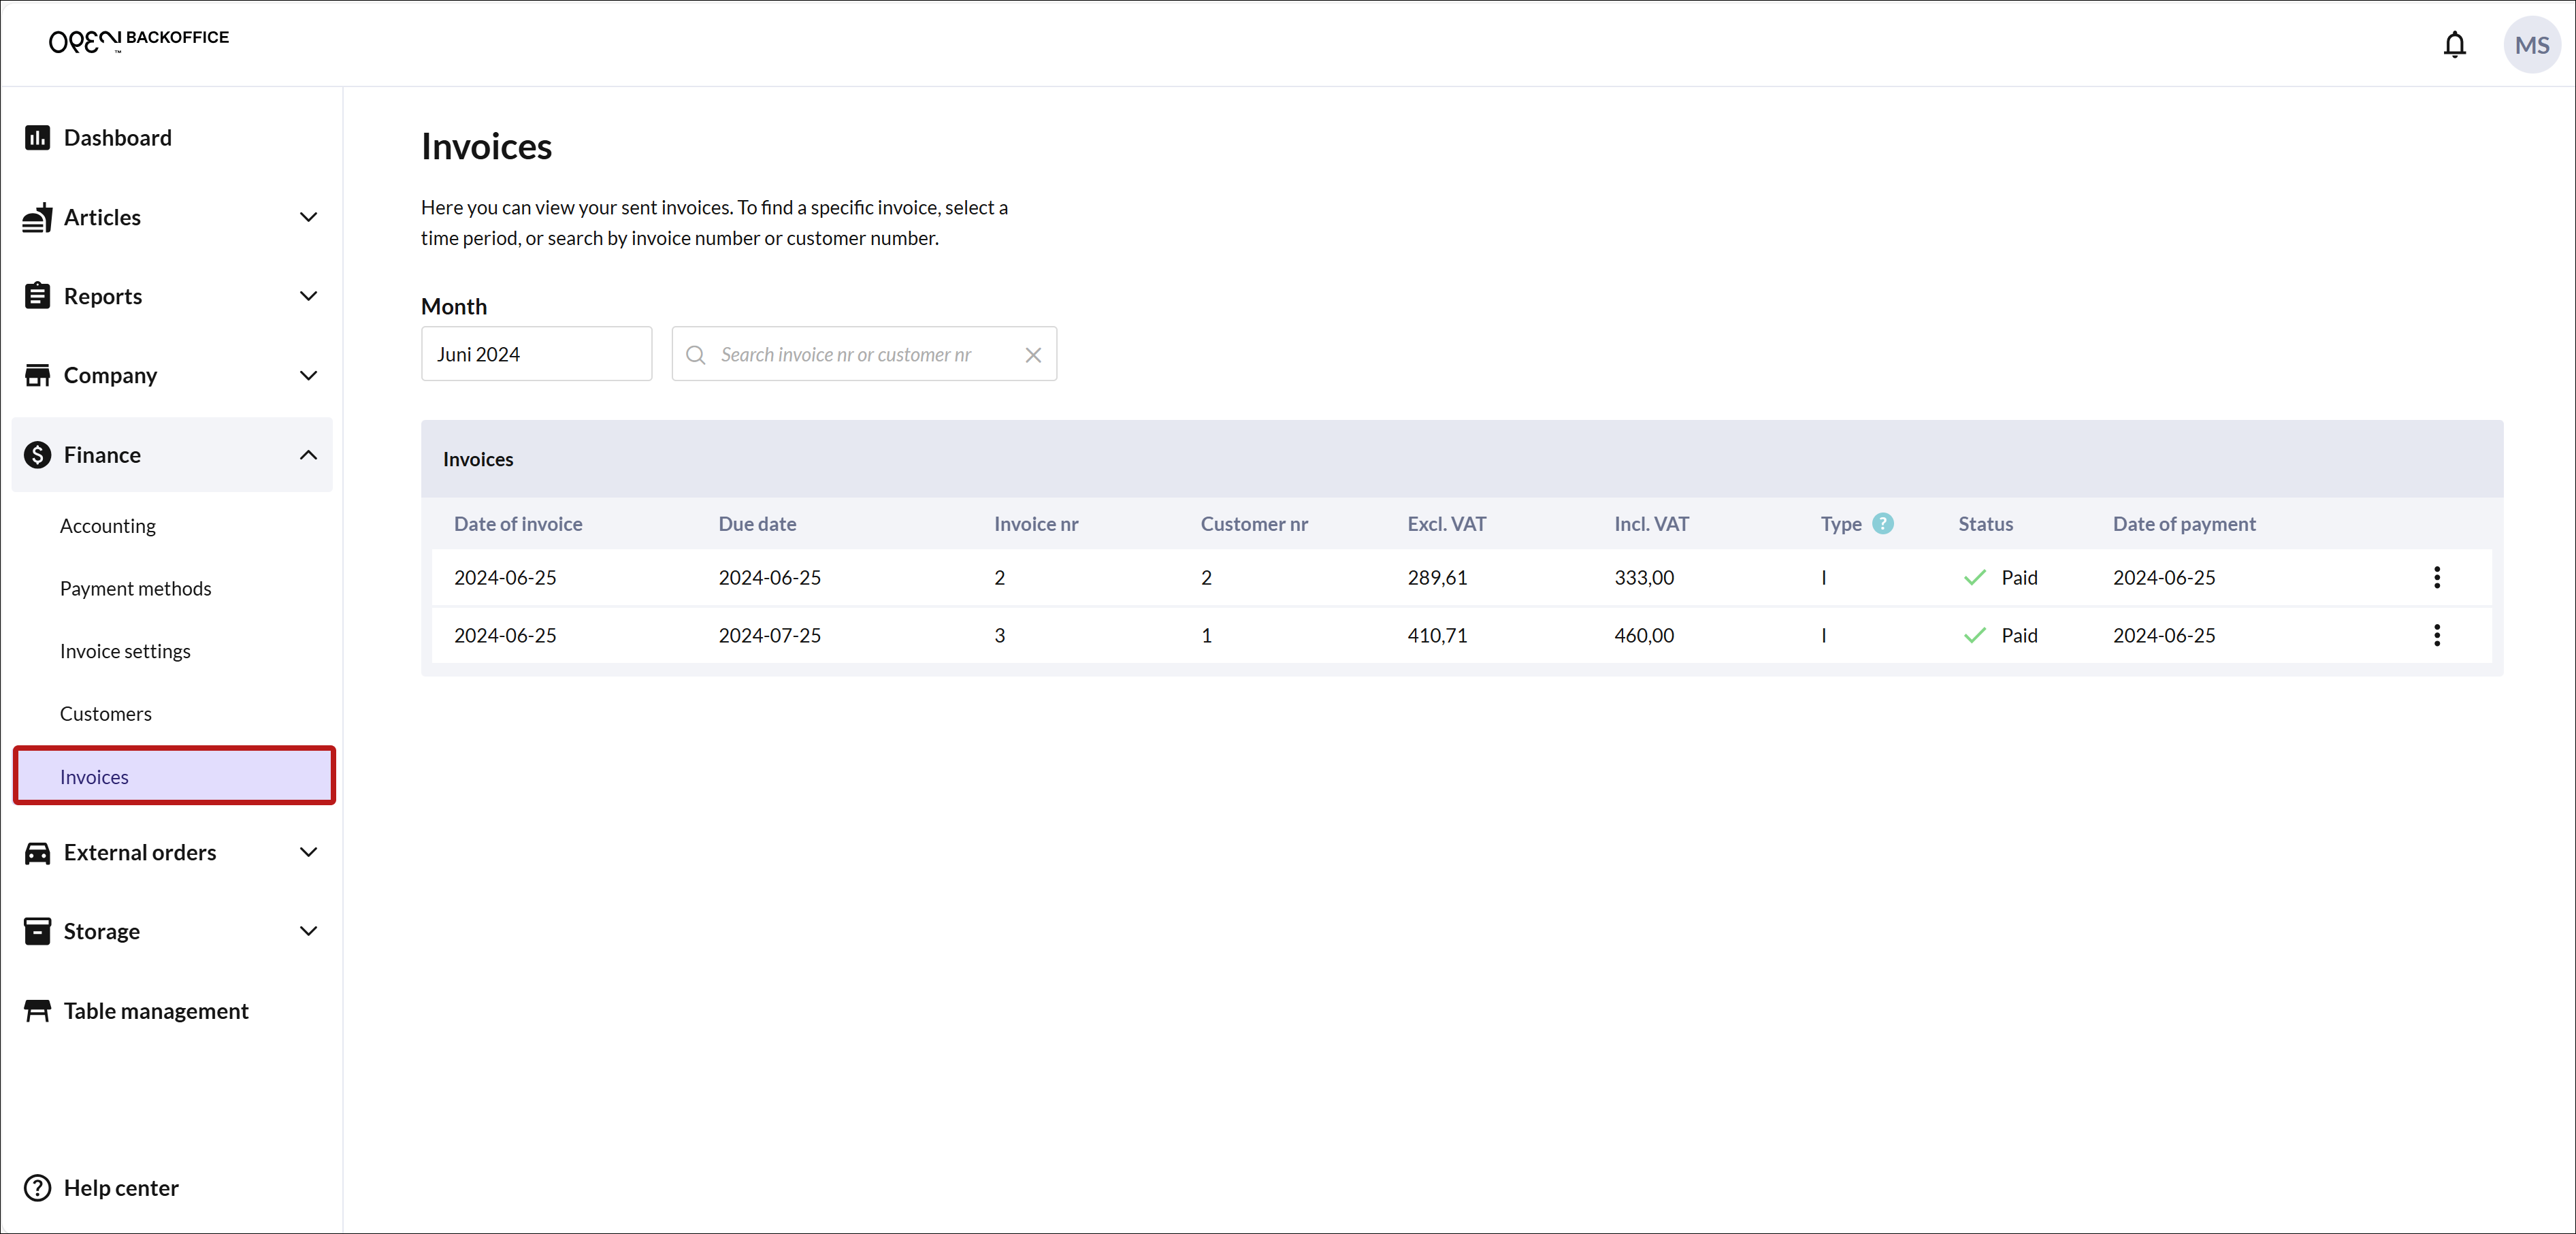
Please note that it is your responsibility to send the invoices to your customers and ensure they are paid, as these functions are not available in BackOffice.
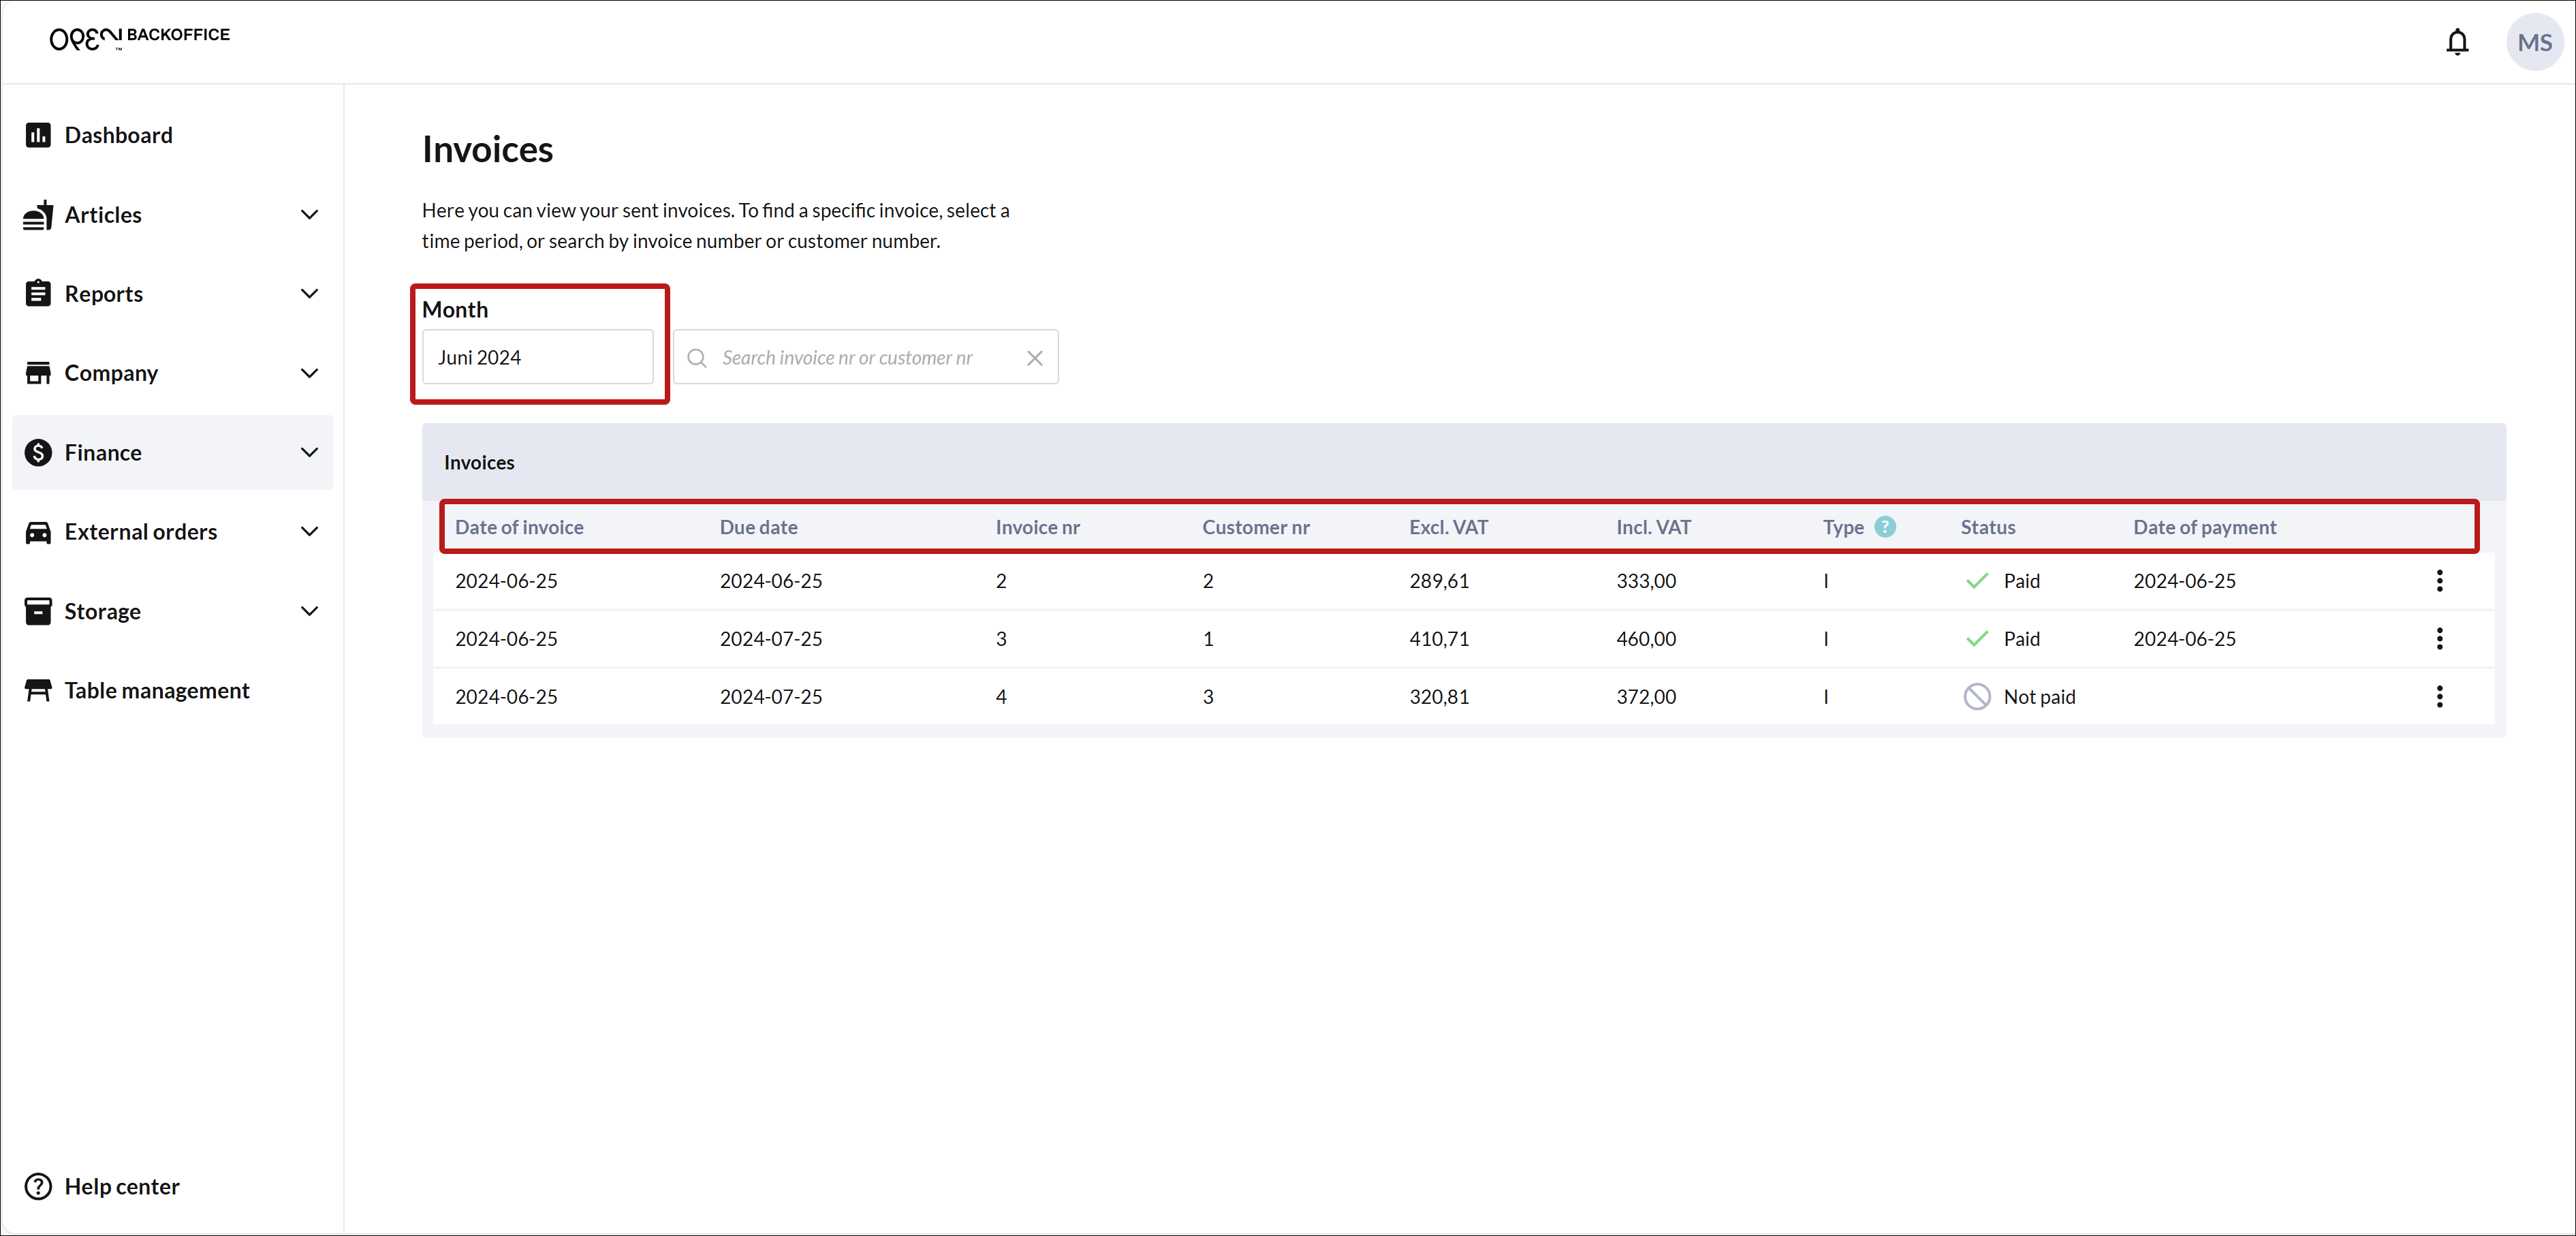
You can filter by date or choose how the invoice list should be sorted by clicking on the various columns.
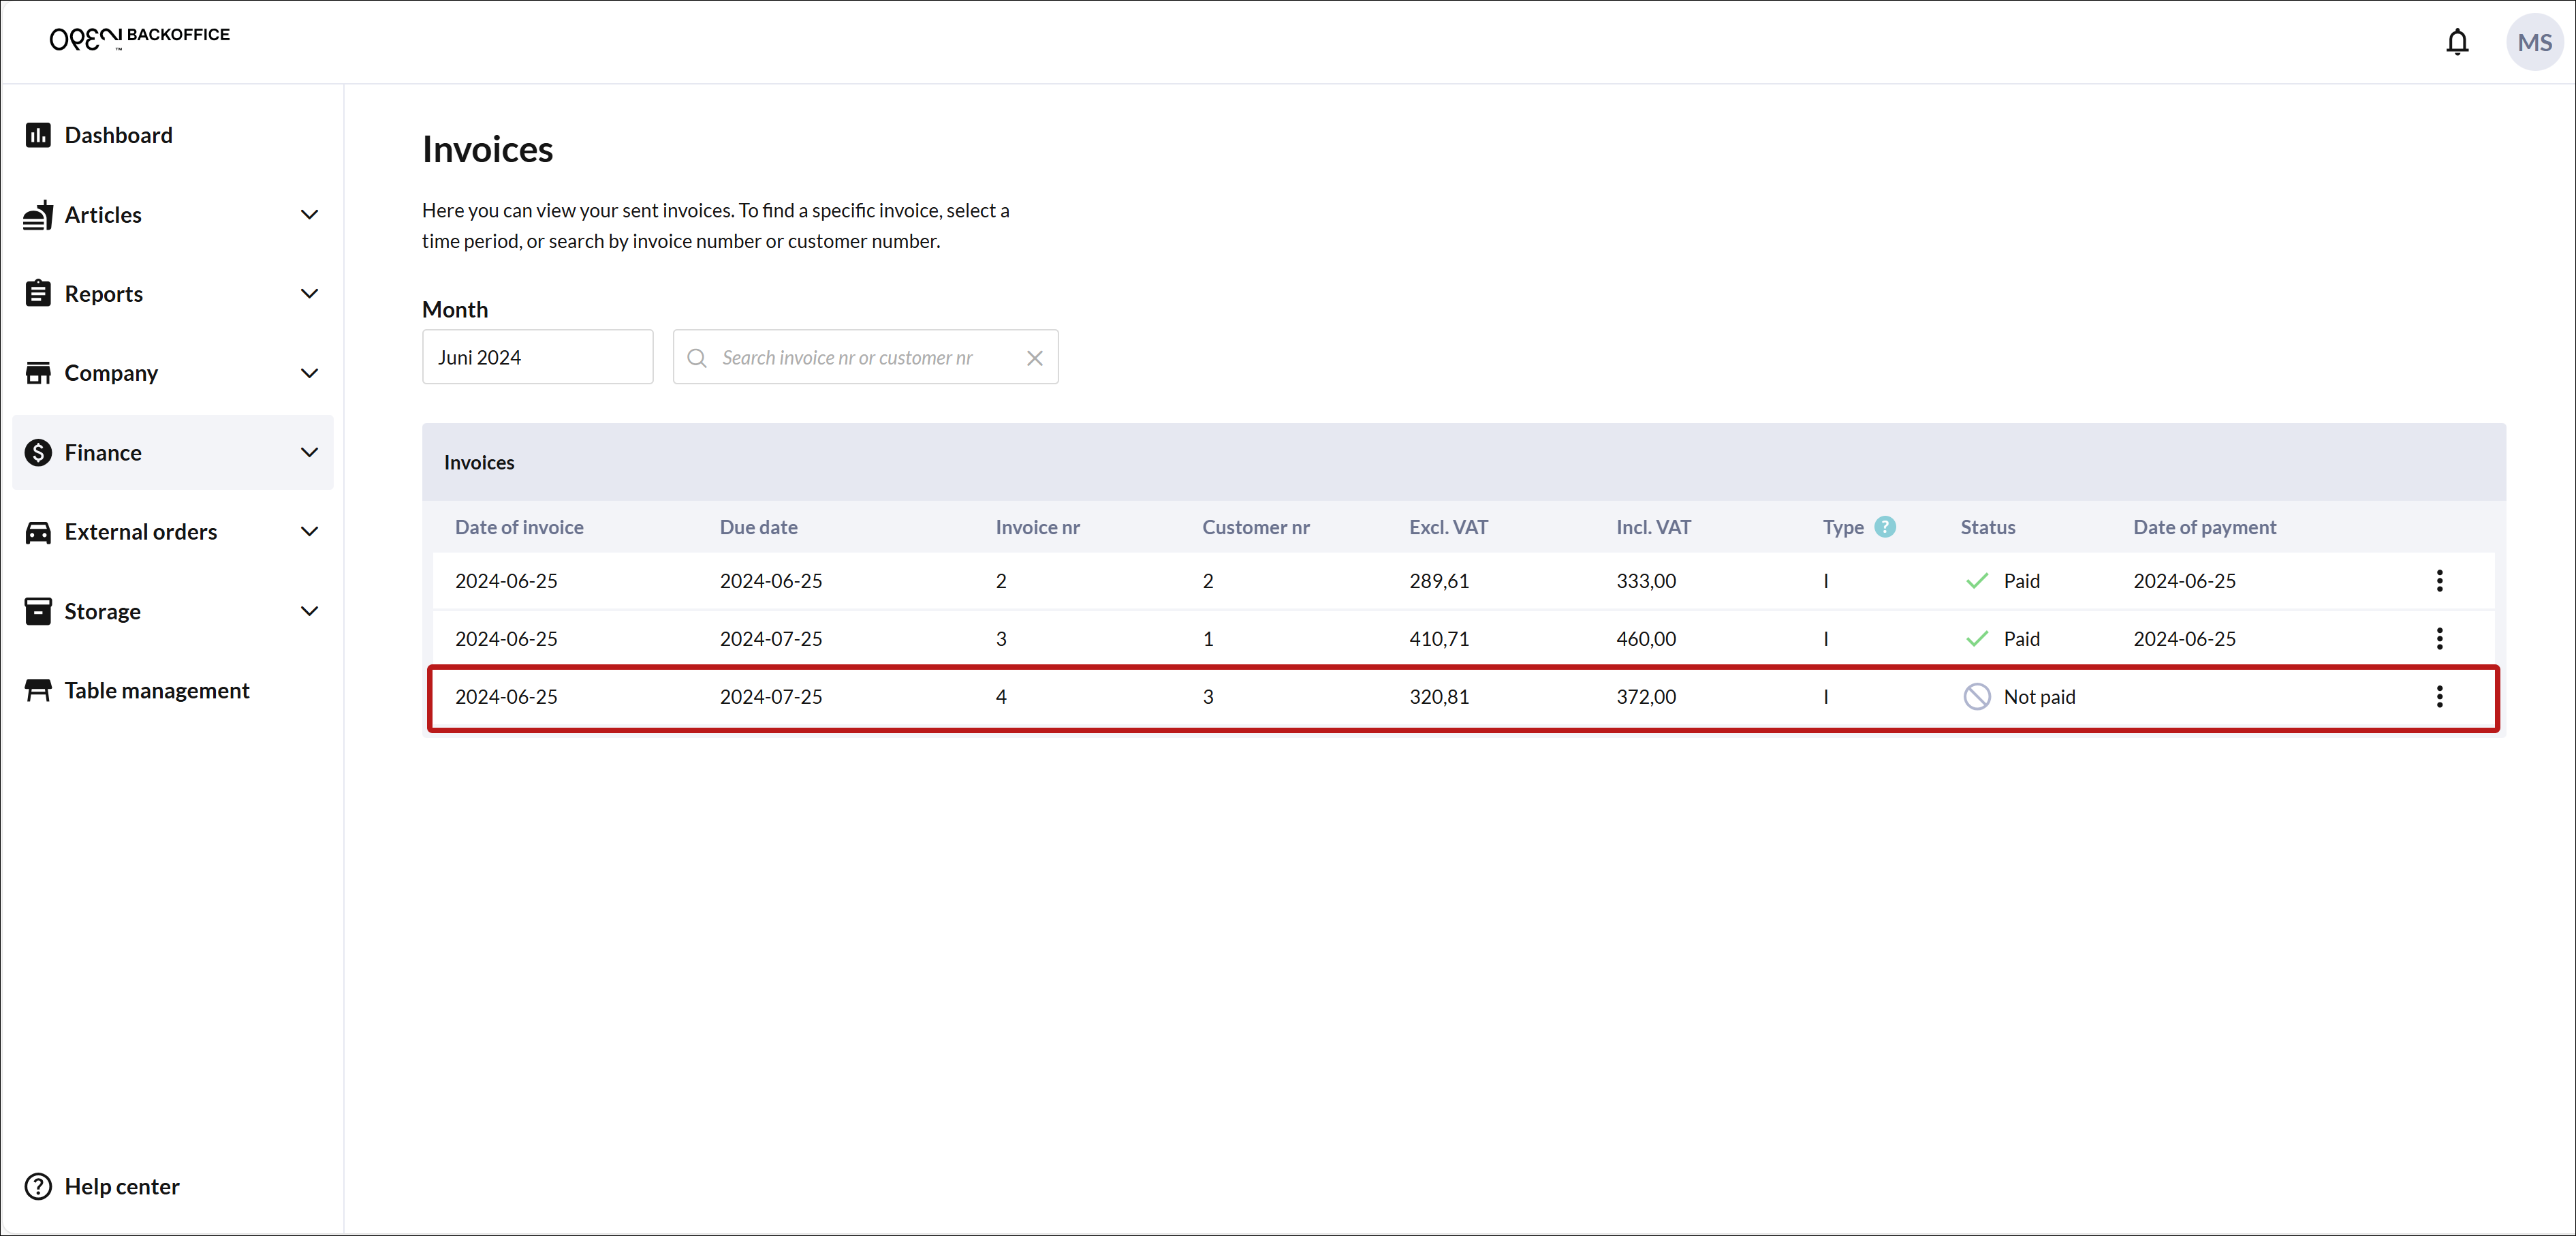
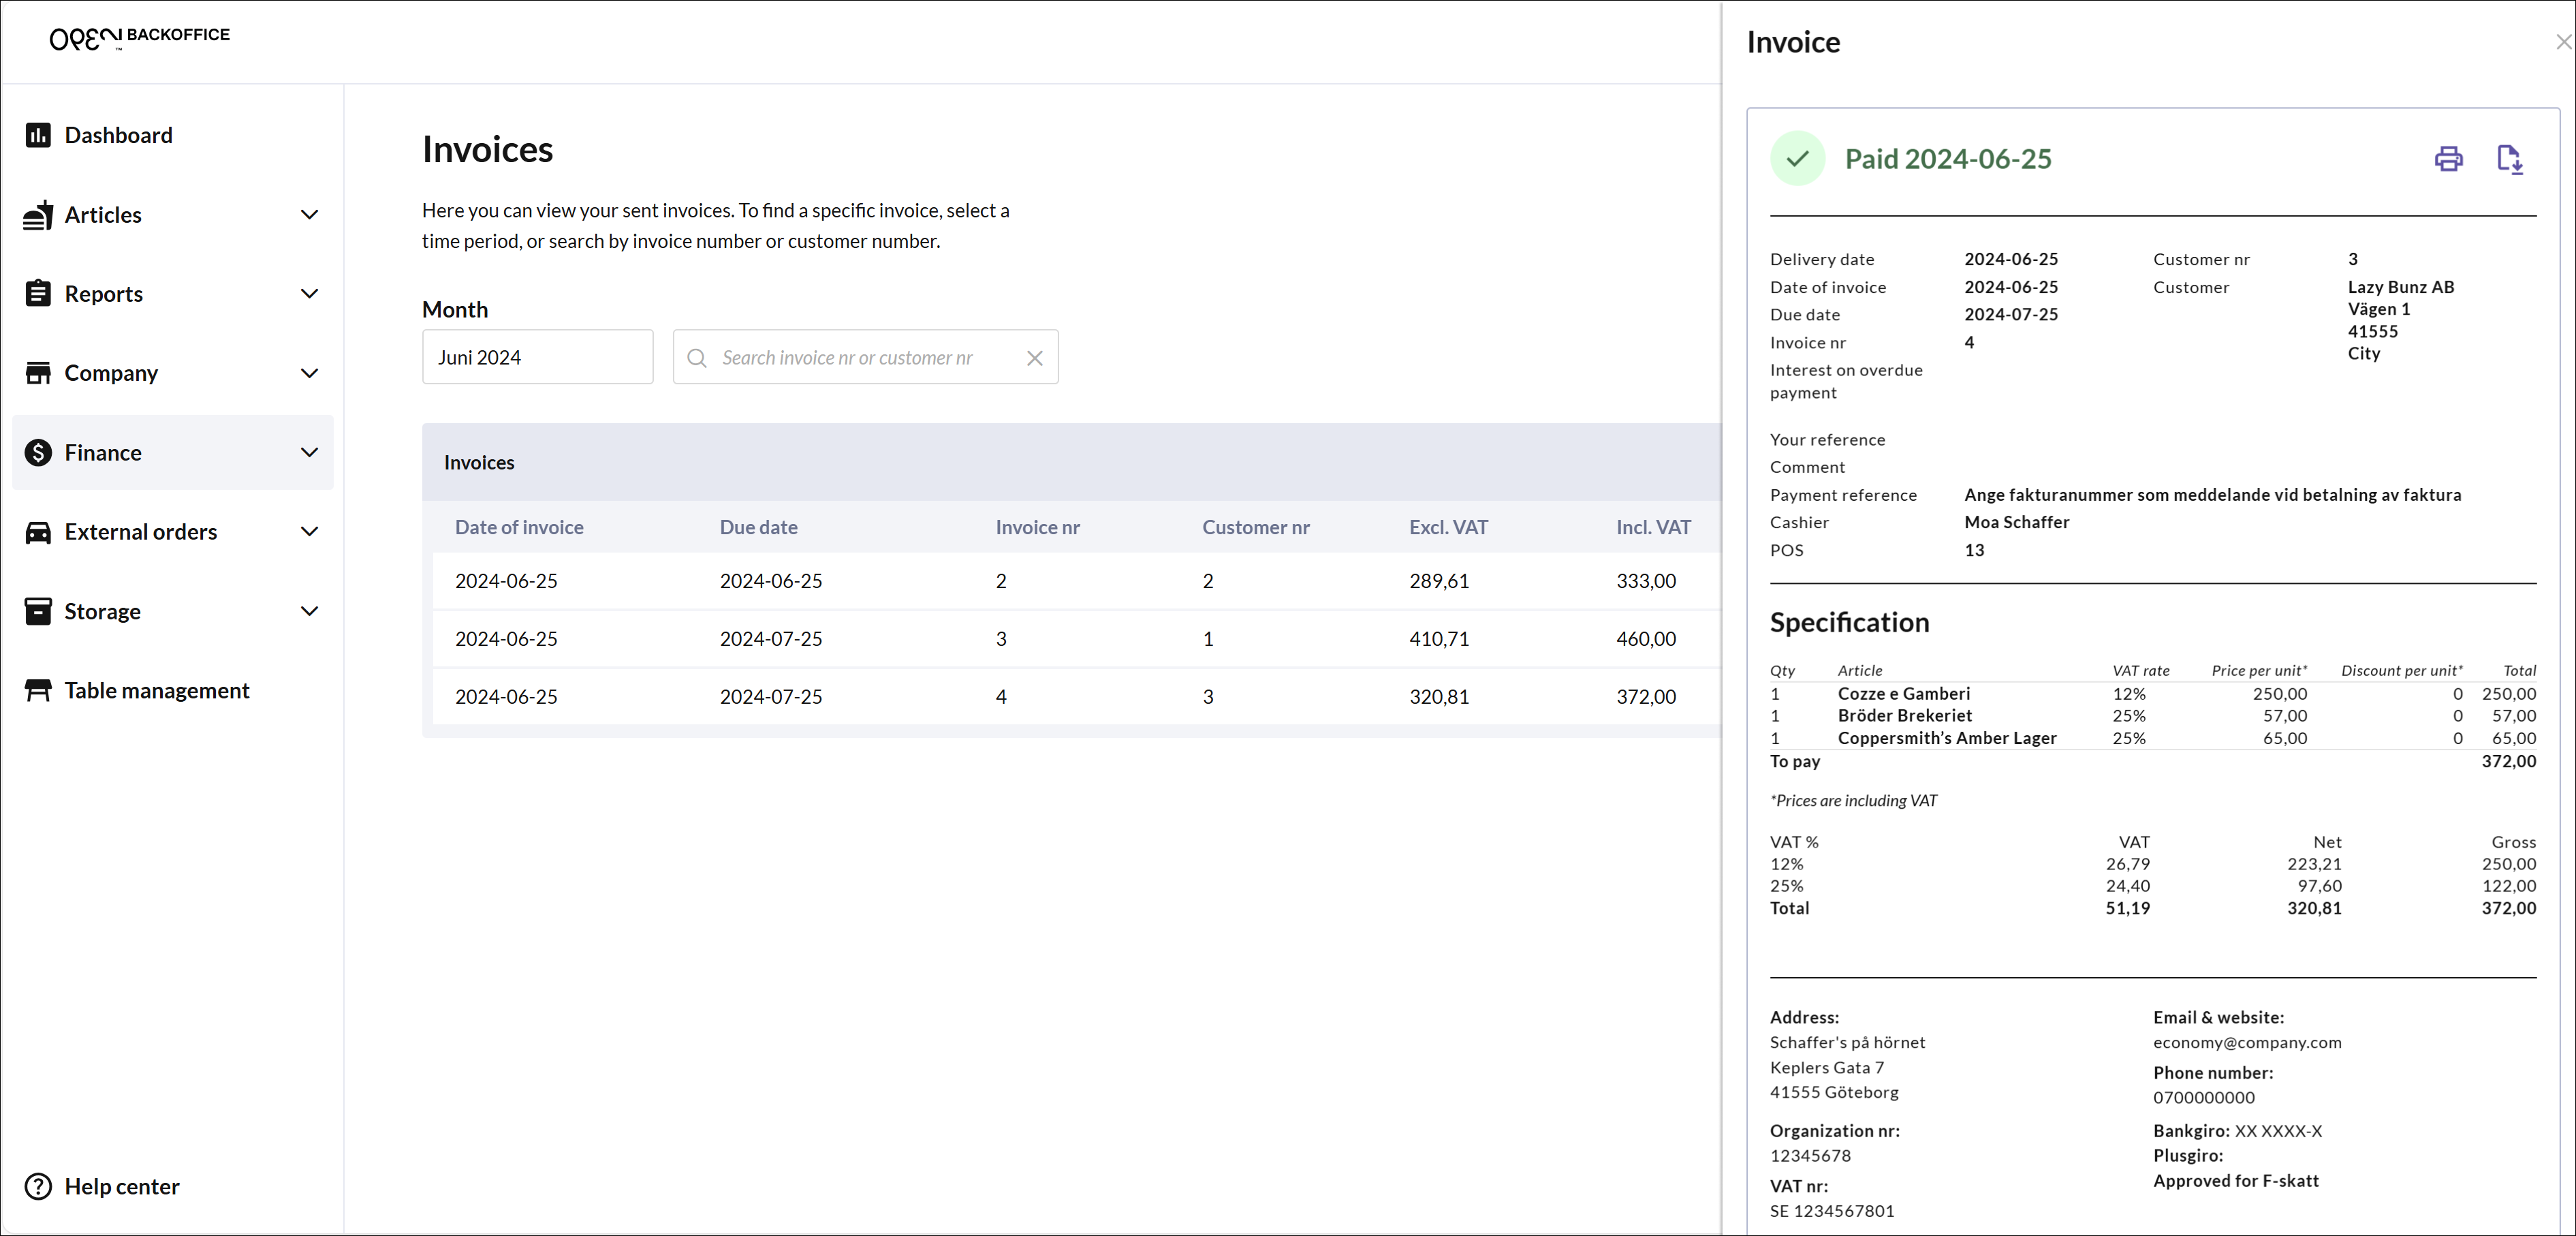
Click on an invoice to view it in its entirety.
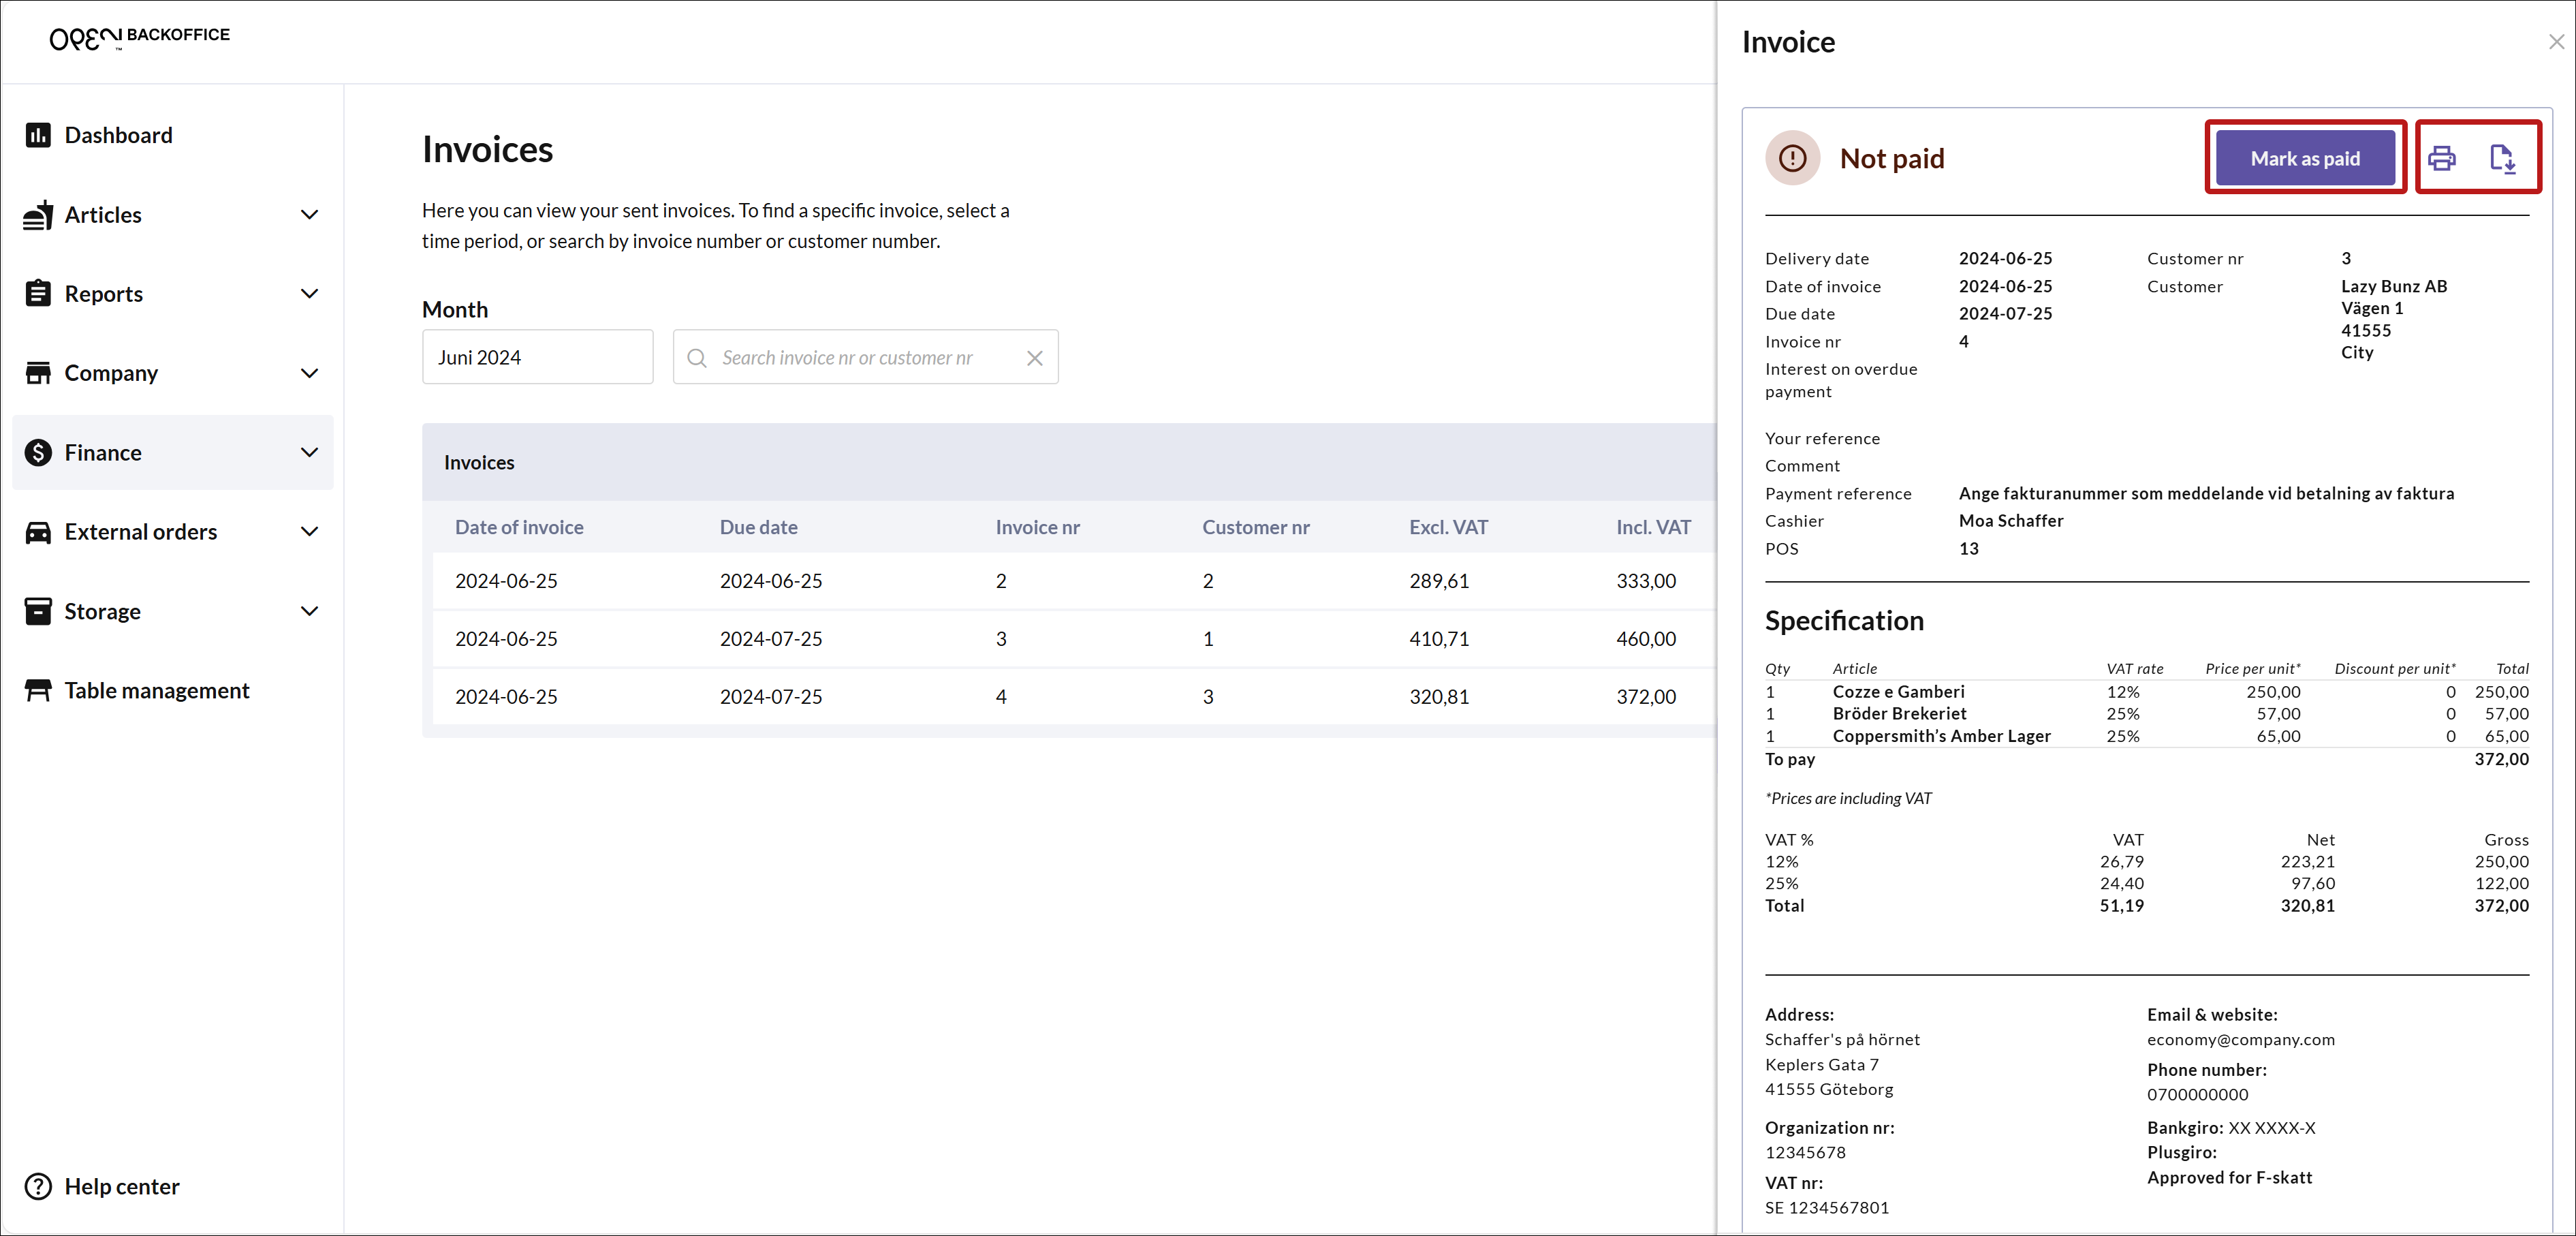
The invoice opens on the right:
Here you can, for example, print the invoice or download it as a PDF.
When the invoice is paid, you can also mark it as paid in BackOffice.
This does not affect your accounting of invoices but is only a visual representation intended to help you keep track of the status of your invoices.
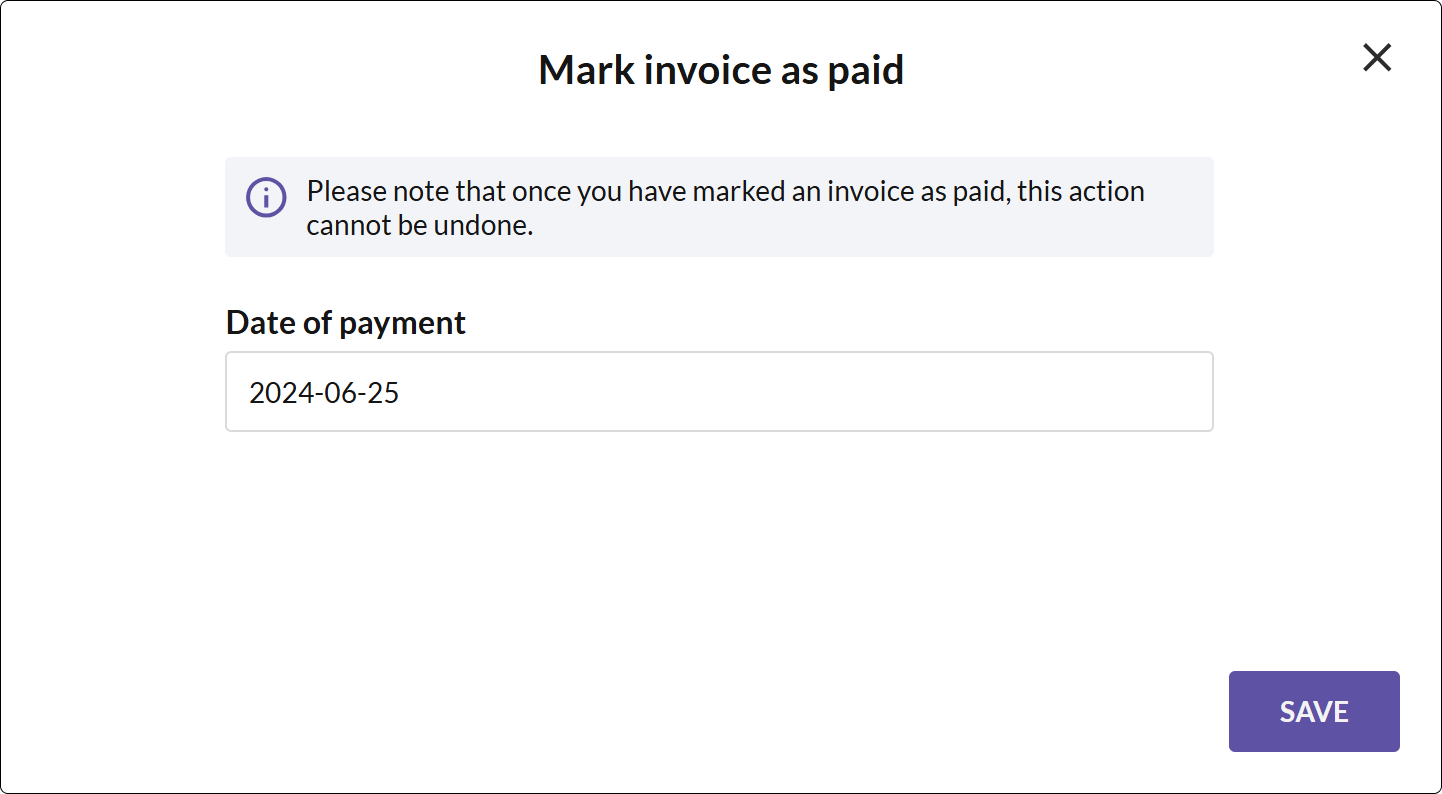
When you mark the invoice as paid, you can also choose the date on which the invoice was paid.
An invoice marked as paid will have a green label "Paid (date)".
Refunds and credit invoices
If a customer wants to return goods that have been purchased via invoice, you handle it like any other refund in the cash register. When the refund is registered, a credit invoice is also created in BackOffice.
You can download the credit invoice (just like regular invoices) as a PDF and send it to your customer. When the credit invoice is paid (either if you have refunded the customer or "cancelled" the original invoice), you can mark it as paid.
