Invoice via Spiris (before Visma eEkonomi)
Spiris is a smart and simple accounting program that handles most of your ongoing accounting automatically. We have taken accounting and invoicing to a new level. We dare to say that it is a web-based accounting program in absolute world class in terms of functionality. Not functions that you need to learn and actively work with, but more advanced functions that do the job for you!
- Automatic accounting
- Smart invoicing
- Complete payroll management
- Awesome app, both for you and for employees
If you are looking for a guide on accounting via Spiris, go here.
Requirements for using Spiris invoicing
For invoicing via Spiris to work, you also need to use Spiris for your accounting. This is because the accounting of the invoices will be done via Spiris.
You also need to have a Spiris package that includes invoicing.
Get started with invoicing via Spiris
- Activate the Spiris integration:
- Select both Accounting & Invoicing (follow the steps in the guide Activate the Spiris integration with Accounting & Invoicing below).
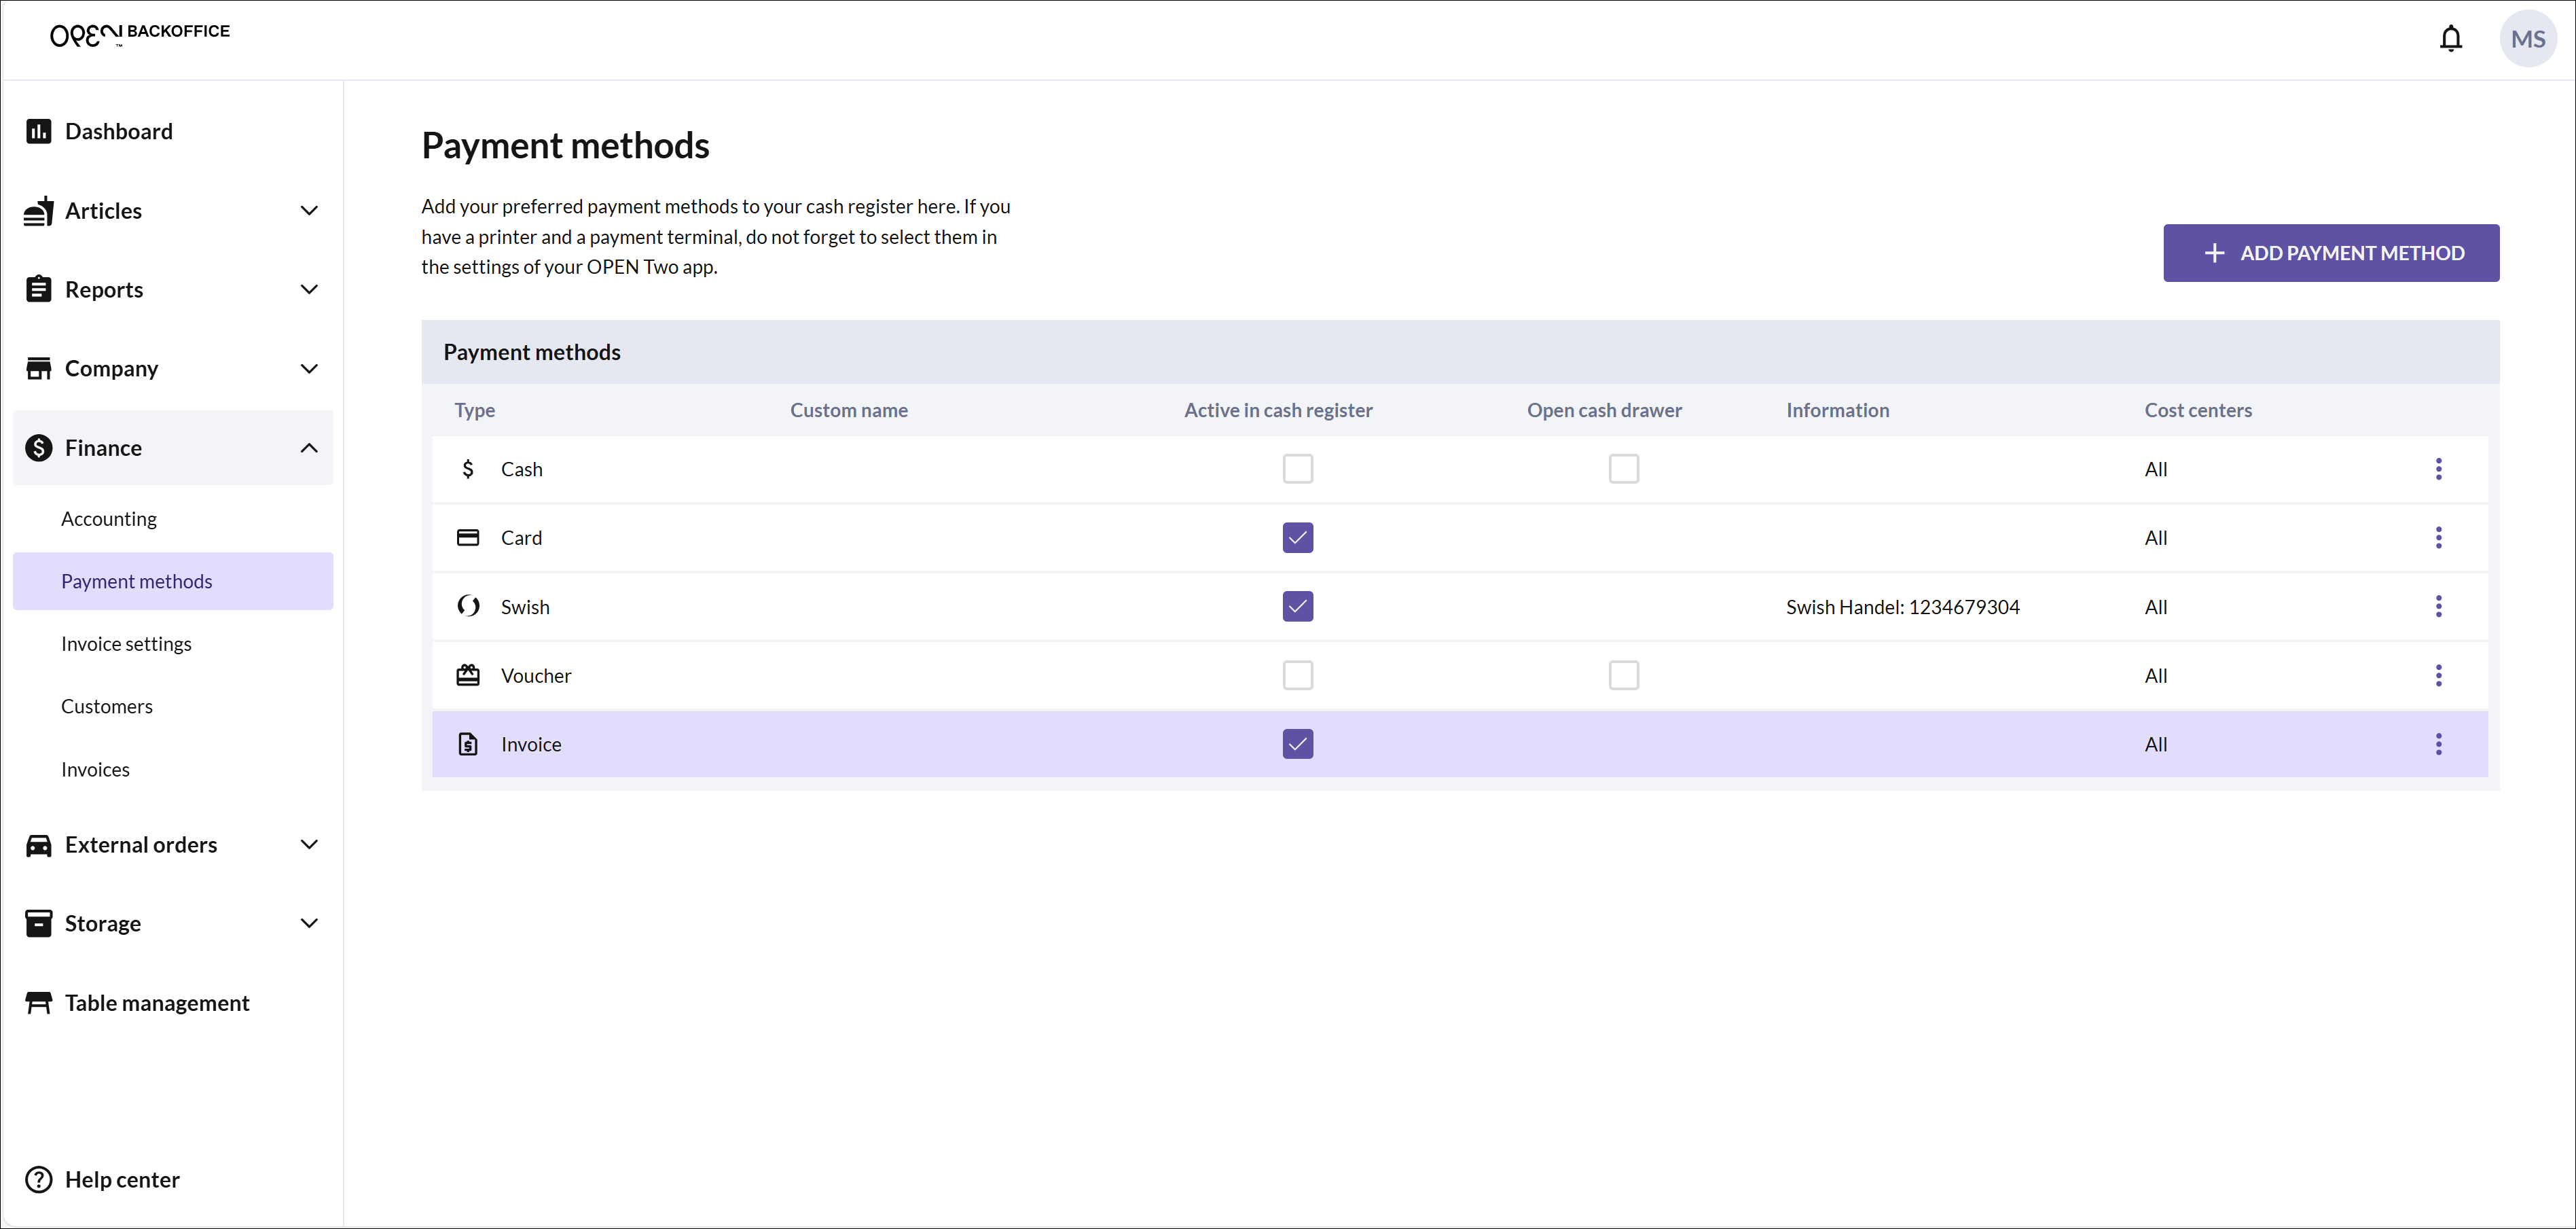
- Activate the invoice payment method:
- The invoice payment method is automatically activated on all cost centers. This can be changed on the Payment methods page in BackOffice.
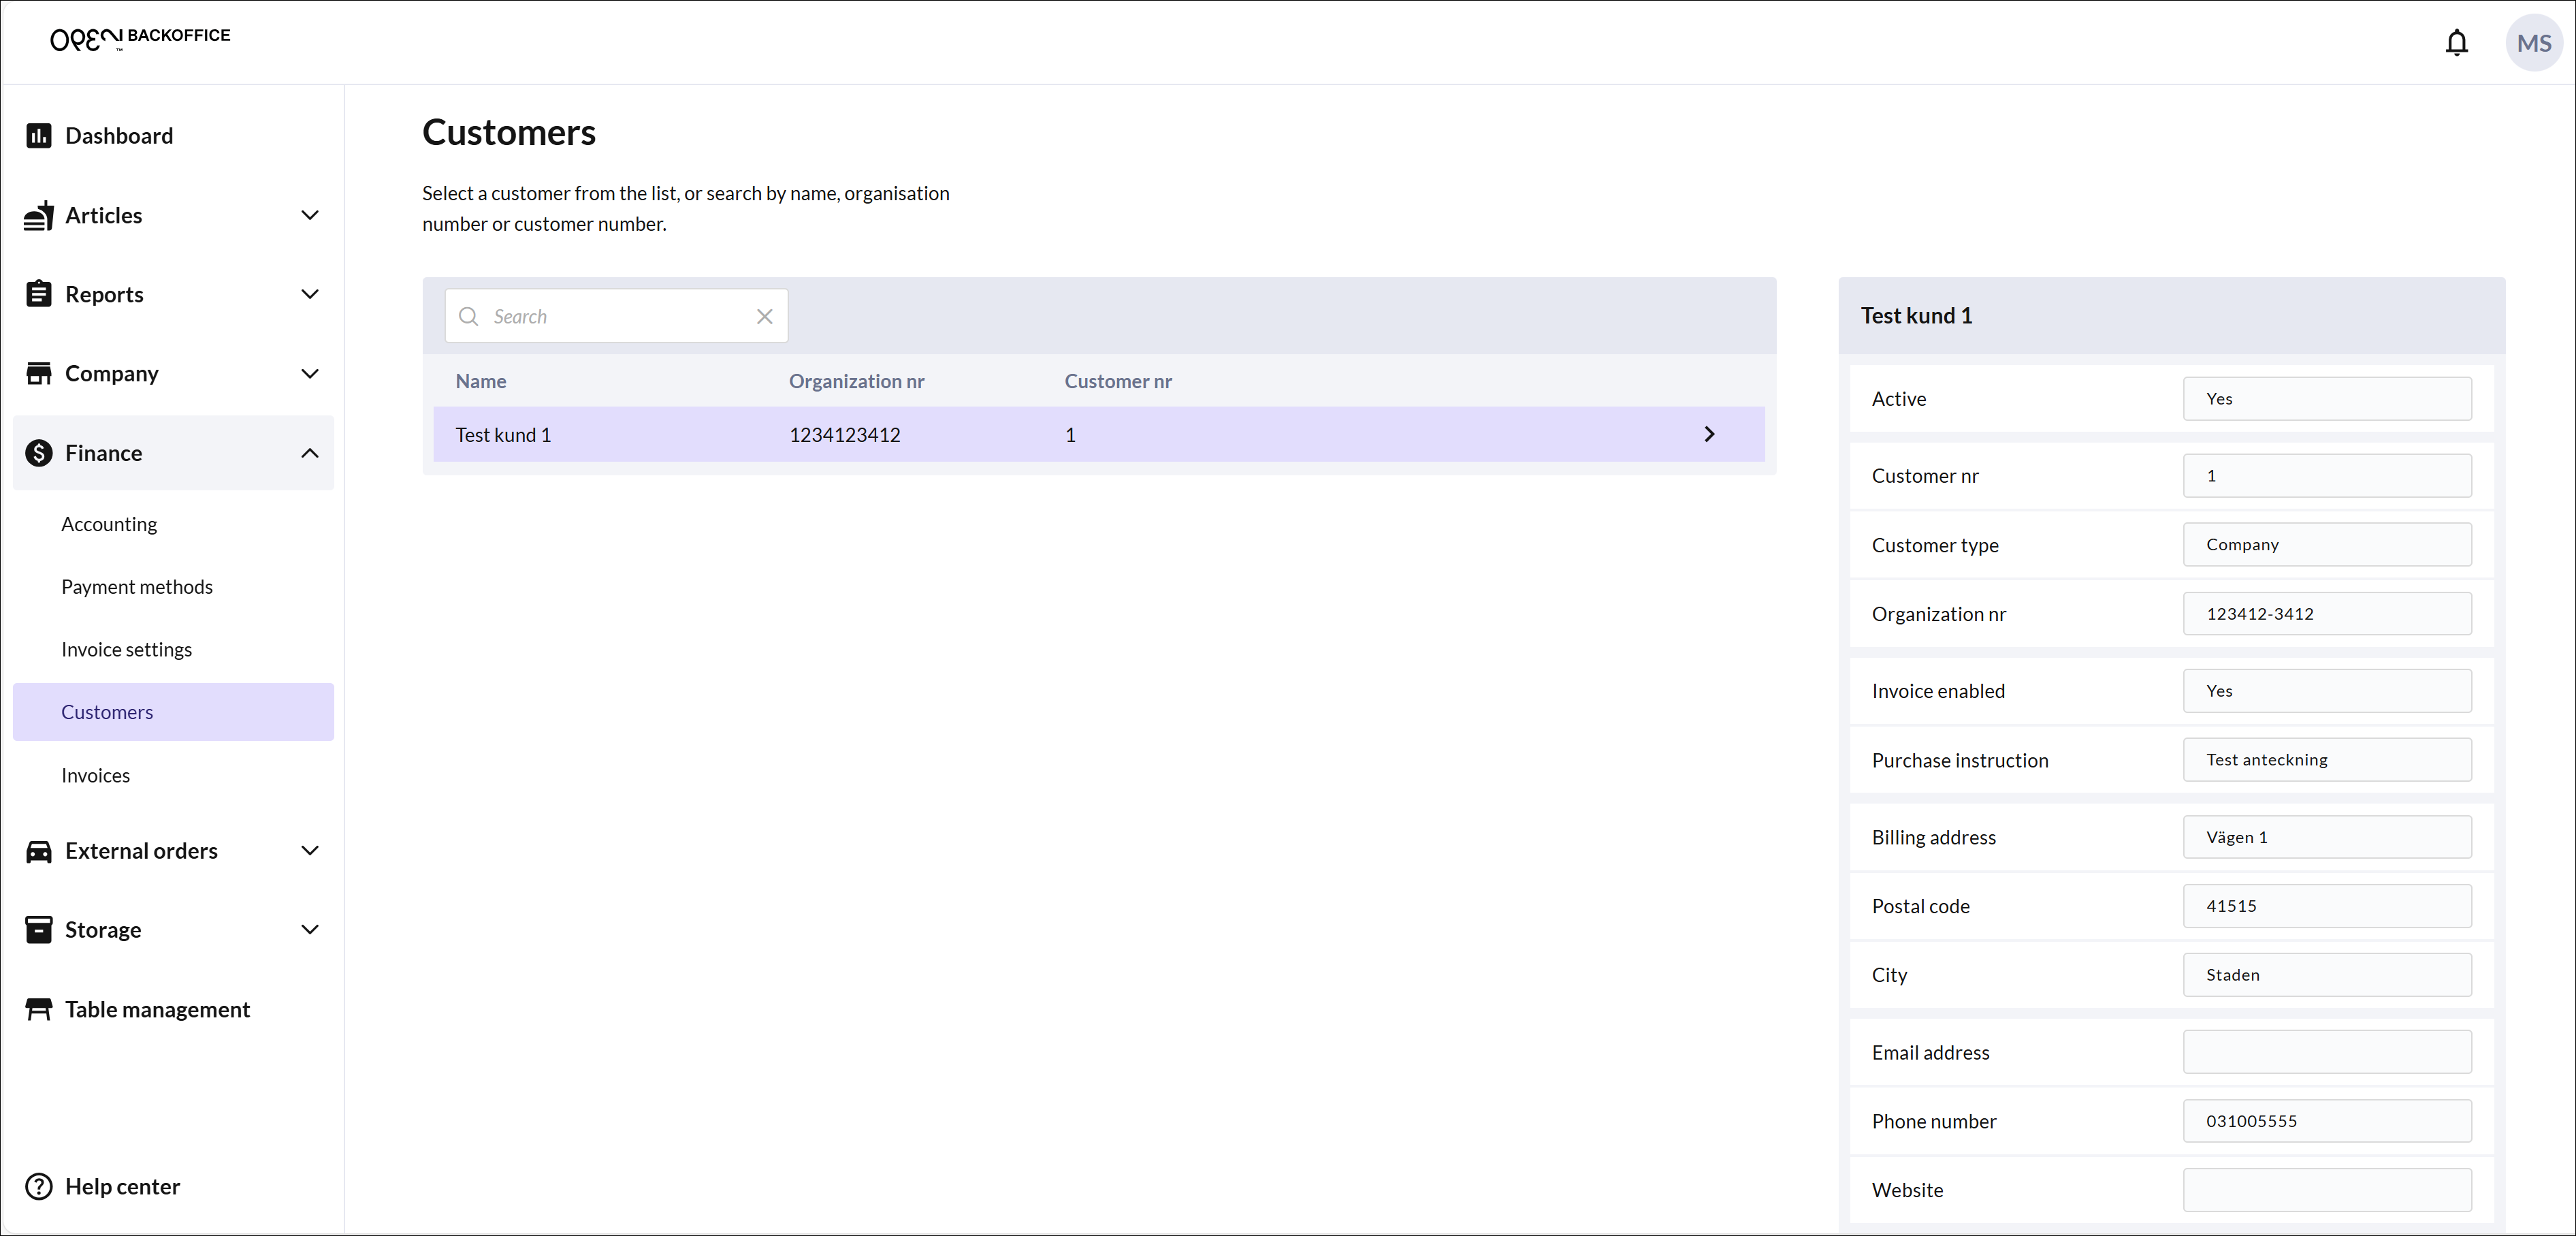
- Access to your customers:
- You can now access your customers on the Customers page in BackOffice and in the checkout. Please note that you create your customers in Spiris.
- Take payment via invoice
- From the cash register you can now invoice your customers.
Activate the Spiris integration with Accounting & Invoicing
In BackOffice, select COMPANY in the menu and go to the INTEGRATIONS page.
In the card for Spiris, press the ACTIVATE button.
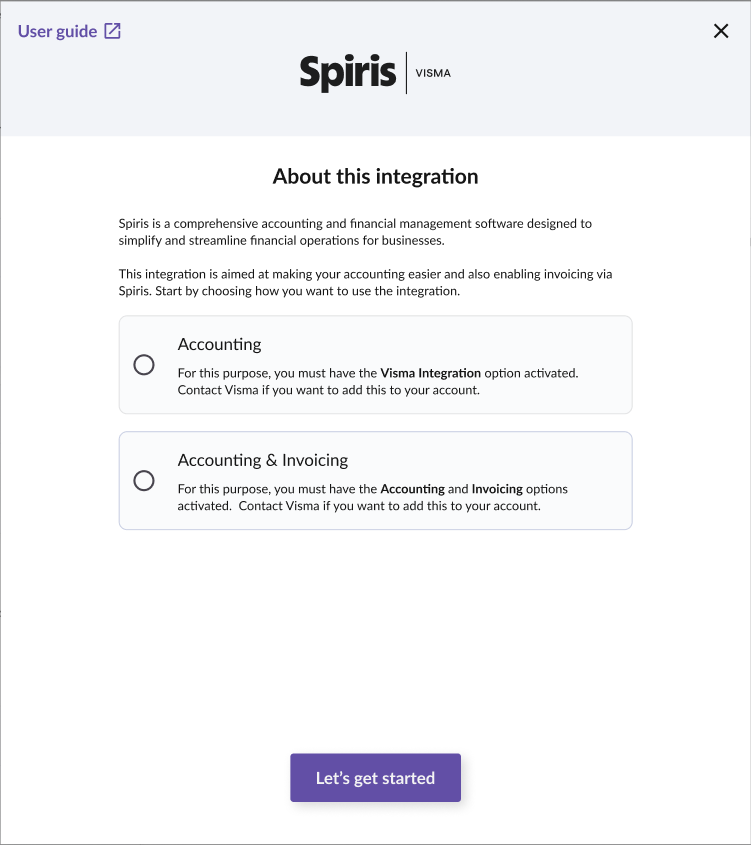
- In the dialog that opens, you will receive a brief introduction to the purpose of the integration. Select BOOKKEEPING & INVOICING and press NEXT.
---- 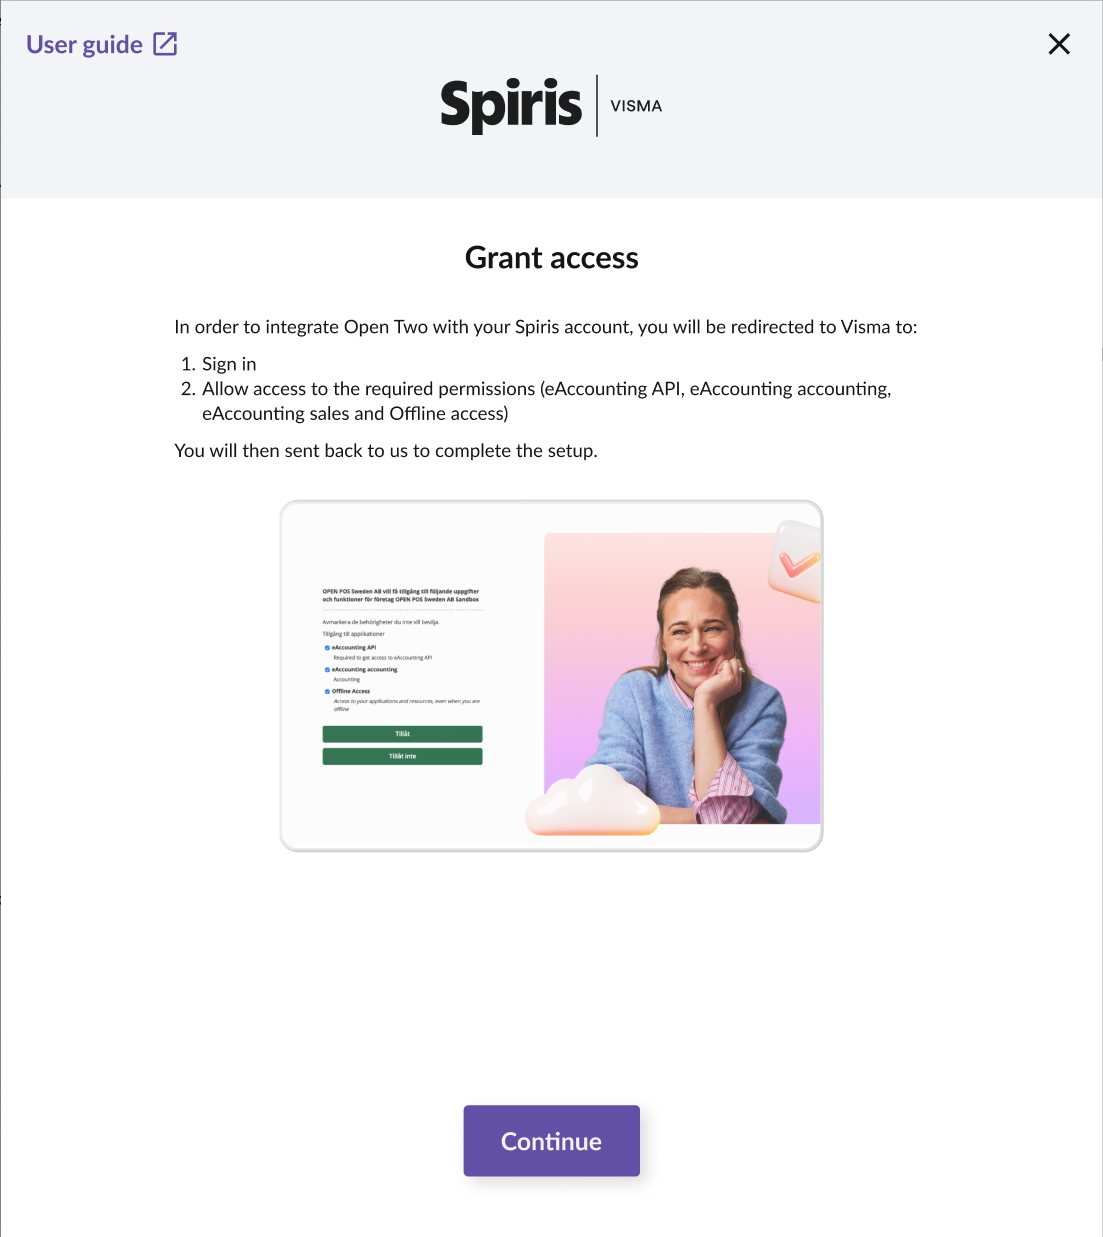
- You now need to give OPEN Two access to the necessary data in Spiris. Press OK and you will be redirected to Spiris.
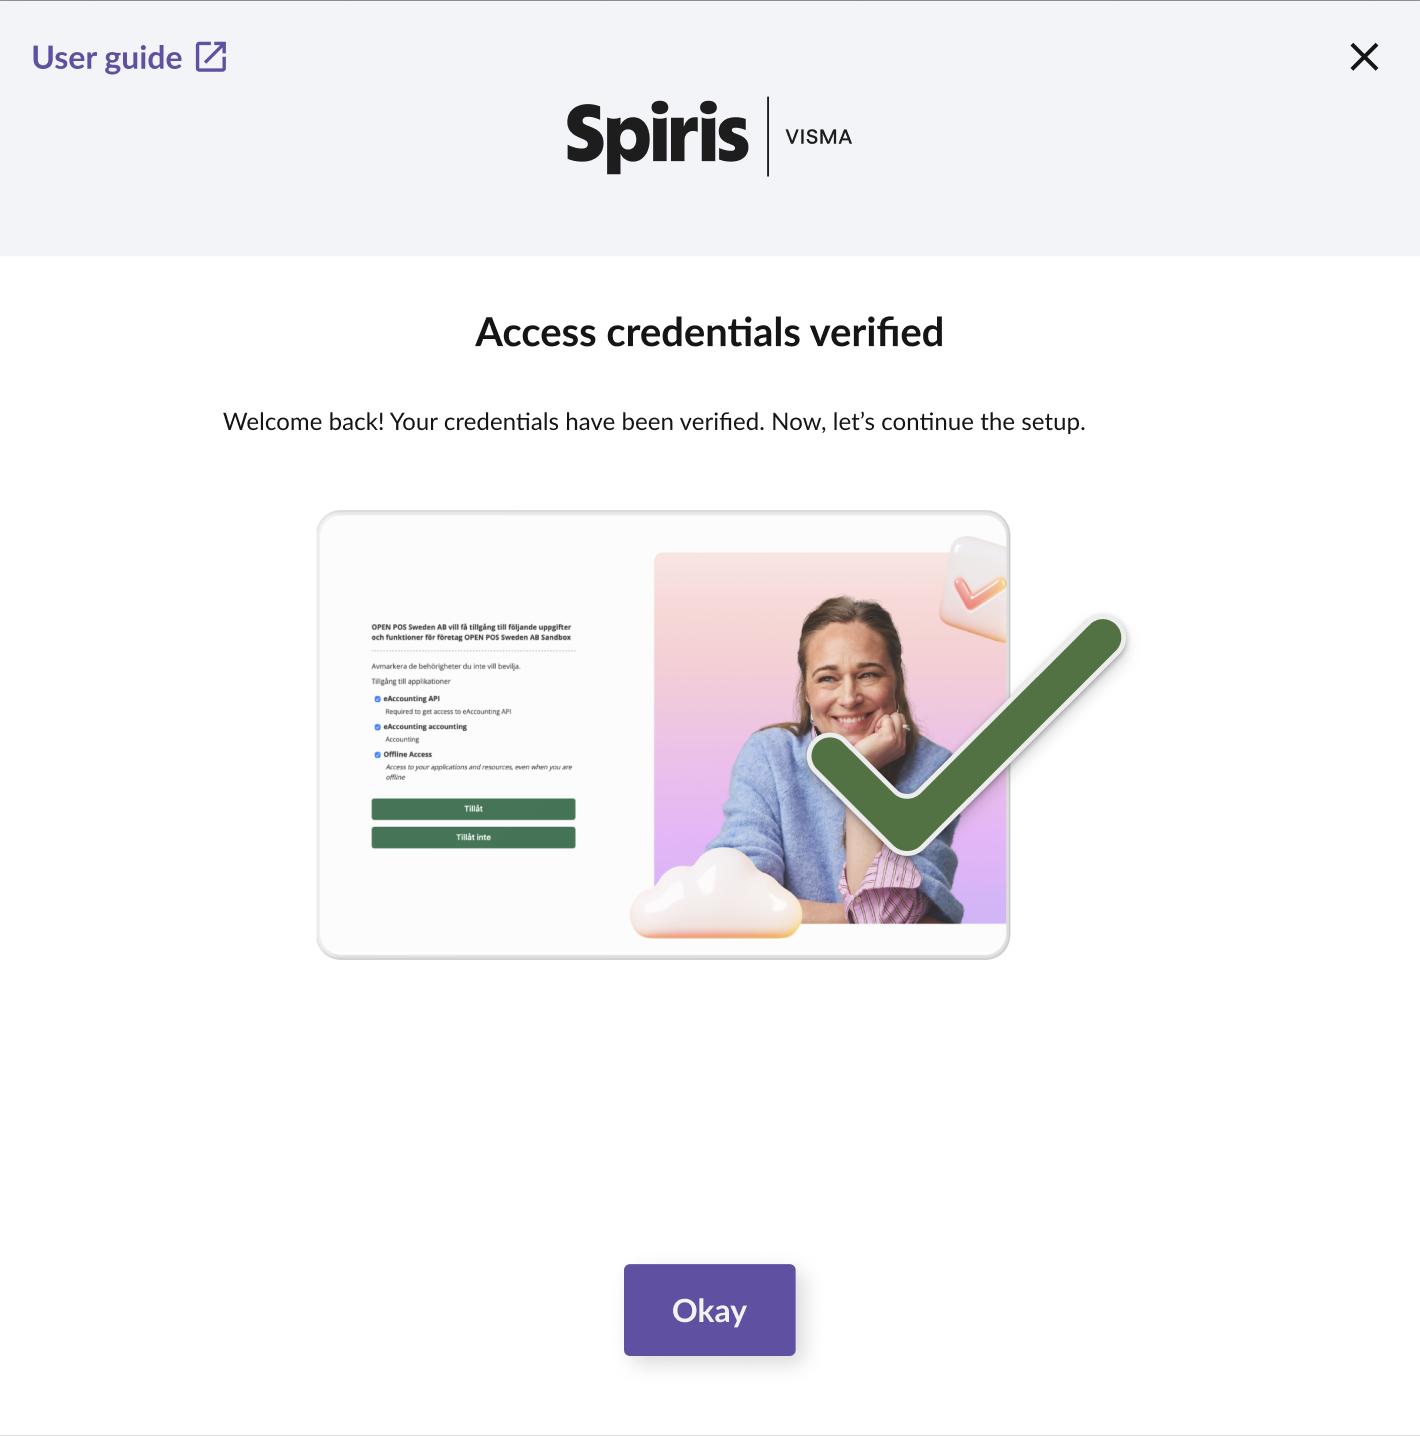
- Log in with your login details and agree to grant OPEN Two access to necessary tasks in Spiris.
- Once the access details are verified, press OK.
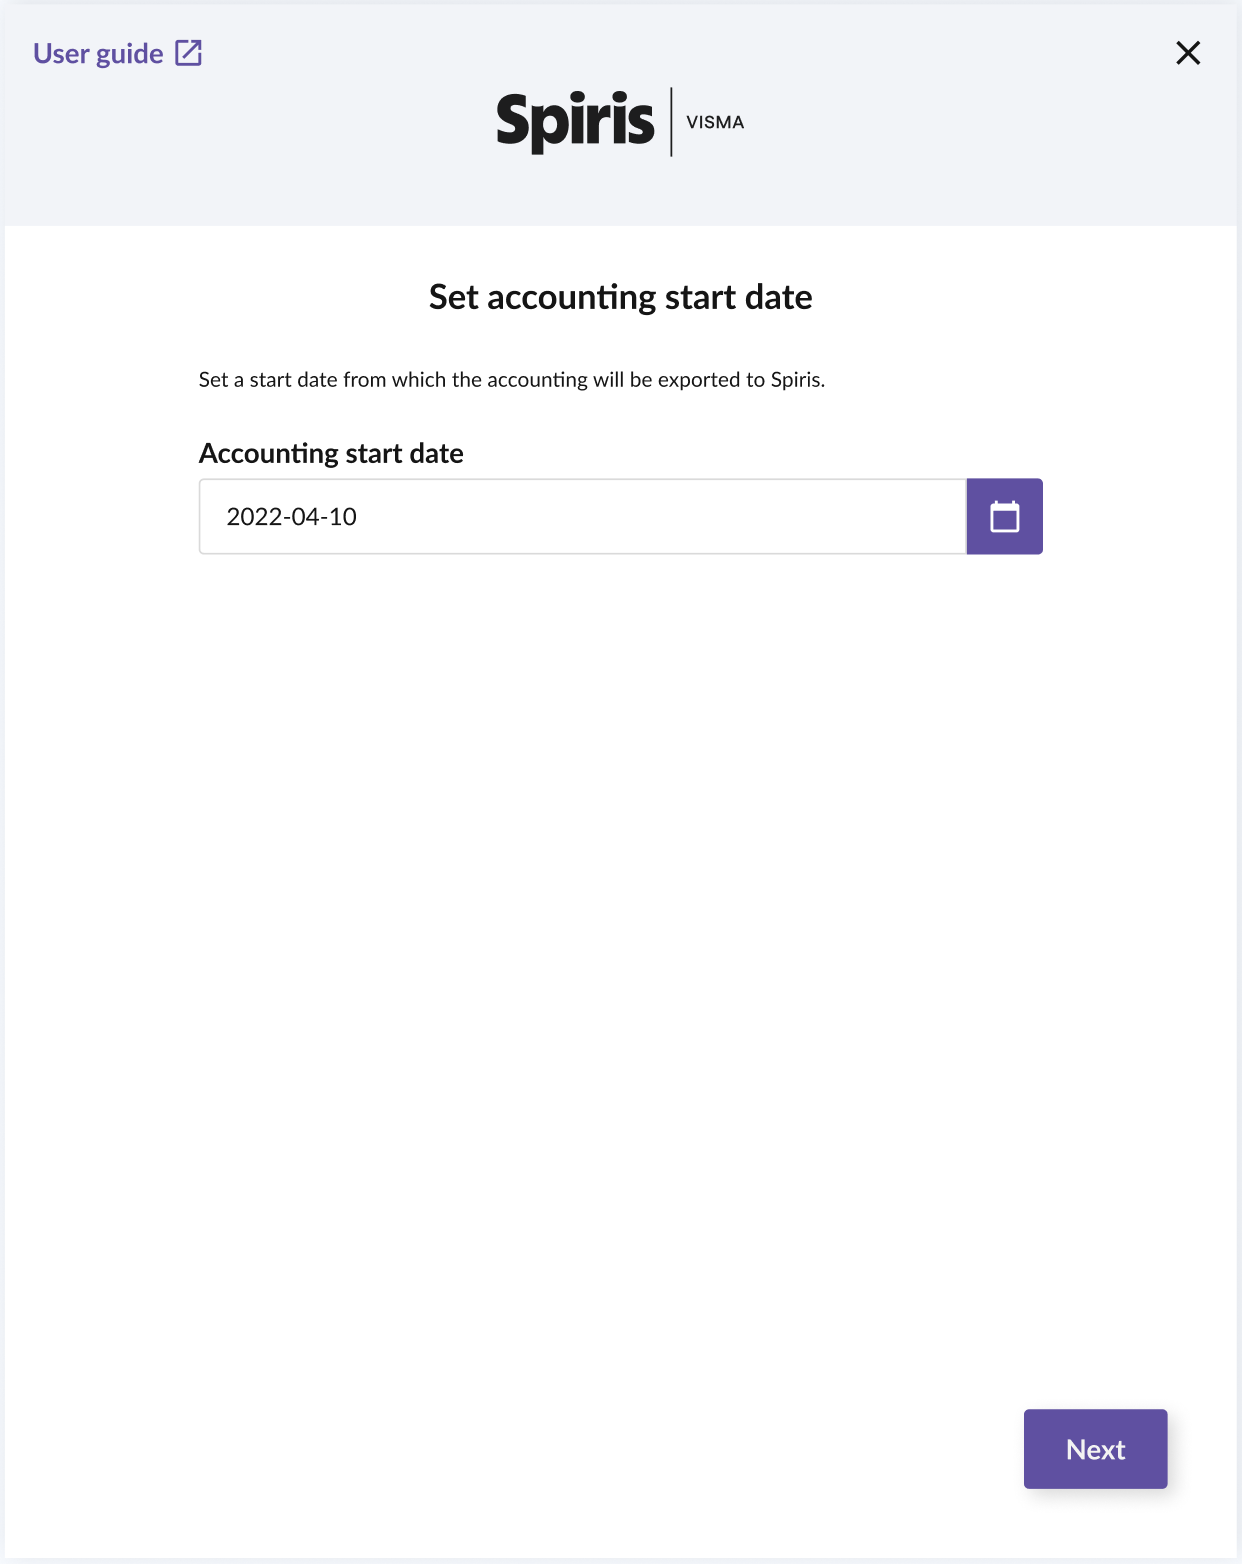
- Fill in the start date from when your sales data should be exported to Spiris for posting. Then press NEXT.
- Select accounting accounts
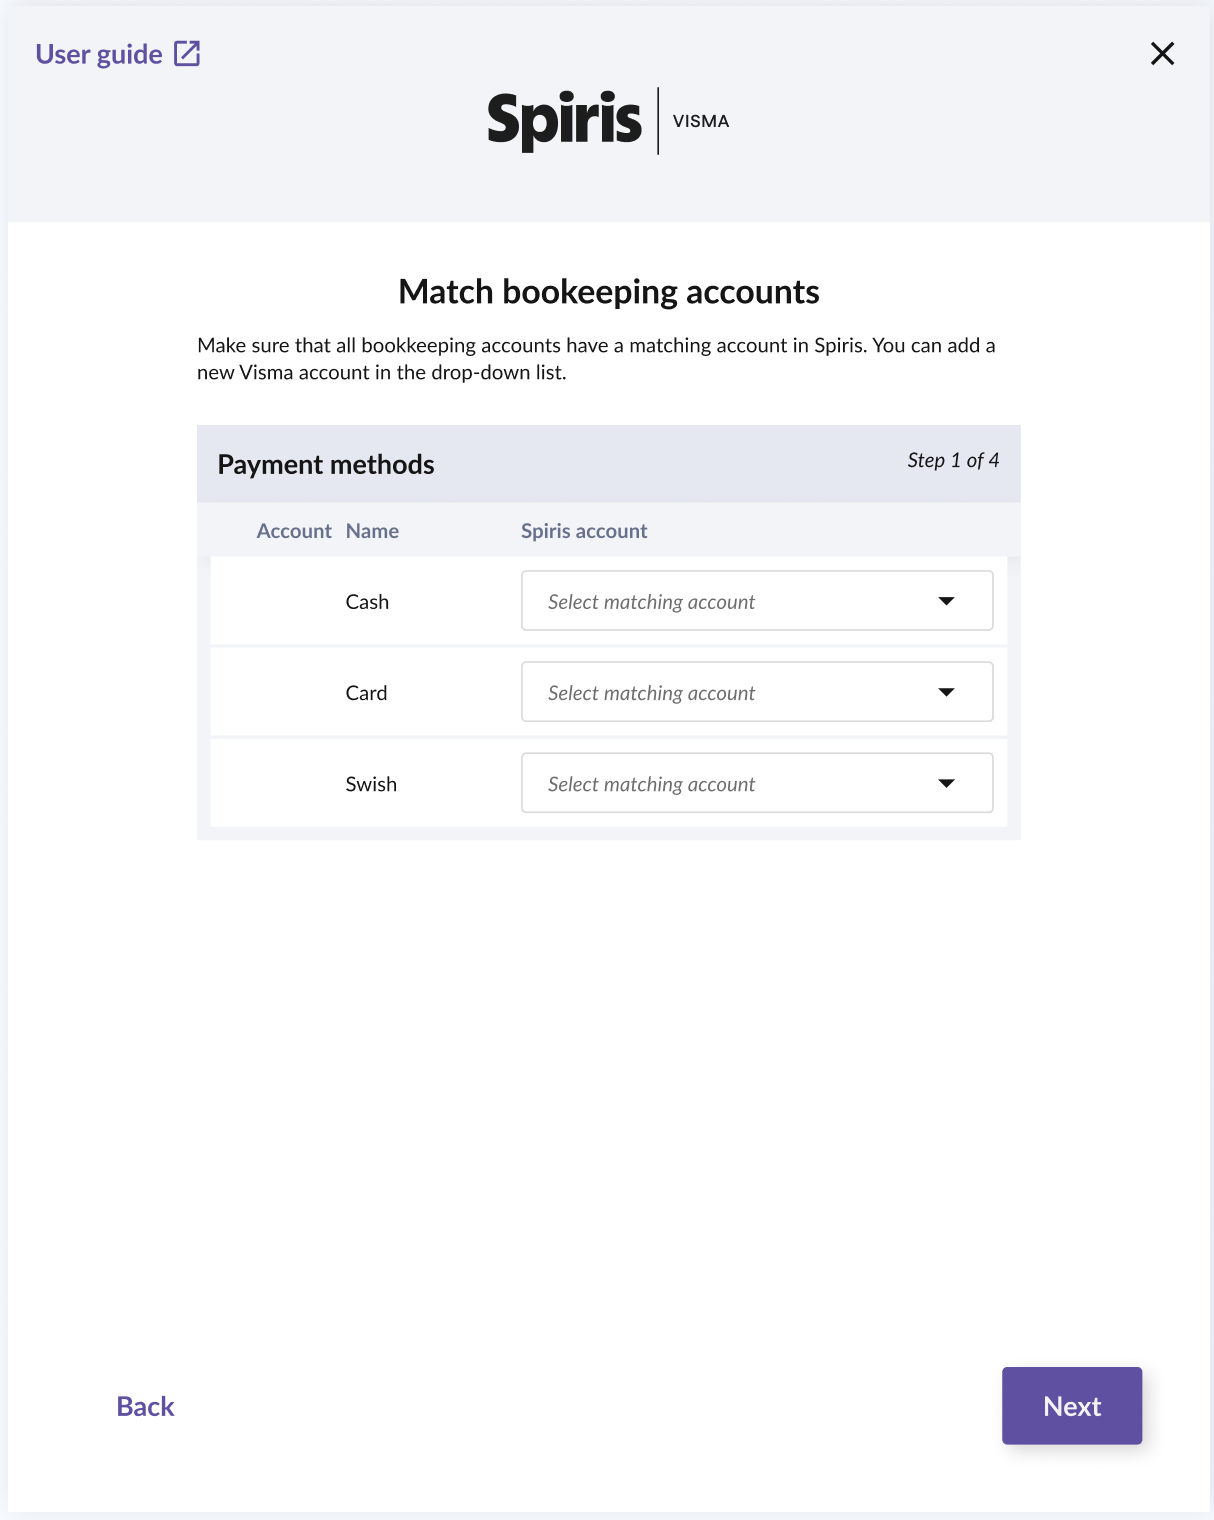
- Select accounting accounts for payment methods
Select which accounting accounts should be used in Spiris for your different payment methods. You can also add a new account from the list. Then press NEXT.
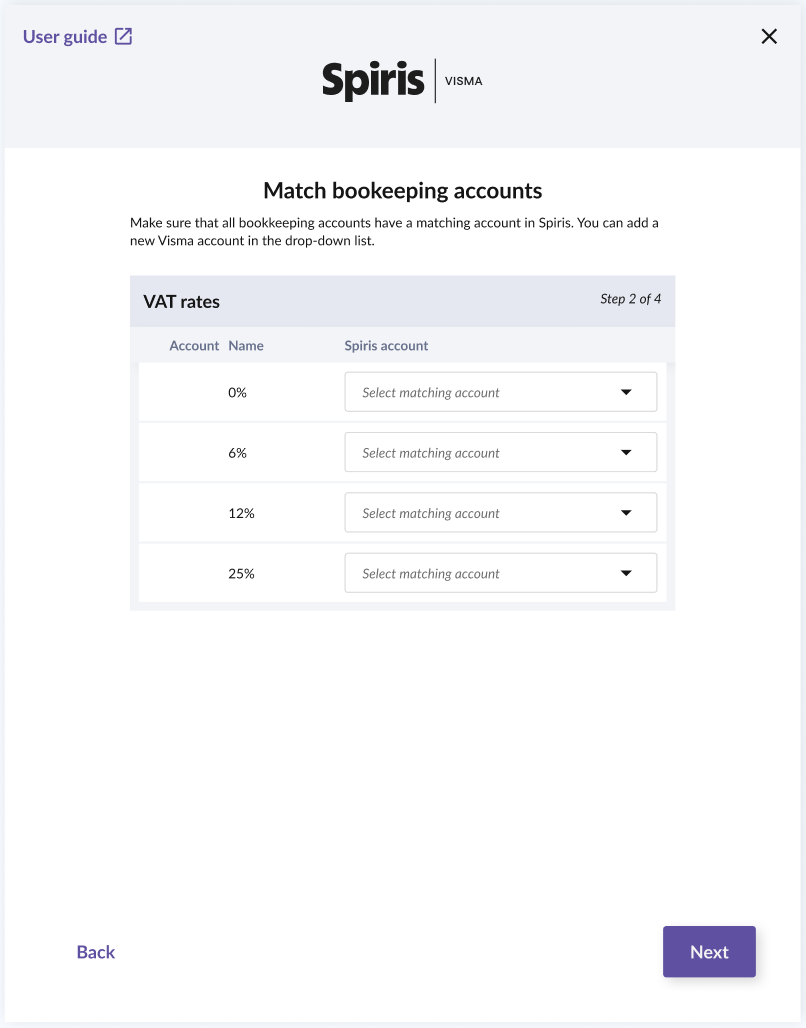
- Select accounting accounts for VAT rates
Select which accounting accounts should be used in Spiris for your different product groups. You can also add a new account from the list. Then press NEXT.
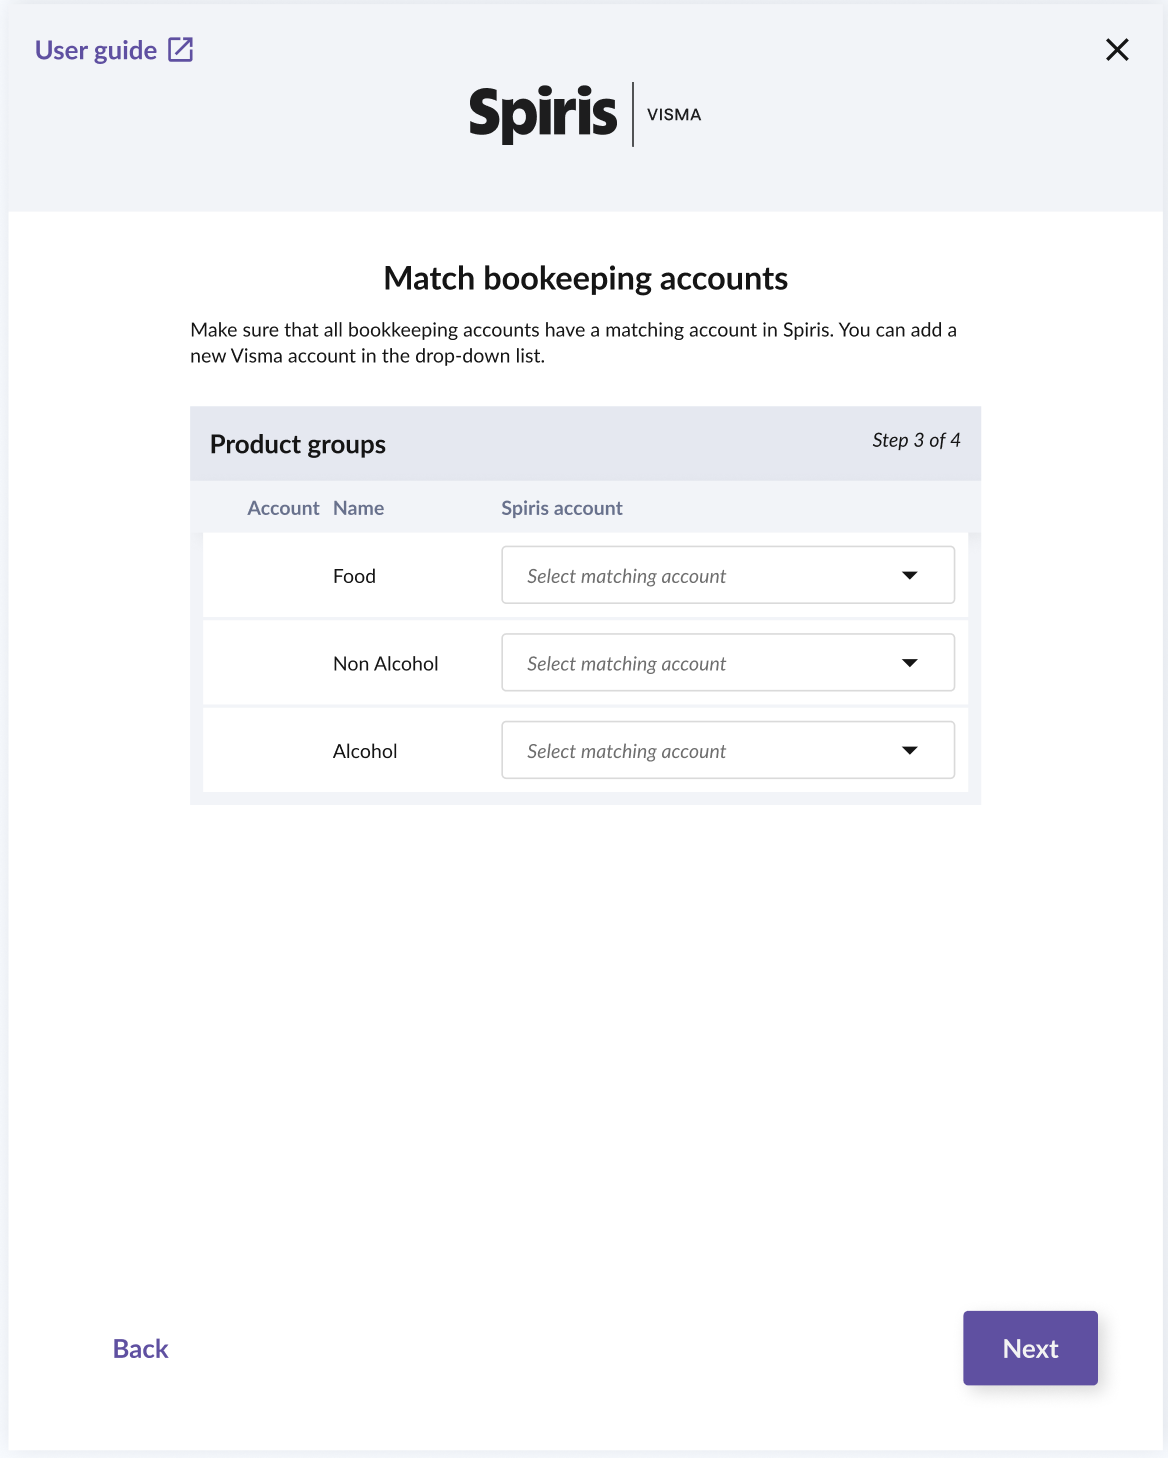
- Select accounting accounts for product groups
Select which accounting accounts should be used in Spiris for your different product groups. You can also add a new account from the list. Then press NEXT.
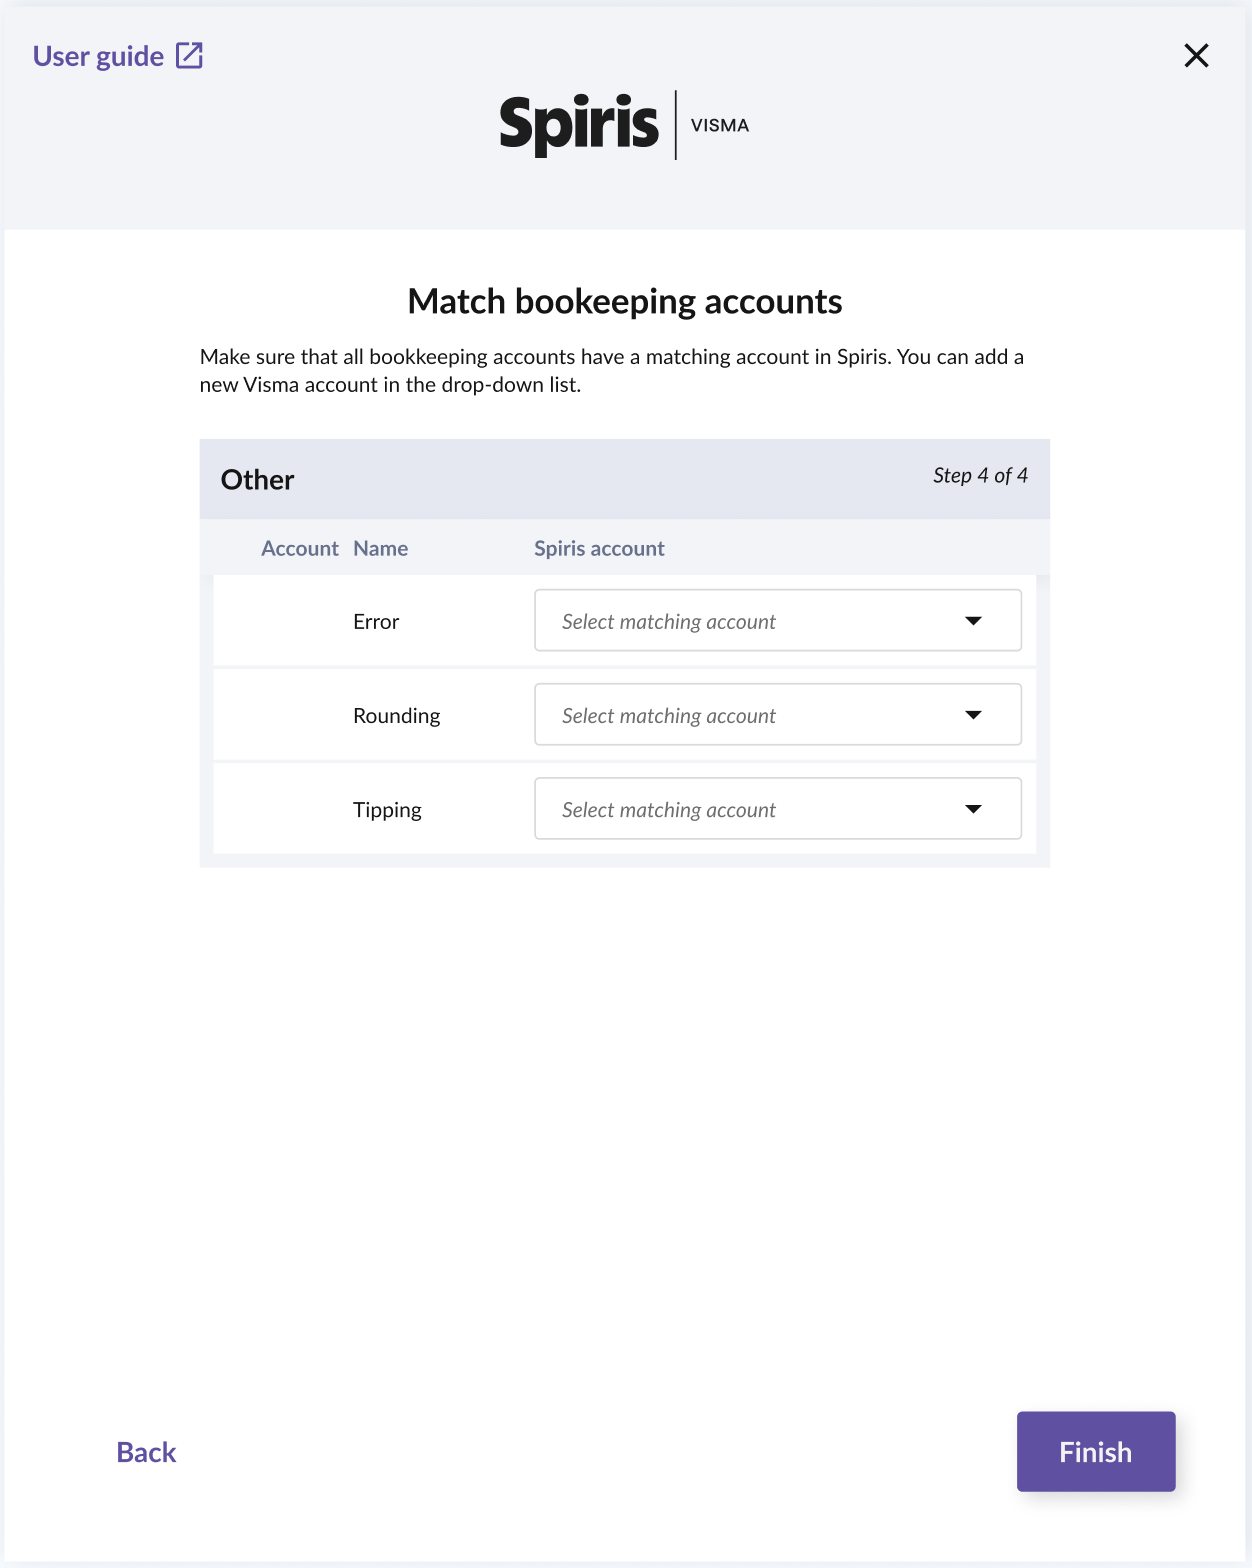
- Select accounting accounts for other events
Select which accounting accounts should be used in Spiris for your other events, e.g. accounting for tips. You can also add a new account from the list.
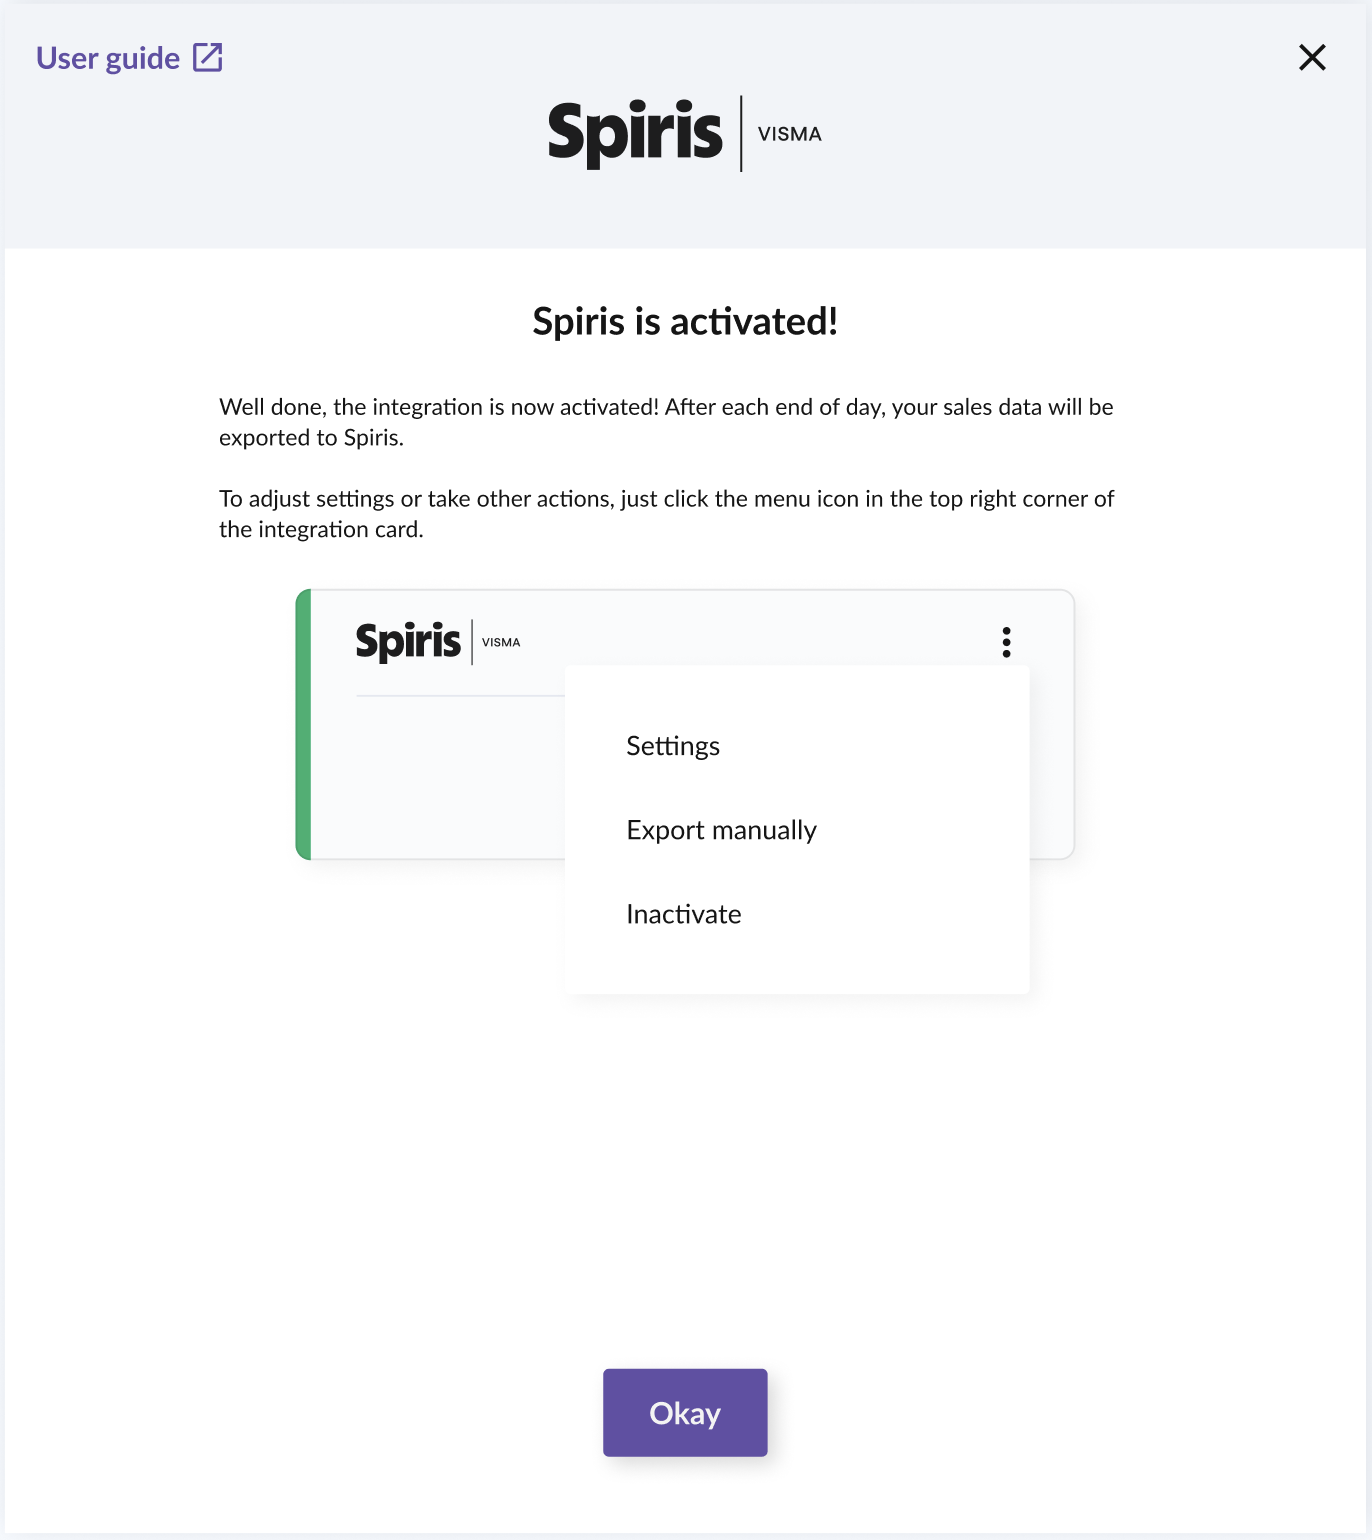
- Now the Spiris integration is activated. Press OK to close the dialog.
How to manage customers
Customer management is done in Spiris, where you can create new customers, edit or delete customers. However, small adjustments, such as changing the billing address, can be made directly from the checkout.
How to manage invoices
All invoice management is done in Spiris.
Keep in mind!
Remember that when you activate your Spris integration, it is important to set a number in the number series at Spiris website. Find it under Settings--> Company settings--> Invoice details. Set the number you want your invoices to start from.
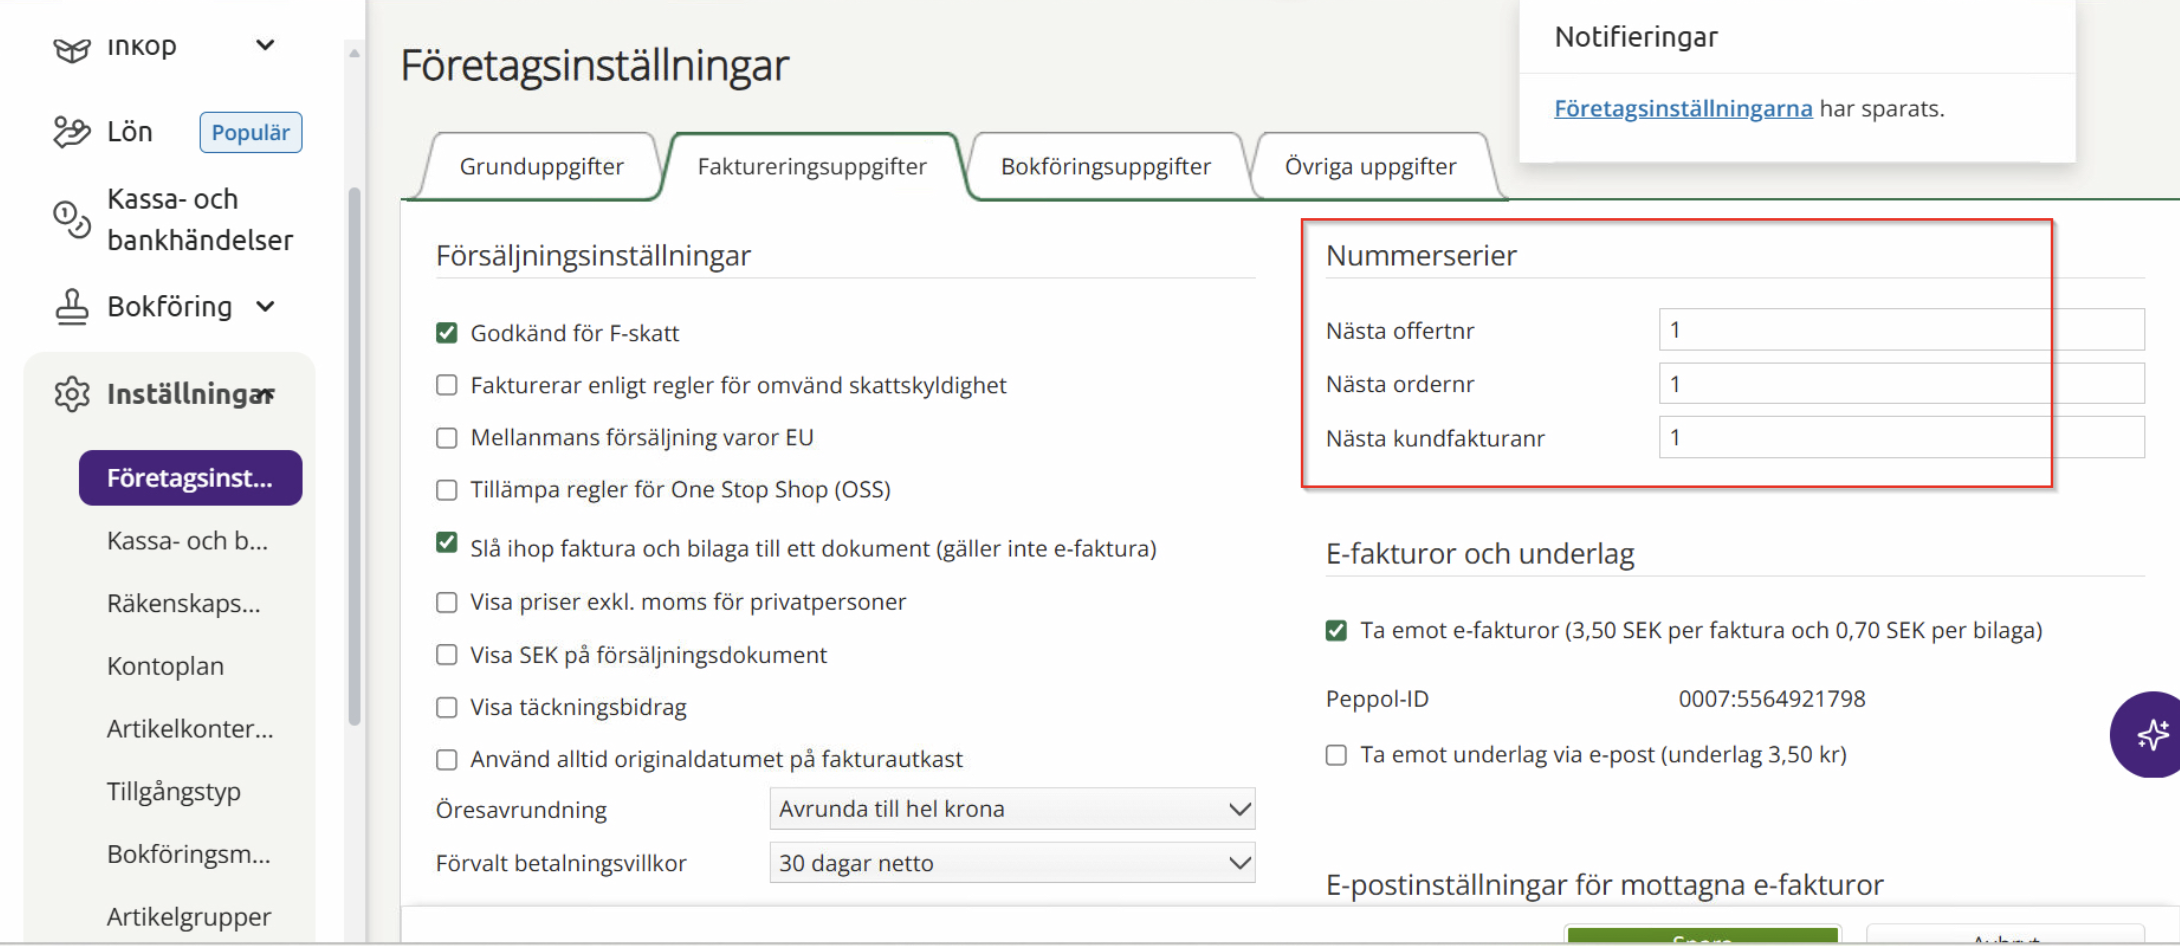
If it is set to 0, the numbering will never start, and you will not be able to use the service.
How to charge via invoice
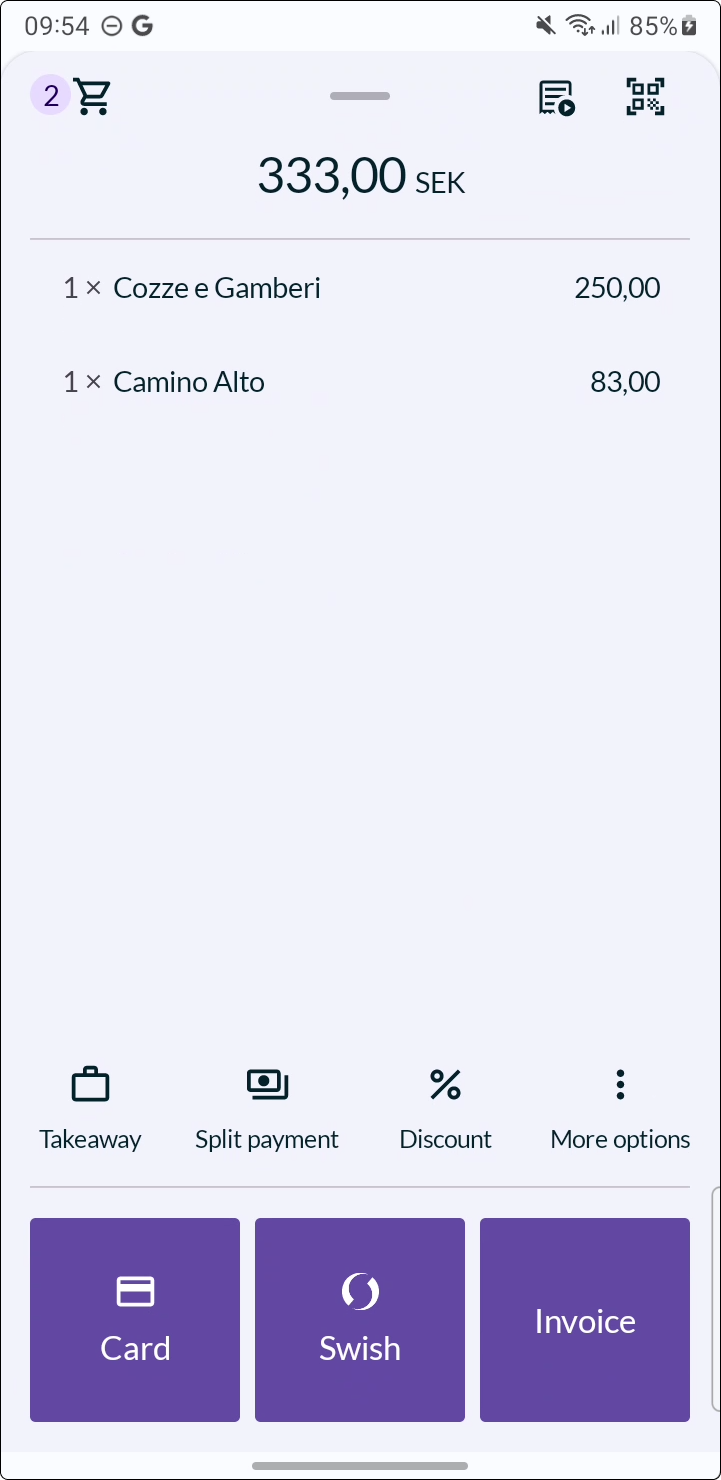
Place the goods as usual in the checkout.
Select the invoice payment method.
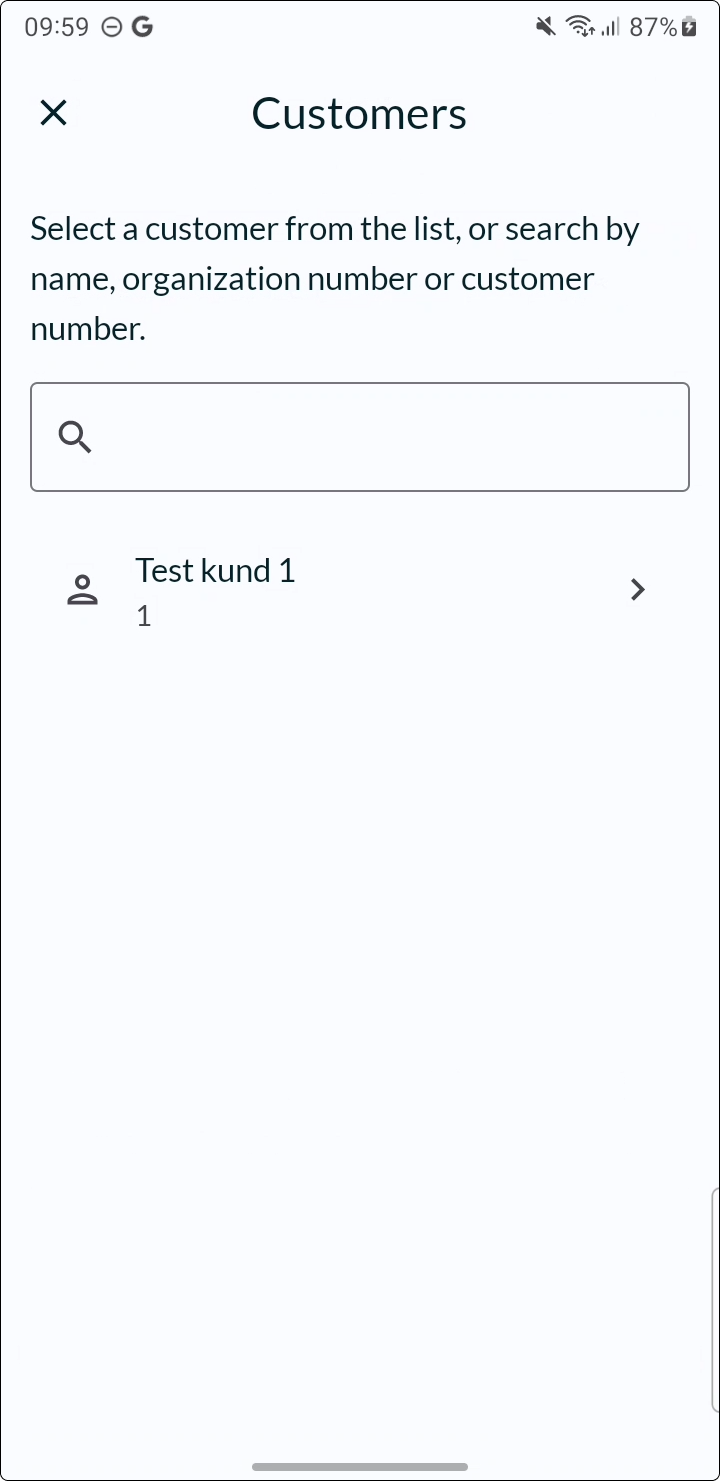
- Search for the customer. You can either search for the customer in the list or search by name, organization number or customer number.
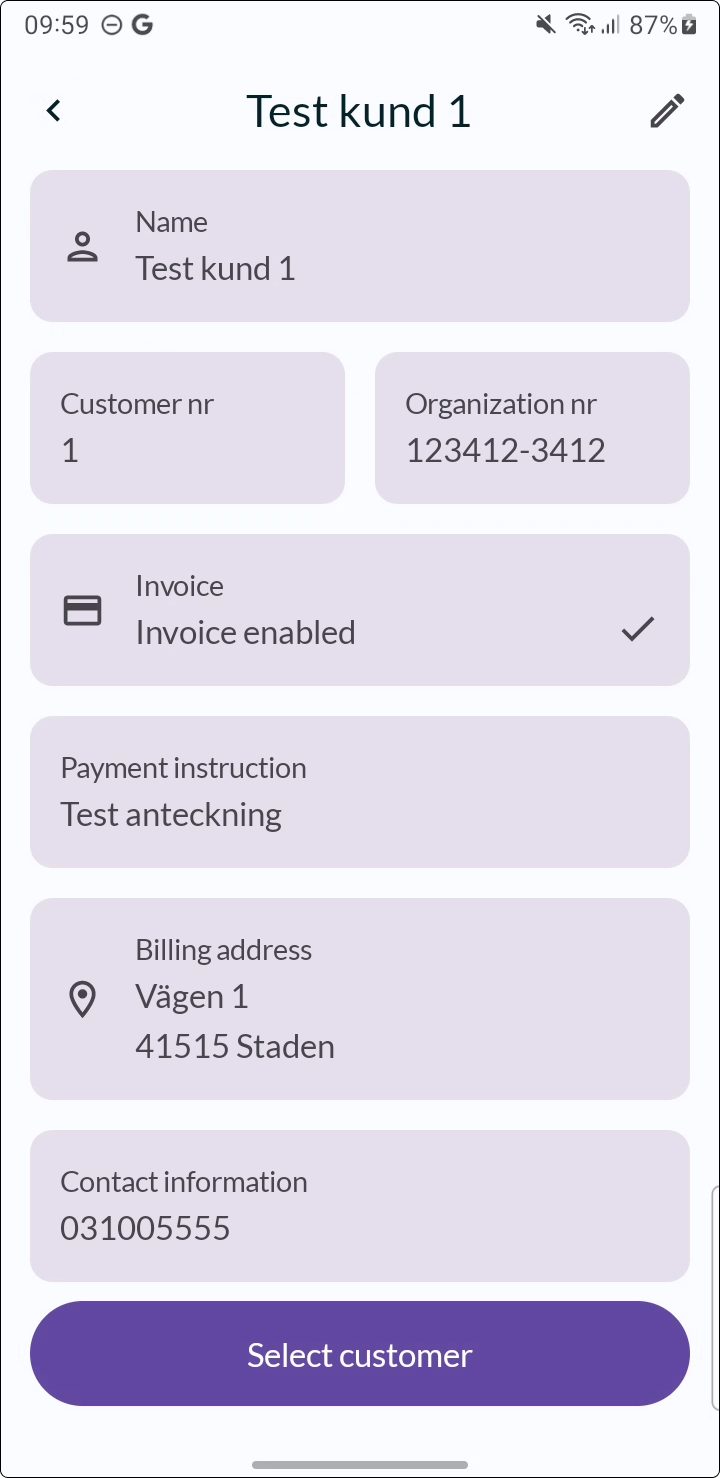
- Select the customer.
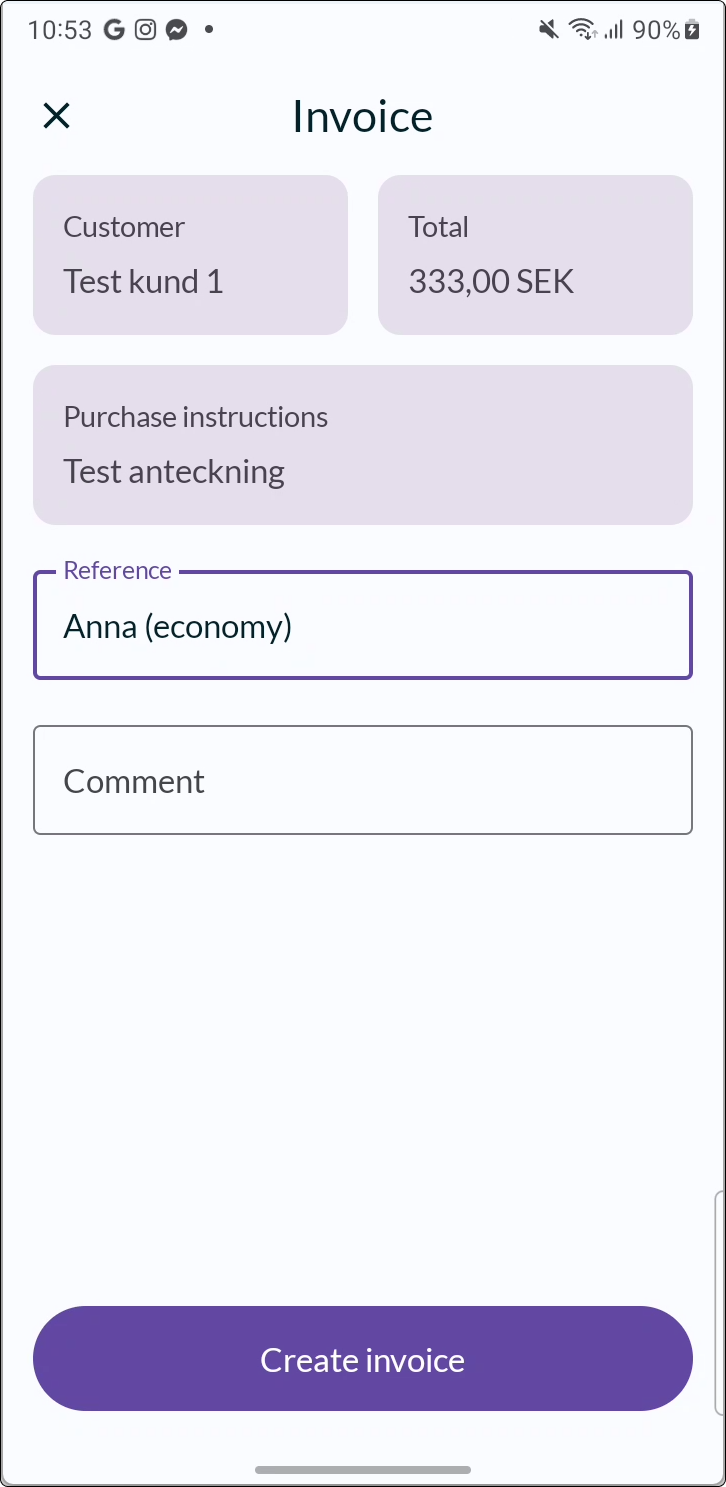
- Enter any reference and comment, then create the invoice.
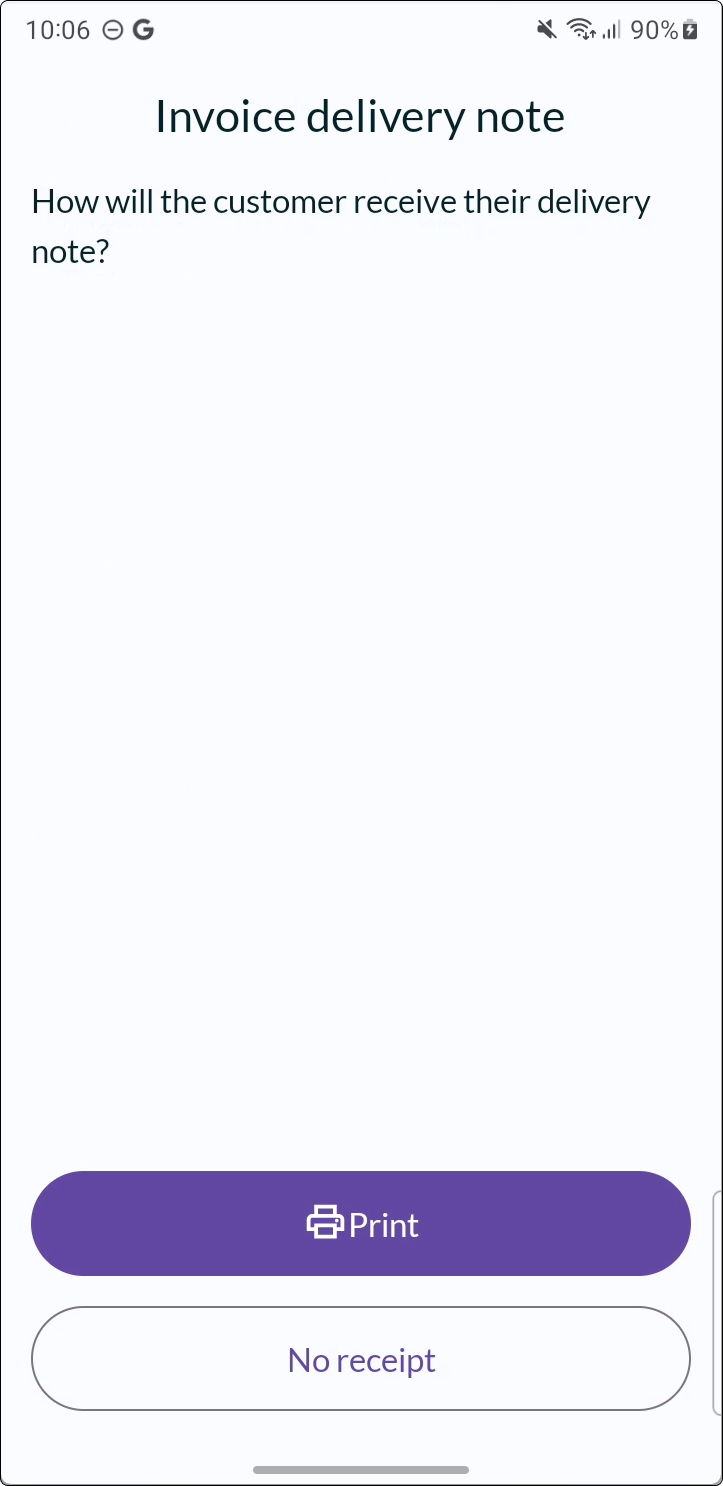
- As a final step, you have the option to print a pro forma invoice (optional).
- All further processing of the invoice takes place in Spiris.