Offer delivery on your menus
Step 1: Navigate to 'Delivery' page
- Sign in to BackOffice.
- Select Online orders in the menu and go to Delivery.

Step 2: Delivery settings
- Enter an estimated time of delivery (minutes).
- Click Continue.

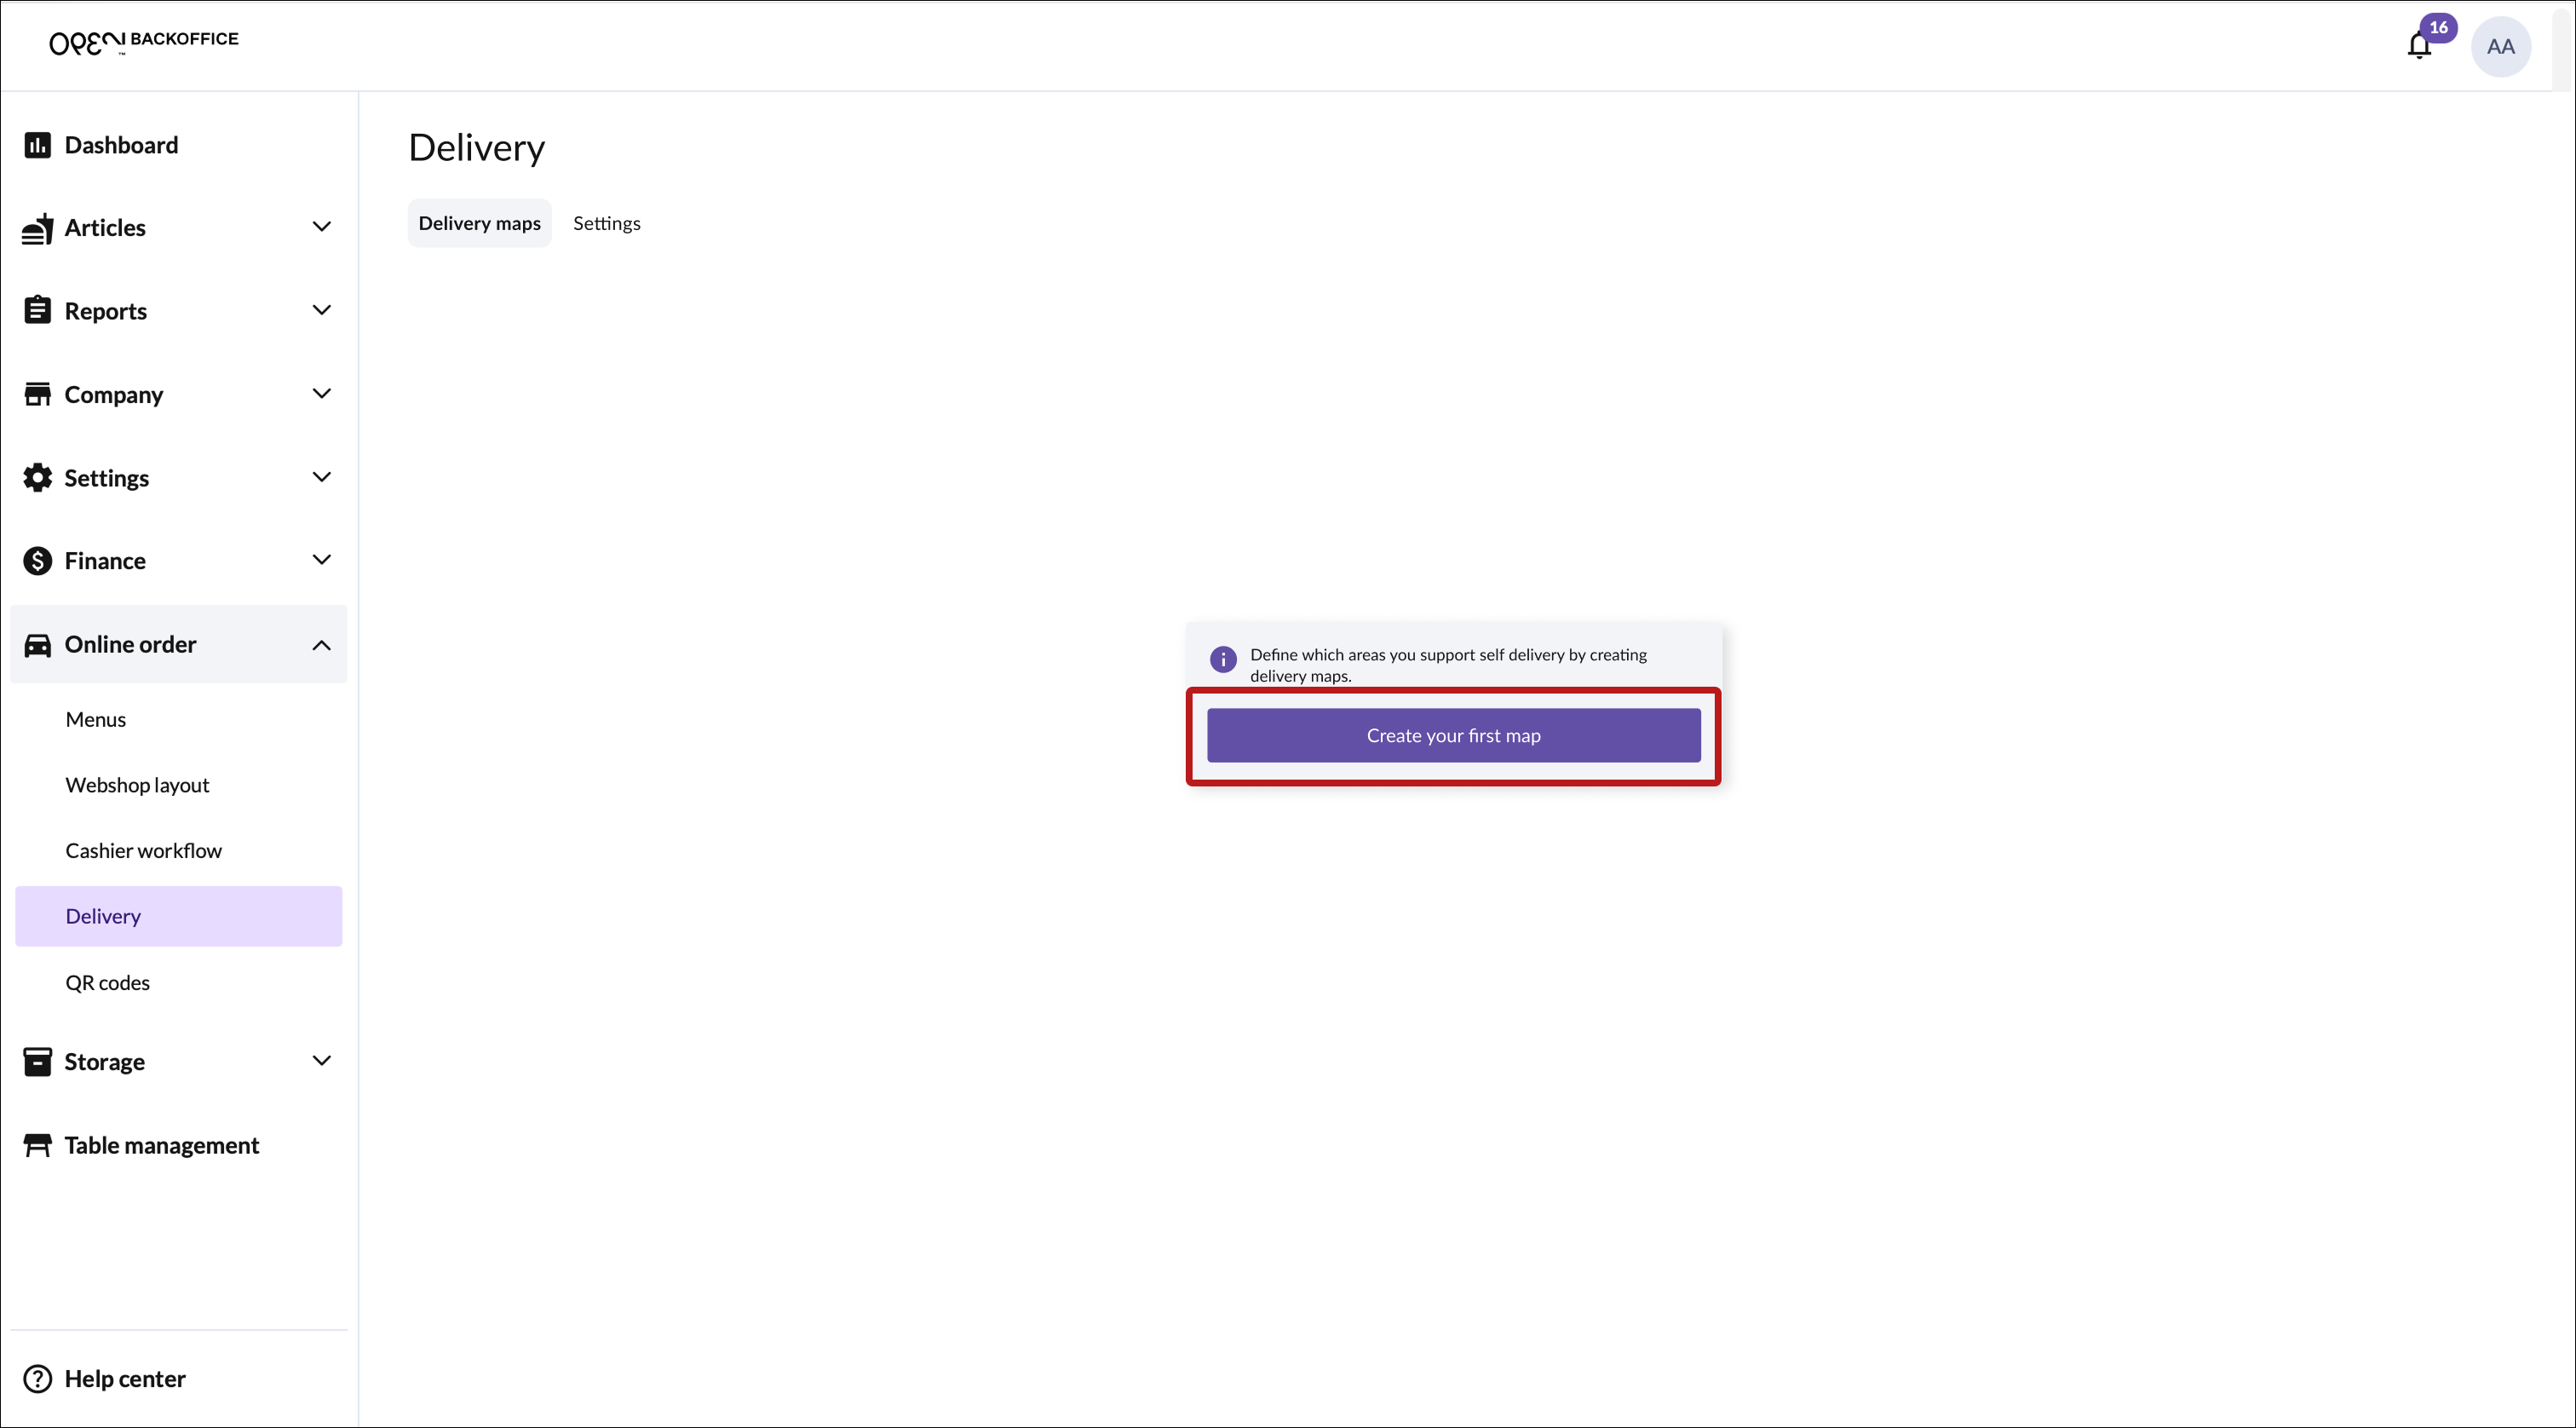
Step 3: Create delivery maps
Click Create your first map to get started.
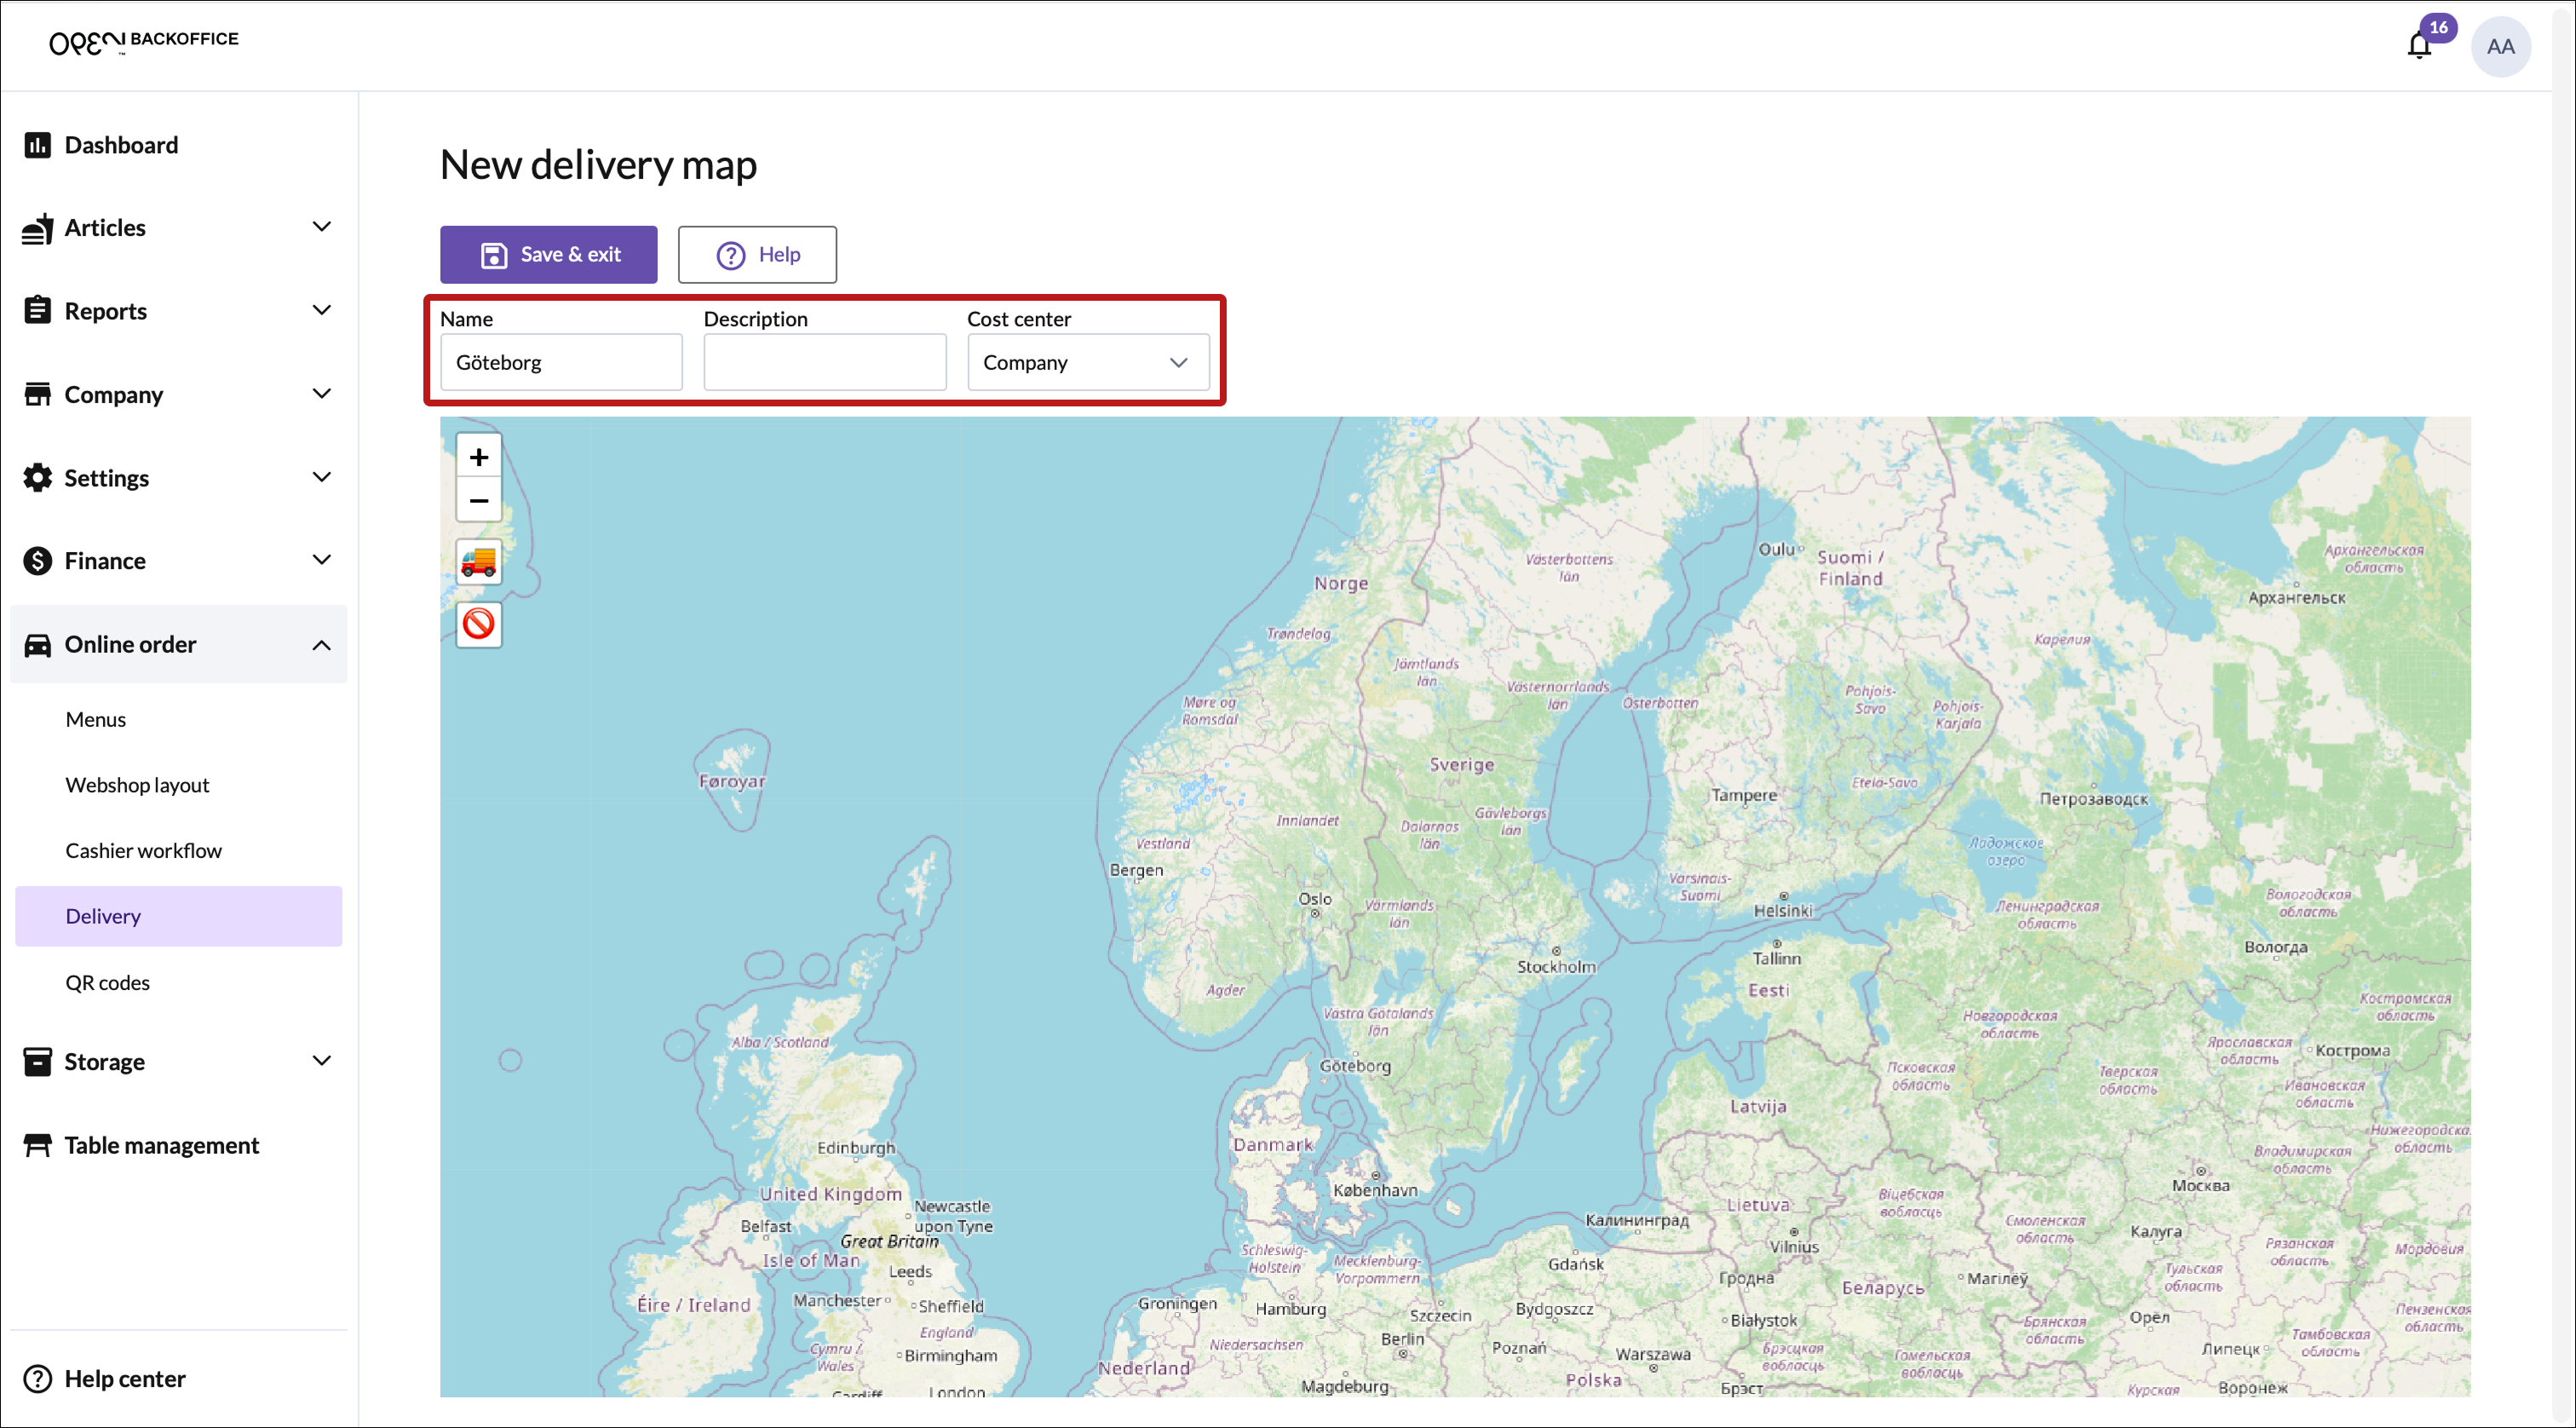
In the view that opens, start by entering:
- Name
- Description (optional)
- Cost center (select a specific cost center, or select Company to apply the map to all your cost centers).
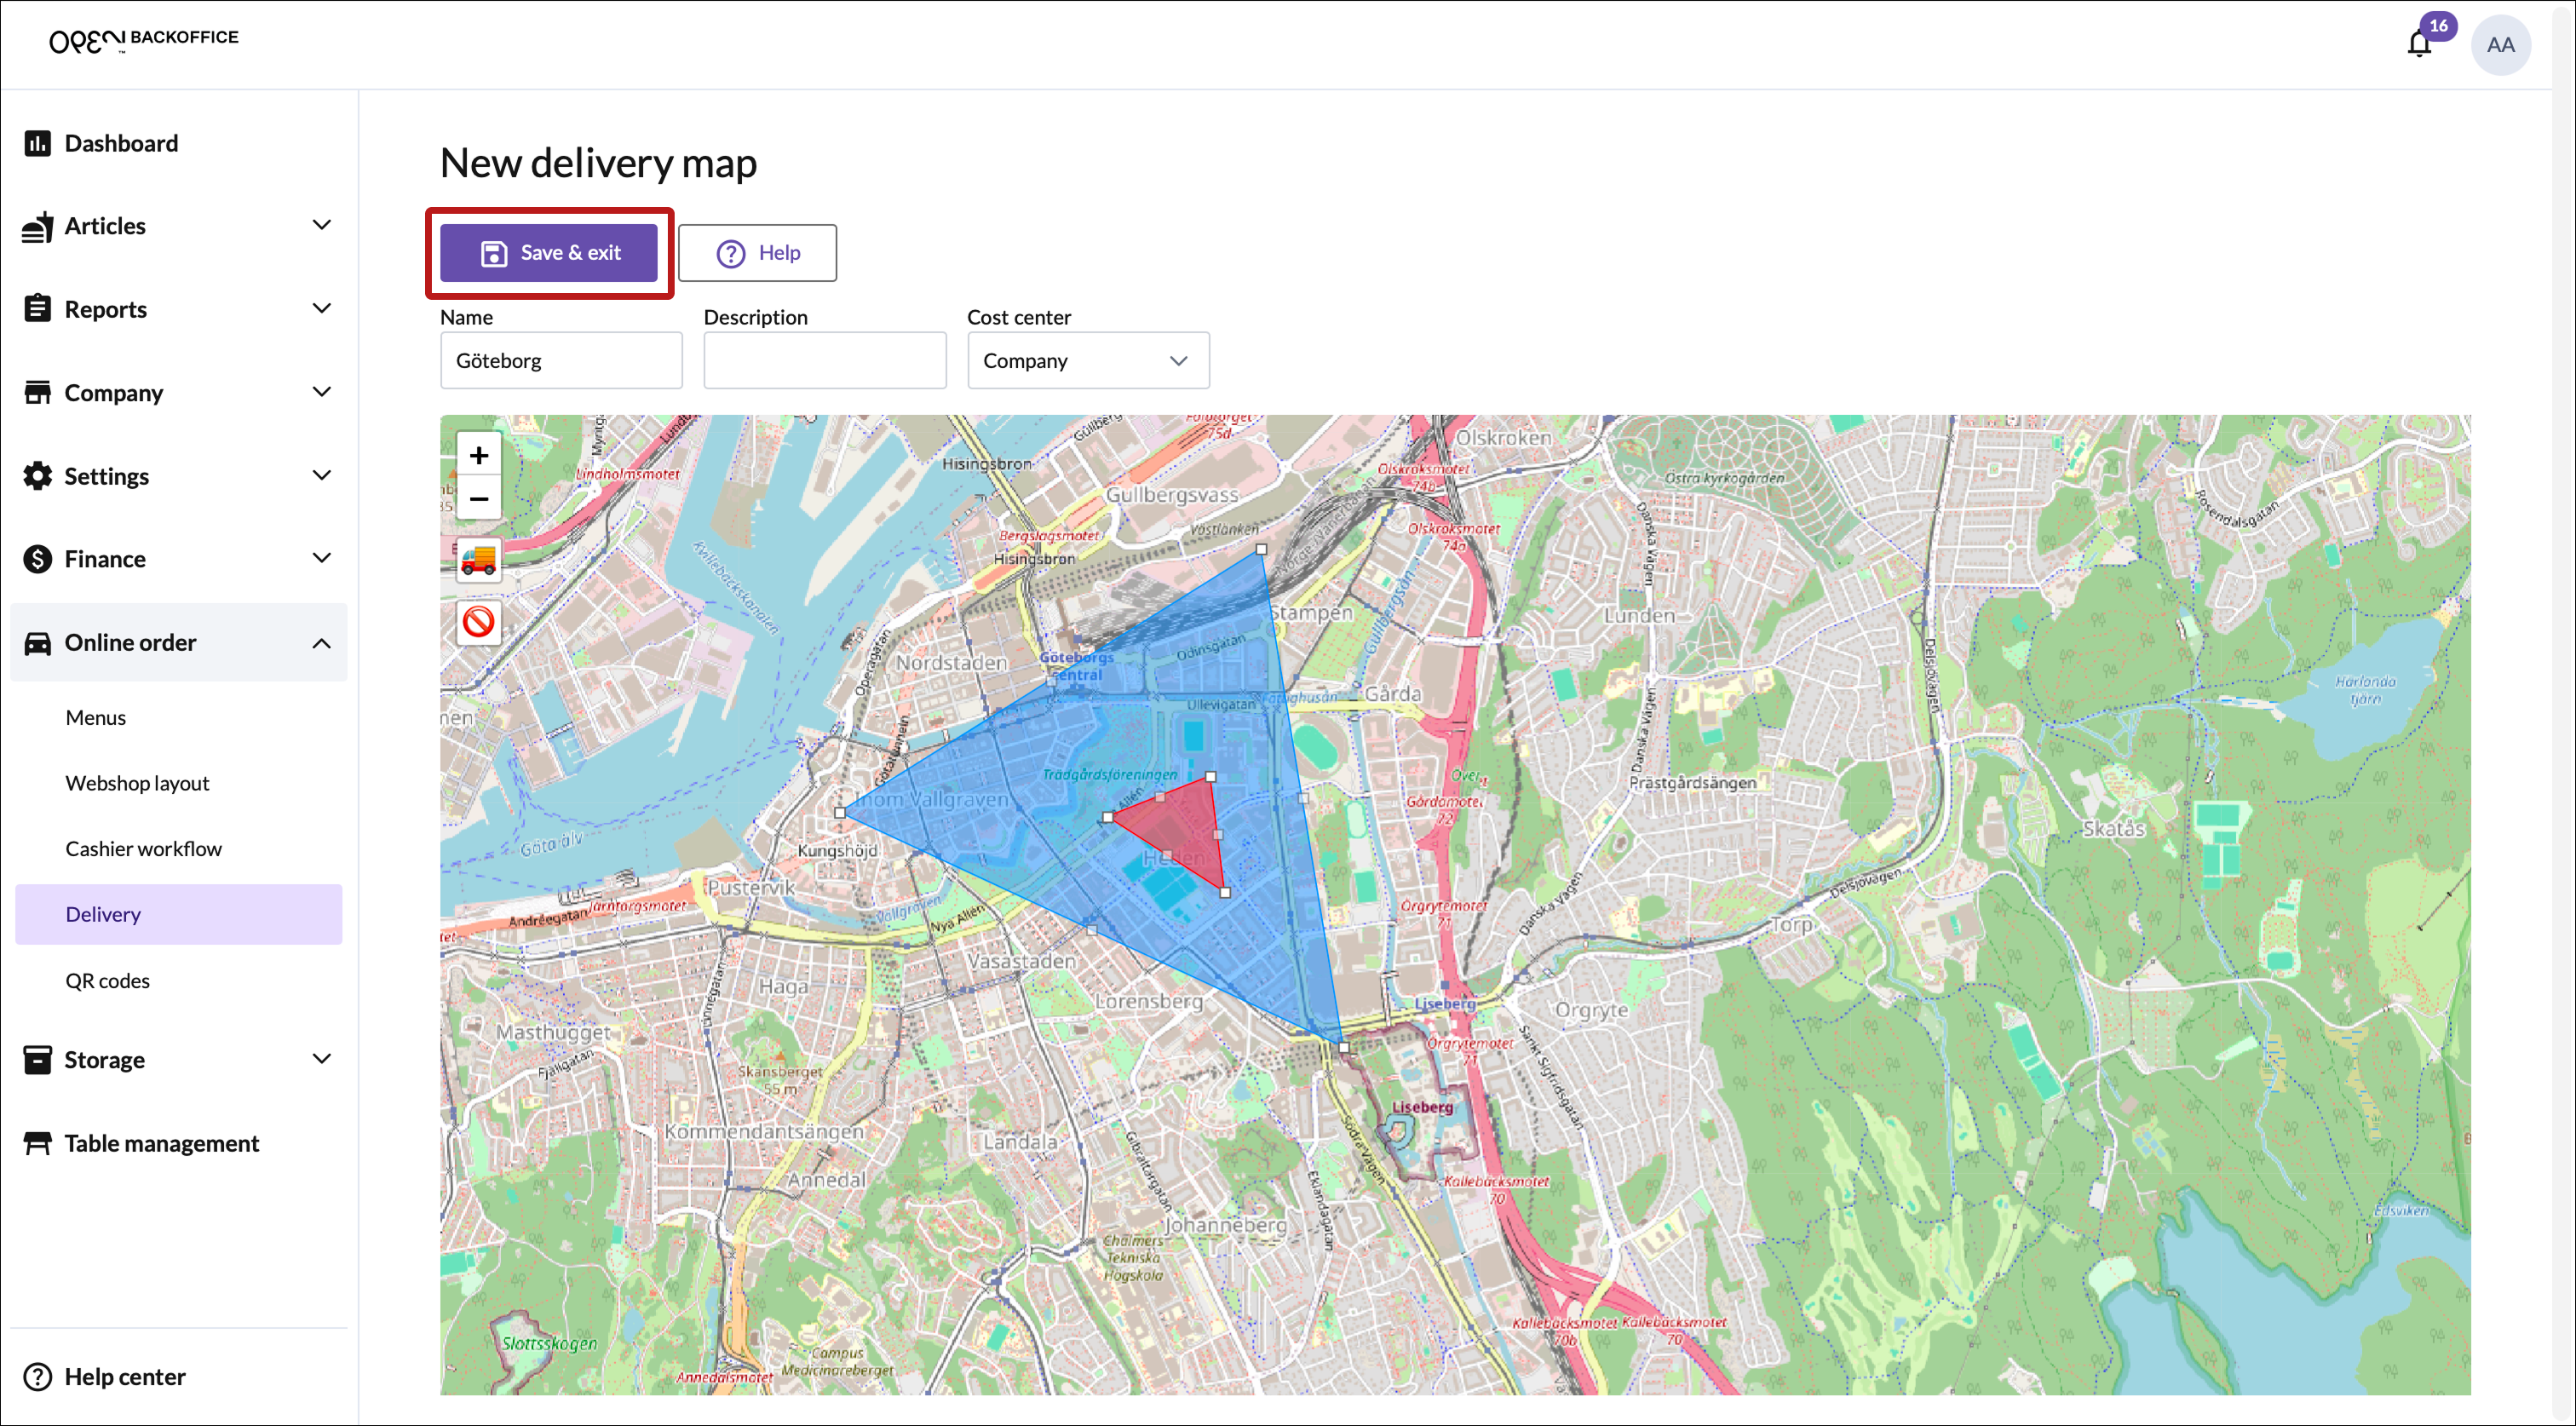
Create a delivery area, and define (optional) areas within where delivery is not supported.
Save your changes by clicking Save & exit.


⏯️ Video guide
Below is a video showing how to create a delivery area with an included area where delivery is not supported.
TIP
Click the Help button to open a dialog with more information on how to create delivery maps.
🚚 How to create a delivery area 🚚
- Zoom in on the map.
- Click the truck icon to create a delivery area on the map.
- Define the area by placing points along its outer boundary.
- Complete the area by connecting the last point back to the starting point.

🚫 How to define areas where delivery is not supported
- Zoom in on the map.
- Click the error icon to create an area where delivery is not supported.
- Define the area by placing points along its outer boundary.
- Complete the area by connecting the last point back to the starting point.
- The non-supported area can be placed inside a delivery area.

Step 4: Delivery maps & settings overview
Once you've saved your map, it will be shown under the Delivery maps tab. Click on your map to open a sidesheet with more information.

In the view that opens, you can edit or delete the map.

Click the Settings tab to access your delivery settings.

Step 5: Add delivery as a dining option for your menus
The last step is to add delivery as a dining option to your menus. Go to the menu settings section in the Create & publish menus guide to learn how.